background image

©

 2020 DJI All Rights Reserved.


31

RoboMaster Server

The Server is the control center of the entire Referee System. It collects data from all robots and Clients 
during the competition, visually presents the data to users, and automatically determines the outcome of 
the competition.
Go to https://www.robomaster.com/en-US/products/components/referee to download the Server.
Running "RMServerStart.exe" will open the RoboMaster Server, log system, mini-map, and the 
RoboMaster Server UI at the same time.
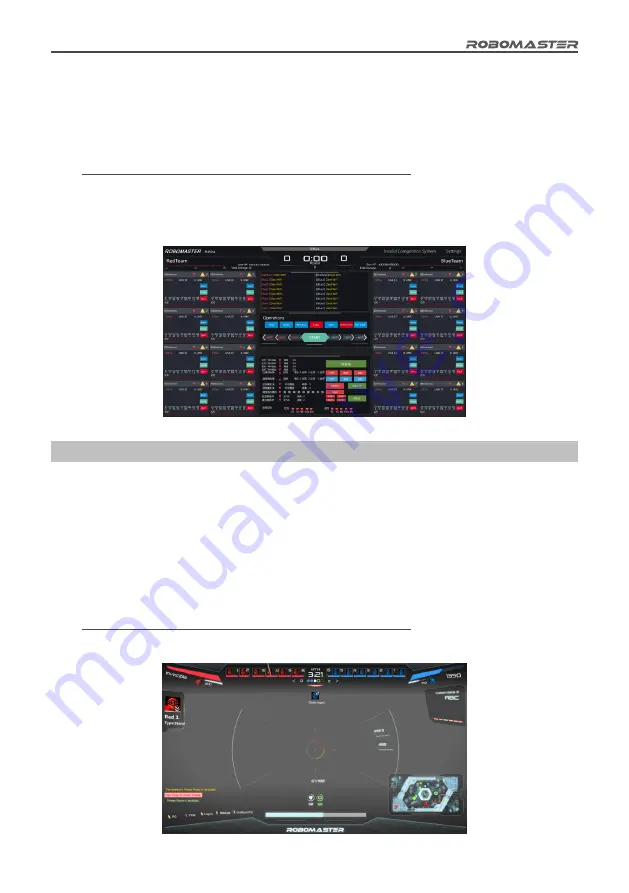
The entire page of the RoboMaster Server UI is shown as follows (Note: slight differences may appear 
between different versions):

Server Configuration

The computer host on which the RoboMaster Server is running must have the IP address set to 

192.168.1.2 and any firewalls must be disabled. For other configurations, refer to "Setting up a LAN".

RoboMaster Client

After the Client runs the first-person view application and connects to the self-built server or competition 

server, the robot-related data uploaded by the Referee System can be viewed through the first-person 

view screen. Data includes the robot's current HP, real-time projectile initial firing speed and launch 

speed, a mini-map of the competition battlefield, the real-time power output of the chassis, and teammate 

information.

Go to https://www.robomaster.com/zh-CN/products/components/referee to download the Client.
The full UI page is shown in the figure below:

Содержание Referee System 2020

Страница 1: ...Prepared by the RoboMaster Organizing Committee March 2019 V1 2 REFEREE SYSTEM USER MANUAL Updated on February 2020 ...

Страница 2: ...ystem in the competition the Referee System has been fully tested in the factory and each module cannot be damaged easily A user should not disassemble or modify any parts of the Referee System without authorization Damage to the Referee System resulting from unauthorized disassembly will void the warranty This product is not intended for use by children without direct adult supervision DO NOT use...

Страница 3: ...e Configuration 10 Robot Property Descriptions 10 Competition Configuration 11 1v1 Mode 11 3v3 Mode 12 Description of Robot Side Functions 13 Robot Side Interaction Instructions 13 Homepage UI Description 13 Homepage 13 Real time Information Page 14 Descriptions of Key Functions 14 Function Page 14 UI Function Descriptions 15 Rule Parameter Settings 18 Wi Fi Settings 19 Reading Module Versions 20 ...

Страница 4: ...ceiver 22 VTM Channel Configuration 23 RoboMaster Referee System User Interface Guide 27 Checking Functions on the Robot Side 27 RoboMaster Tool 2 Upgrade Procedure 28 Introduction to the Main Upgrade Interface 28 Upgrade Procedure 29 RoboMaster Server 31 Server Configuration 31 RoboMaster Client 31 Client Configuration 32 Setting up a LAN 32 ...

Страница 5: ...ot combat system The Referee System is composed of the following 1 The robot side of the Referee System hereinafter referred to as Robot Side 2 The PC client hereinafter referred to as Client and the PC server hereinafter referred to as Server Robot Side Modules 1 Main Controller Module MC02 The Main Controller Module is the core control unit of the Referee System that monitors the operation of th...

Страница 6: ...to the Small Armor Module and the Large Armor Module 5 Speed Monitor Modules SM01 SM11 The Speed Monitor Modules detect the robot s initial firing speed and launch speed This includes one Speed Monitor Module for 17mm projectiles and one for 42mm projectiles Armor Module Support Frame A AH02 Small Armor Module AM02 Large Armor Module AM12 Speed Monitor Module for 17mm projectiles SM01 Speed Monito...

Страница 7: ...Client 8 Positioning System Module UW01 This module obtains the location of the robot on the battlefield VTM Transmitter VT02 VTM Receiver VT12 Positioning System Module UW01 Module Installation on the Robot Side The figure below shows the installation of each module of the Referee System RFID Interaction Module Positioning System Module Power Management Module Light Indicator Module Main Controll...

Страница 8: ...t Side The figure below shows the connection of each module of the Referee System Module installation and use may vary for different robots Please refer to the RoboMaster 2020 Robot Building Specification Manual Download https www robomaster com en US resource download ...

Страница 9: ... controller user supplied only DT7 DR16 remote controller receiver systems are supported 2 Client software configuration a DJI WIN driver drives the robot remote controller Download https www robomaster com en US products components detail 1837 b RoboMaster Client software Download https www robomaster com en US products components referee Server The Server is the control center of the whole Refer...

Страница 10: ...be configured on the Server and synchronized to the Robot Side The table below shows the properties that can be configured Property Name Property Information Referee System module type and quantity Refer to the Robot Side Configuration section Initial HP 0 65535 Maximum HP The maximum HP if the robot s level can be upgraded in competition Initial HP 65535 Damage from 17mm projectiles HP deducted w...

Страница 11: ... nor determine the outcome of the competition automatically Users may also opt to use base or customize competition rules for a more personalized experience The following examples cover 1v1 Mode and 3v3 Mode 1v1 Mode Users can select any two Robot Side configurations from the configuration table to be applied to two robots respectively One robot will be assigned to the Red team and the other to th...

Страница 12: ...uantity Remarks Red team Standard 1 Hero 1 Engineer 1 Base 0 1 Optional Blue team Standard 1 Hero 1 Engineer 1 Base 0 1 Optional The table below shows the configurations of the Referee System modules required to set up the 3v3 combat system above Module Name Quantity Remarks Main Controller Module 6 Power Management Module 6 Light Indicator Module 6 Large Armor Module 0 8 Small Armor Module 0 16 S...

Страница 13: ...displayed as shown in the figure below 1 The in the upper left corner indicates that the Robot Side is not connected to the Server 2 The in the upper right corner indicates the Wi Fi connection status and signal strength 3 The in the upper right corner indicates the current Wi Fi connection type The significance of the pattern descriptions is as follows a The currently connected Wi Fi is the User ...

Страница 14: ... display page press and hold the OK key to enter the robot function page For some function pages the current settings can be saved Press the OK key On the homepage press the OK key to enter the real time information display page On the function page if there is a page link in the selected line on the current page pressing the OK key will direct you to the linked page otherwise pressing the OK key ...

Страница 15: ... Wi Fi settings Set Robot ID E g Set Robot ID to Red 1 Hero 11 MODULES FAULT LightInd Offline Press and hold the OK key Press the OK key Press the OK key Press the OK key RED BLUE RED 1 RED 2 RED 3 RED 4 RED 5 Hero Engineer Standard Standard Standard Robot ID Robot Type Module Game Wi Fi Setup Setup Setup Setup Setup Set Robot Type E g Set Robot Type to Standard Robot ID Robot Type Module Game Wi ...

Страница 16: ...ber of the Armor Modules If the read number of effective Armor Modules is the same as the number of Armor Modules installed the procedure is complete Be sure to set the ID of an Armor Module before use and ensure that the IDs of Armor Modules connected to the same Main Controller Module are not repeated If there is a configuration error the Robot Side self test will detect that the Armor Module is...

Страница 17: ...h the interactive interface This provides data for the Robot Side and the Server to help determine the robots destroyed The steps to calibrate the Speed Monitor Module are as follows a On the function page of the Main Controller Module proceed as shown to enter the Speed Monitor Module Calibration Setup page b On this page select Compass Calibration to enter the Speed Monitor Module calibration st...

Страница 18: ...xPower MaxSpeed0 MaxSpeed1 HP Setup Setup Setup Setup Reset HP Set max HP Set max power Reset MaxHP MaxPower MaxSpeed0 MaxSpeed1 HP Setup Setup Setup Setup Set MaxPower Success Press the PgDn key 2 times Press the OK key MaxPower 80 MaxPower 120 MaxPower Unlimited MaxPower 80 MaxPower 120 MaxPower Unlimited Based on the procedures above you can also configure the following functions 1 Reset HP 2 S...

Страница 19: ...SSID Connect Information Select a pre set configured SSID Press the OK key 11 MODULES FAULT LightInd Offline Press and hold the OK key Press the OK key Robot ID Robot Type Module Game Wi Fi Setup Setup Setup Setup Setup SSID is the Wi Fi name After scanning the SSID select it and press and hold the OK key to remember it The Robot Side will automatically connect to this SSID upon startup Click Forg...

Страница 20: ...line Press and hold the OK key Press the OK key Press the OK key Robot ID Robot Type Module Game Wi Fi Setup Setup Setup Setup Setup Scan SSID Forget SSID Connect Information SSID test0_AP Signal 25dBm Rssi 100 00 Rate 72Mbit s Current Wi Fi connection name Signal strength Signal quality Sending rate Module0 5 0 0 6 Module1 5 0 0 6 Module2 5 0 0 6 Module3 5 0 0 6 Module4 5 0 0 6 Press the OK key P...

Страница 21: ...o have normal power supply This setting is saved when powered off All Lights Control The robot indicator lights show that this function is enabled This setting is not saved when powered off Bullet Test The 17mm projectile Speed Monitor Module is used for a fluorescent projectile brightness test This setting is not saved when powered off Introduction to the Robot Side Module Initialization To ensur...

Страница 22: ...ace select a correct serial device number then click Open 6 If activation fails please check the connection and network status of the VTM and then repeat the activation operation in step 5 7 After activation check whether your activation region matches your mode Mode 1 for Mainland China and other regions and Mode 2 for Japan Once completed activation cannot be repeated again Activation of the VTM...

Страница 23: ...tatus of the VTM and then repeat the activation operation in step 5 7 After activation check whether your activation region matches your mode Mode 1 for Mainland China and other regions and Mode 2 for Japan Once completed activation cannot be repeated again VTM Channel Configuration Each Robot ID is bound with a VTM channel ID Their correspondence is shown in the table below Mainland China and oth...

Страница 24: ...he steps to configure the VTM channel are as follows 1 Connect the VTM Transmitter to the Main Controller Module and set the Robot ID For details please refer to the Set Robot ID section under UI Function Descriptions 2 The VTM Receiver ID and video display must be configured through the RoboMaster Client on the PC as follows a Use a USB Type C data cable to connect your PC to the USB port of the ...

Страница 25: ...for a third party driver c Install DJI Phantom 4 Drivers_1 2_Installer for the VTM Receiver by referring to the Activation of the VTM Receiver section d Open RoboMaster Client and click the Enter Client button to enter the client screen as shown in the figure below To download RoboMaster Client refer to the RoboMaster Client section e On the client screen press the p key on your computer keyboard ...

Страница 26: ...ted from the VTM and at the same time the VTM connection status indicator on the settings panel of the client will change to green as shown in the figure below USB Type C interface Status LED UART serial port h If connection is not carried out for a long period of time please restart the VTM Receiver and VTM Transmitter and then repeat the steps above to link again i If there is still no video out...

Страница 27: ...e W52 enabled and channels 24 28 are 5 7 GHz enabled For 5 7 GHz enabled channels please apply for the usage license If the 5 7 GHz usage license is not obtained please set Red 1 Red 2 and Blue 1 Blue 2 for debugging to carry out a combat not exceeding 2v2 If the 5 7 GHz usage license is obtained you can select only the red team or only the blue team for debugging or during combat set Red 1 Red 4 ...

Страница 28: ...sh red or blue depending on the robot The direct effect of the RFID Interaction Module card is to regenerate a robot s HP Pay attention to the detection distance If the RFID Interaction Module and card come into contact with a magnetic object the detection distance and detection accuracy will be affected 9 Set the VTM Receiver and the VTM Transmitter for details refer to the Video Transmission Mod...

Страница 29: ...r then click Open 4 Now the upgrade page will display the basic robot information and all module information as shown in the figure below Upgrade Page 5 If the firmware update instructions at the bottom of the interface say Remote server has found the latest firmware then click on Firmware Download to download the firmware to your local computer 6 When the download is complete the app version numb...

Страница 30: ...rade page will display the basic robot information and the firmware information for all modules Click the Upgrade button as shown in the figure below 8 When the upgrade progress bar has finished updating the module firmware update is complete ...

Страница 31: ...rent versions Server Configuration The computer host on which the RoboMaster Server is running must have the IP address set to 192 168 1 2 and any firewalls must be disabled For other configurations refer to Setting up a LAN RoboMaster Client After the Client runs the first person view application and connects to the self built server or competition server the robot related data uploaded by the Re...

Страница 32: ...2345678 select WPA2 for the encryption method and enable the DHCP function 2 Connect the host on which RoboMaster Server is running to the wireless router via a network cable and set the static IP address of the host to 192 168 1 2 3 Connect the host on which the RoboMaster Client is running to the wireless router via a network cable and the IP address can be obtained automatically without manual ...

Страница 33: ... com Website http www robomaster com Tel 0755 36383255 Mon Fri 10 30 am 7 30 pm Address Room 202 Floor 2 Integrated Circuit Design Application Industrial Park 1089 Chaguang Road Xili County Nanshan District Shenzhen City Guangdong Province WeChat Weibo ...

Отзывы: