background image

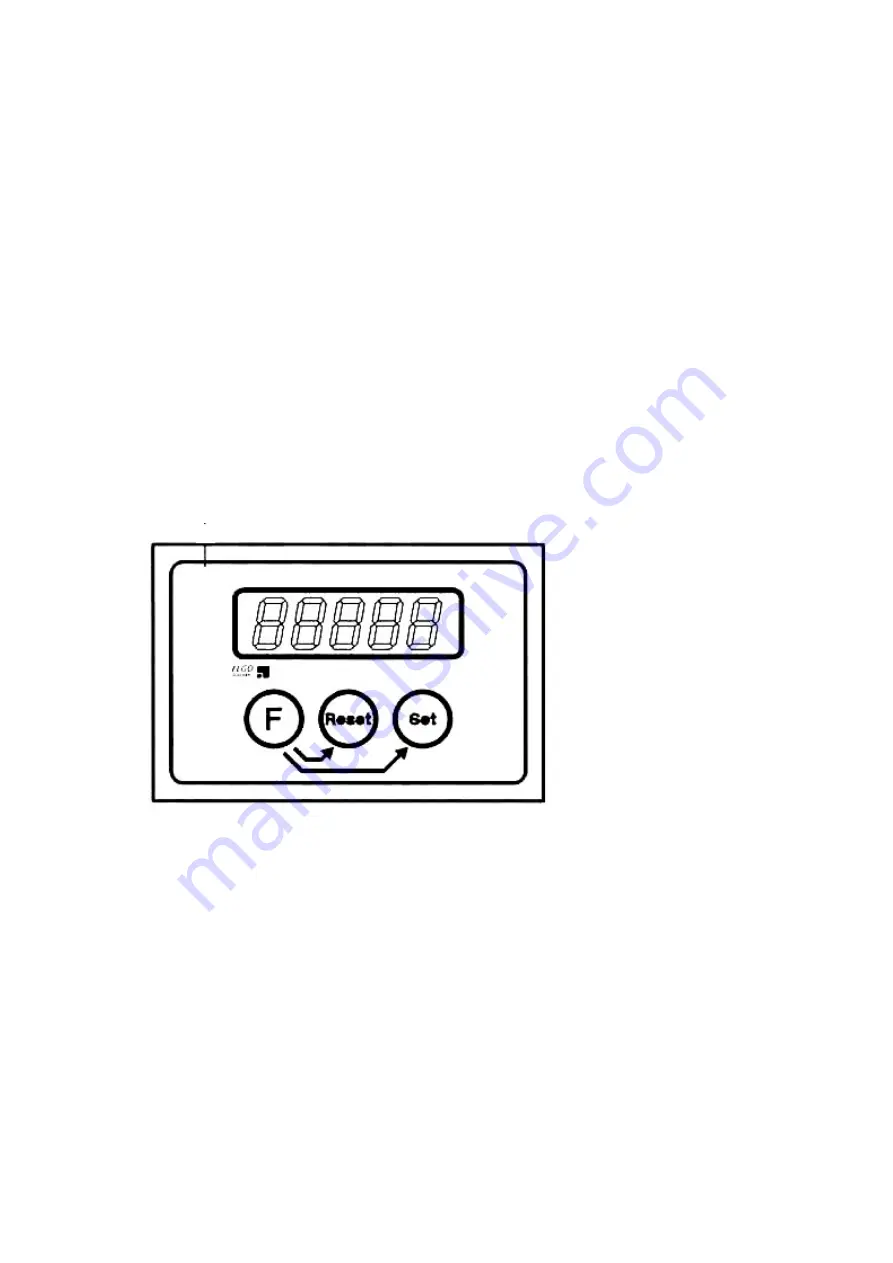
Calibration of the digital read out (fig. 6) 

It is highly recommended that each time the planer knives are changed, the digital 
read out is calibrated, this to avoid measurement errors. 
Calibration is done as follows: 

- set the thicknesser table at a random height and thickness a sample. 
- now measure exactly the thickness of the sample. 
-  now the digital read out has to be set at the same measure, and this can be 

achieved as follows: press simultaneously the buttons F and SET on the read-out: 

Now the read-out begins to count up at 3 progressive speed rates: 
-  Rate 1: at 1Hz for 10 sec. 
-  Rate 2: at 10 Hz for 10 sec. 
-  Rate 3: at 1000 Hz for as long as the 2 buttons F and SET are held. 

- Shortly before the desired value is reached, release the  two buttons and press the 
same two buttons so as to approach the desired value with the slowest rateof 1 Hz. 

The thicknessser now is calibrated over the full 300 mm capacity. 
To set the read-out at 0, simultaneously press Set and RESET. 

fig.6 

Important 

Before starting to work on the thicknesser always ensure that the anti-kickback 
protection fingers are clean and hang down freely in position under their own weight. 
These anti-kickback fingers should be inspected on a regular base, and kept clean and 
free of any resin deposits whatsoever. 
Ensure the correct position and locking of the dust chute. 
Roller supports should be used when long workpieces are machined. 
Ensure the ticknesser table is well cleaned, since a smooth table surface is essential 
for good operation of the thicknesser. 

and RESET.

14

F

Содержание D 630

Страница 1: ...ing of the planer knives Safety instructions for the thicknesser Adjusting the depth of cut on the thicknesser Calibratiion of the digital read out Thicknesser feed Friction reduction roller in the table optional Maintenance and lubrication of the machine Change and tensionning of the belts Tensionning of the drive chains Problems and trouble shooting Electrical components spares list Instruction ...

Страница 2: ...27 F 54501 Vandoeuvre Cedex France Description of the machine THICKNESSER D 630 Date of construction of the machine from 2002 on Option Tersa Monobloc cutterbloc Table friction reduction rollers 7 5 and 11 kW main motor Sectional infeed roller Rubber rollers Rear table extension Always mention the following items on your order Type of machine Serial number of the manual Part number and quantity Yo...

Страница 3: ...sh the quality of the work but also increase the risk of accidents Always wear suitable clothing loose or torn clothes are very dangerous Keep children away from the machine and out of the workshop To avoid damaging your hearing we recommend to wear ear protection when working with the machine Attention Working with woodworking machines can be extremely dangerous if the safety instructions are not...

Страница 4: ...er ISO Norm 7960 Annexe D Workpost under Level continuous Level accoustic Max value load pressure as per index power accoustic pressure A as per index C dB A dB A MW dB Thicknessing 83 97 5 130 Dust emission The dust emission examination has been carried out by the following approved body Prüfinstitut für Holzstaubmessungen Institut für Werkzeugmaschinen Universität Stuttgart Germany Measurements ...

Страница 5: ...is prohibited NORMAL USE thicknessing on the thicknesser unit PROHIBITED USE the use of other materials than wood such as ferrous or non ferrous materials REMAINING RISKS unintentional contact of the hands with the running cutter block workpiece kickback tipping over of the workpiece due to insufficient support ejection of knots ect The above does not negate the fact that extra safety equipment su...

Страница 6: ...RSA cutter block reversible knives OPTION Dimensions thicknesser table mm 630x1160 Thicknesser capacity mm 300 Variable feeding speed by frequenty variator m min from 5 to 22 m min standard Friction reduction rolls in the thicknesser table 1 or 2 OPTION Digital read out thicknesser standard Rise and fall thicknesser table 2 speeds slow fast standard Safety micro switch on hood standard Dust suctio...

Страница 7: ...General dimensions 7 ...

Страница 8: ...8 ...

Страница 9: ... lifted with a small crane or a forklift but severe shocks must be avoided Place the machine on a concrete base and level the machine perfectly horizontally in both directions The machine is construted in such a manner that it is not necessary to fix it to the ground but if you wish to do so fixing bolts must be introduced through the leveling bolts in the base plates Please find the dimensions of...

Страница 10: ...minal N Connect the earthing green yellow to the terminal marked with the earth symbol PE ATTENTION Check first if the spindle runs free and if all protections are mounted before starting up the machine If the rotation direction of the spindle is not correct the leads L1 and L2 must be exchanged The rotation direction of the spindle is anti clockwise left seen from the side of the machine with the...

Страница 11: ...or can be started by pushing the button POT of the potentiometer and by turning the same button the feeding speed can be chosen from 5 to 22 meters per minute To stop the feeding motor push the same button POT All motors are stopped automatically when the emergency stop button AU1 is used Make sure the brake release switch S4 1 is set at position O and the warning light inside the same button is n...

Страница 12: ... injuries when handling planer knives the wear of safety gloves is highly recommended even blunt knives can cause serious damage to your hands Make sure both planer knives and jib strips are well cleaned before putting them into the slots in the planer arbor Take care of the springs underneath the knives and see to it that they do not stay blocked inside their seats in the arbor Now put the cleane...

Страница 13: ... dust extraction system Always wear suitable clothing loose or torn clothes are very dangerous Keep children away from the machine and out of the workshop To avoid damaging your hearing we recommend to wear ear protection when working with the machine The height of a planer knife must be 20 mm minimum Adjusting the depth of cut on the thicknesser fig 5 The raise and fall of the thicknesser table i...

Страница 14: ... held Shortly before the desired value is reached release the two buttons and press the same two buttons so as to approach the desired value with the slowest rateof 1 Hz The thicknessser now is calibrated over the full 300 mm capacity To set the read out at 0 simultaneously press Set and RESET fig 6 Important Before starting to work on the thicknesser always ensure that the anti kickback protectio...

Страница 15: ...er can be done without having to stop the feeding motor In case of overloading of the feeding mechanism the feeding motor must be disengaged immediately by pushing the button of the potentiometer POT and the main cutterblock motor by pushing the emergency stop button fig 3 AU1 on the switch panel After reducing the depth of cut on the thicknesser the motor can be started up again fig 7 Emergency s...

Страница 16: ...t be taken away with a piece of cloth and a little solvent petrol kerosine or other product Never smoke or have any naked flame near the machine when using inflammable products this to prevent risk of fire and serious burns for the operator After removing the front back and side cover plates all machine parts which need maintenance are exposed The thread bars and posts of the table and the drive c...

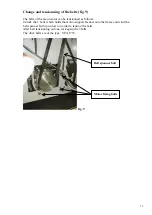
Страница 17: ... follows Unlock the 3 bolts which holds the motor support bracket onto the frame and wind the belt spanner bolt up or down in order to tension the belts After belt tensionning is done lock again the 3bolts The drive belts are of the type SPA 1750 fig 9 Motor fixing bolts Belt spanner bolt 17 ...

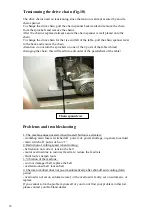
Страница 18: ...ism of the table Problems and troubleshooting 1 The machine does not start when the start button is activated workshop main fuse is switched off power cut power shortage or general overload main switch off put switch on 1 2 Reduction of cutting speed when working belt tension not correct tension the belt motor overload due to incorrect feed rate reduce the feed rate blunt tools sharpen tools 3 Vib...

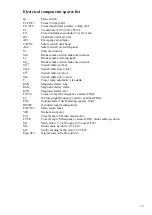
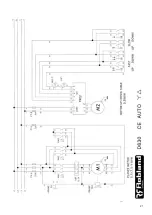
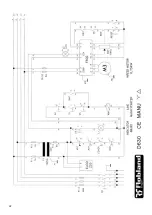
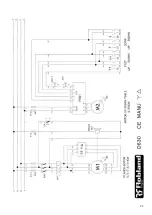
Страница 19: ... S6pp Switch table down fast S7n Switch table up slow S8p Switch table down slow T Timer relay automatic star delta KM1 Magnetic starter line KM2 Magnetic starter delta KM3 Magnetic starter star F9 F10 Fuses 6 Amp AM frequency variator FRQ2 L2 Warning light frequency variator overload FRQ2 POT Potentiometer 10K feeding speed 1 Watt RESET Overload reset feeding motor F4 F5 F6 Main motor fuses YB1 B...

Страница 20: ...20 ...

Страница 21: ...21 ...

Страница 22: ...22 ...

Страница 23: ...23 ...

Страница 24: ...24 ...

Страница 25: ...25 ...

Страница 26: ...26 ...

Страница 27: ...27 ...

Страница 28: ...28 ...

Страница 29: ...29 ...

Страница 30: ...30 ...

Страница 31: ...31 ...

Страница 32: ...32 ...

Страница 33: ...33 ...

Страница 34: ...34 ...

Страница 35: ...35 ...

Страница 36: ...36 ...

Страница 37: ...37 ...

Страница 38: ...38 ...

Страница 39: ...39 ...

Страница 40: ...40 ...

Отзывы: