Robo-Tank DIY ATO System
User Manual – Page 13
11. Adjusting the Advanced Settings
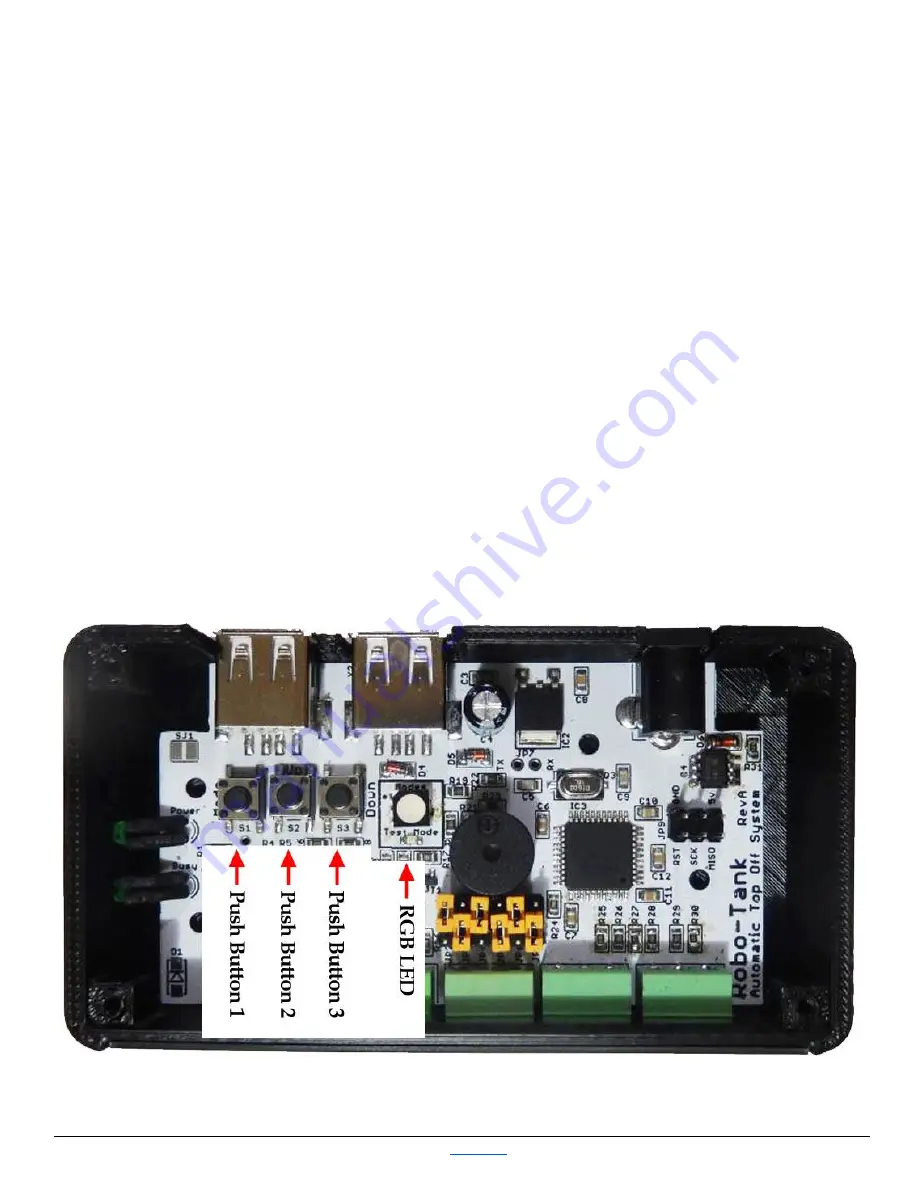
To adjust the settings remove the lid on the ATO module by removing the 4 screws on the bottom. Inside you’ll see the 3
push buttons which allows you to navigate the setup menu and adjust the settings.
When you enter and navigate the setup mode the large RGB LED beside the push buttons will change to a specific color
based on the setup mode so you know which setting you are adjusting.
Button 3 is used to enter / exit (will auto exit after 2 minutes if idle) the setup mode and toggle between the different
“Setup Options”.
Button 1 is used to change the setting for the current “Setup Option” and allows you to reset it back to the lowest setting
if you accidentally toggle past your choice or lose track of where you are.
Button 2 is used to recall the current setting for the current “Setup Option” and allows you to reset the current setting to
the factory default value.
When you enter setup mode, the ATO still functions as normal however the alarms are disabled, and will auto exit if no
button is pressed within 2 minutes.
The small green LED under the large LED along with the buzzer is used to give feedback as you scroll through the menu, it
will beep once every time you press button 1, and if you press button 2 it will beep and the green LED will flash X number
of times to indicate the current setting. Count them as it beeps to get the current setting and match according to the chart
on the following page.
All settings are saved to an EEPROM which will retain its memory without power for longer than you or I will.


