Basic Operations
Preparing to Print
39
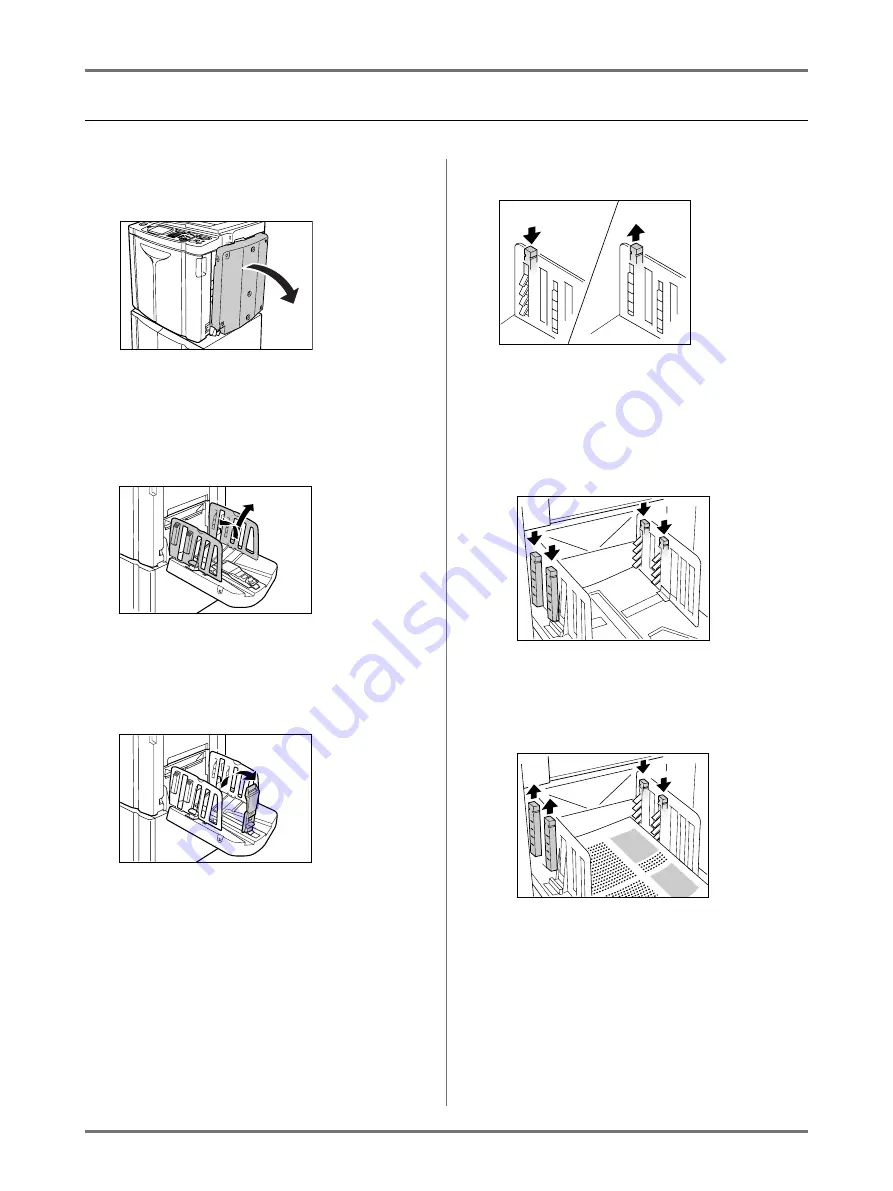
Setting up the Auto-control Stacking Tray (Optional)
1
Open the Auto-control Stacking
Tray.
Pull the Auto-control Stacking Tray down until it
comes to a rest.
2
Raise the Receiving Tray Paper
Guides.
3
Raise the Paper Stopper.
The Receiving Tray Paper Guides/Stopper posi-
tions are automatically adjusted for paper size
used.
Note:
• The Receiving Tray Paper Guides/Stopper
positions can be adjusted on the Touch Panel.
• Pressing the Receiving Tray Paper Guides'
Opening Button during printing moves the
Receiving Tray Paper Guides for about
1 mm (
3
/
64
") outward each time.
4
Adjust the Paper Arrangers.
Alignment of paper is affected by sizes and
strength of paper. Adjust the Paper Arrangers so
that printed paper is aligned.
Press the Paper Arranger to push the plates out,
pull up to pull them in.
For plain paper
Press to open all of the four Paper Arrangers.
For plain paper with images
lopsided on page
Press to open the two Paper Arrangers on the
more heavily printed side.
Push out plates
Pull In
Содержание SE 9380
Страница 1: ......
Страница 2: ......
Страница 97: ...Functions for Master Making Checking the Print Image Prior to Making Master Preview 95...
Страница 203: ...Storing Original Data and Use Method Copying Moving Stored Data 201...
Страница 223: ...Maintenance Cleaning 221...
Страница 257: ...Troubleshooting Troubleshooting 255...
Страница 263: ...Appendix Specifications 261...
Страница 268: ...266 056 36003 001...


