Chapter 5 Useful Functions
110
4
Change the target for entry to
[Sets].
• You can change the target for entry by press-
ing the [×] key or the [
U
] key.
• It is also possible to select the entry field by
directly touching the target.
5
Enter a value in [Sets] using the
numeric keys.
6
Change the target for entry to the
next group.
• Press the [+] key or the [
U
] key.
• It is also possible to select the entry field by
directly touching the target.
Repeat steps 3 to 6 as necessary.
7
Touch [OK].
The basic screen is displayed.
When you press the [START] key, printing is
performed according to the program that you
set.
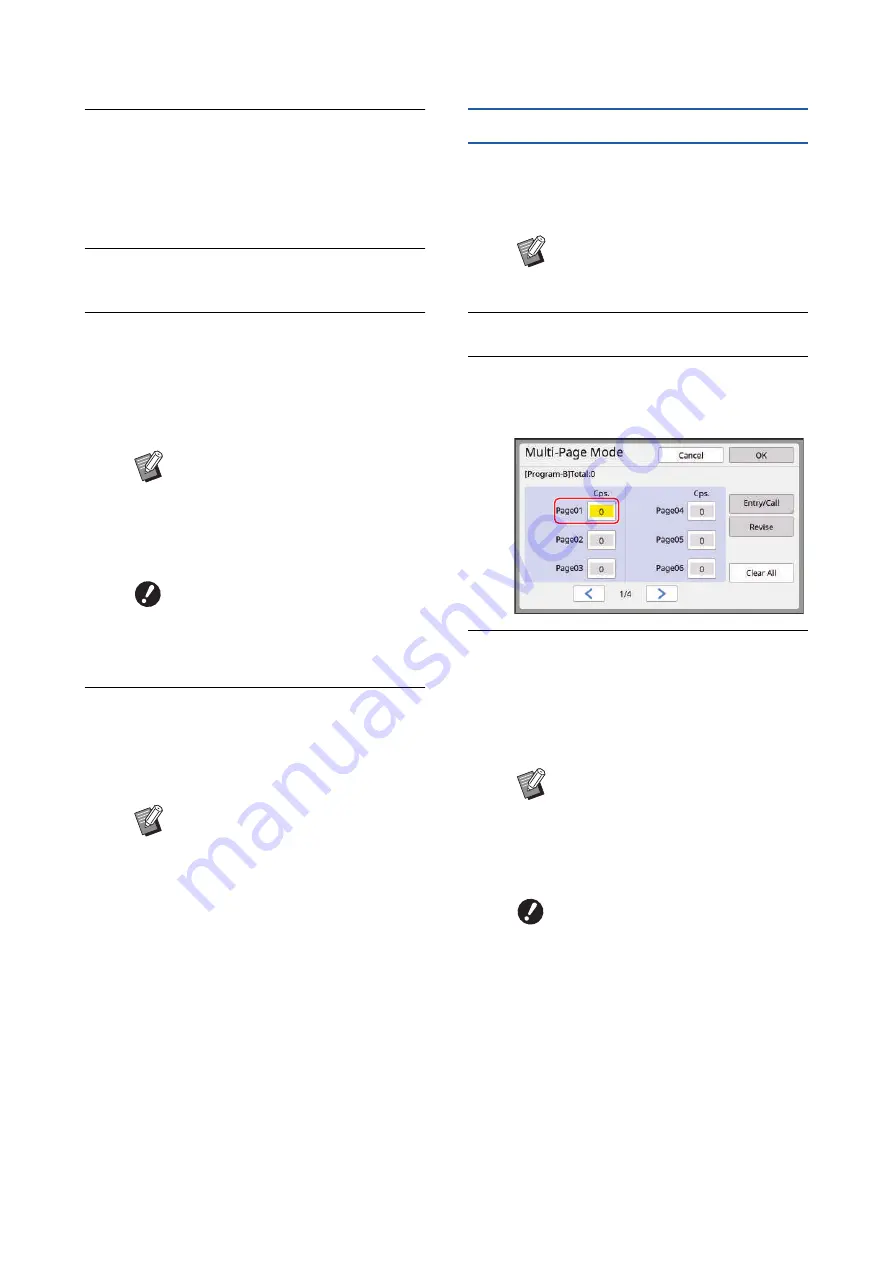
Setting [Multi-Page Mode]
1
Touch [Program] in the [Functions]
tab screen.
The [Program Type] screen is displayed.
2
Touch [Multiple].
3
Enter a value in [Cps.] using the
numeric keys.
You can enter a value into the active entry field.
4
Change the target for entry to the
next field.
• Press the [+] key or the [
U
] key.
• It is also possible to select the entry field by
directly touching the target.
Repeat steps 3 to 4 as necessary.
B
To clear all entered values, touch
[Clear All].
B
The total of the entered number of
copies is displayed at the top of the
screen.
B
If you want to register the pro-
grams that are set in this screen,
touch [Entry/Call] before [OK].
Then, go to step 3 in “Registering
[Program]” (
B
Printing is performed in the reverse
order of registration from the last
group. (Example: [003G] -> [002G]
-> [001G])
In this case, [001G] is output on the
top of the printed paper in the paper
receiving tray.
B
You can also display the [Program
Type] screen by pressing the [P]
key.
B
To clear all entered values, touch
[Clear All].
B
The total of the entered number of
copies is displayed at the top of the
screen.
B
If you want to register the pro-
grams that are set in this screen,
touch [Entry/Call] before [OK].
Then, go to step 3 in “Registering
[Program]” (
Содержание MH 9350
Страница 21: ...Chapter 1 19 1 About This Machine ...
Страница 31: ...29 2 Chapter 2 Basic Operations ...
Страница 53: ...51 3 Chapter 3 Functions for Master Making ...
Страница 97: ...95 4 Chapter 4 Functions for Printing ...
Страница 109: ...107 5 Chapter 5 Useful Functions ...
Страница 130: ...Chapter 5 Useful Functions 128 ...
Страница 131: ...129 6 Chapter 6 Functions for Scanning ...
Страница 137: ...135 7 Chapter 7 Setting the Operation Conditions ...
Страница 159: ...157 8 Chapter 8 RISO Console ...
Страница 165: ...163 9 Chapter 9 Replacing Consumables ...
Страница 177: ...175 10 Chapter 10 Maintenance ...
Страница 181: ...179 11 Chapter 11 Troubleshooting ...
Страница 205: ...203 12 Chapter 12 Appendix ...
Страница 215: ...Chapter 12 Appendix 213 12 V View edit 48 W WAKE UP key 23 Z Zoom 71 ...


