


Chapter 4. Installation
4.1.3
Connecting the power adapter
1. Connect the power adapter of WiComm-1 to an AC outlet. WiComm-1 performs various tests automatically and
it may take several seconds for normal operation.
2. Verify that the WiComm-1 is normally operated. If the WiComm-1 is operated normally, the PWR LED turns on
and the RDY LED blinks slowly. After a wireless is enabled, the Wi-Fi LED turns on. No blink of the RDY
LED indicates a failure in the equipment. In such case, turn off the power of the equipment and turn on the
power again. If the problem continues, refer to
‘8.2 Troubleshooting’
of this document.
4.2 WiComm-1 Access and Environment Setting
After connecting the WiComm-1 to a PC, let's access the WiComm-1.
y
To access the WiComm-1, the IP address of the WiComm-1 is required. However, in most cases, a DHCP
server does not assign the same IP whenever the power is turned on, so it is recommended to use a fixed IP
address.
y
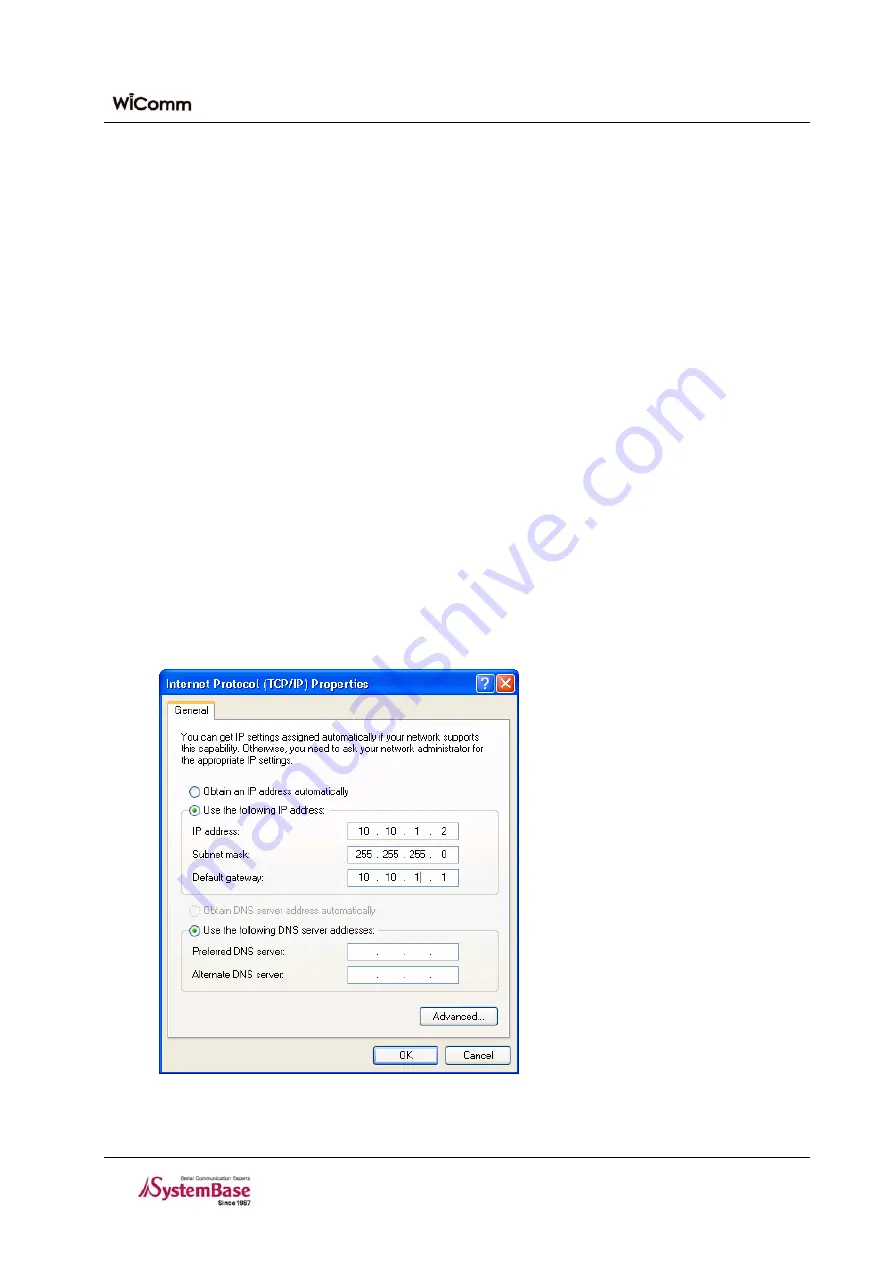
In default, a fixed cable IP address (10.10.1.1) is assigned in the WiComm-1.
4.2.1
Network Setting for a PC
1. To access the WiComm-1, network setting for a PC should be changed to enable the PC to access 10.10.1.1.
Perform the network setting by referring to the figure below:
Figure 4-1.
PC Network Setting Window
4-2
Содержание WiComm-1
Страница 1: ...WiComm 1 User s Guide Ver 1 0b 2008 09 09...


