background image

Chapter 2 Functions of the Front Panel of GPSA


RIGOL


RSA3000E User Guide


2-9


File 


RSA3000E allows you to save various types of files to the internal or external memory, 

and recall them when necessary.


Press File on the front panel to enter the file operation menu interface.


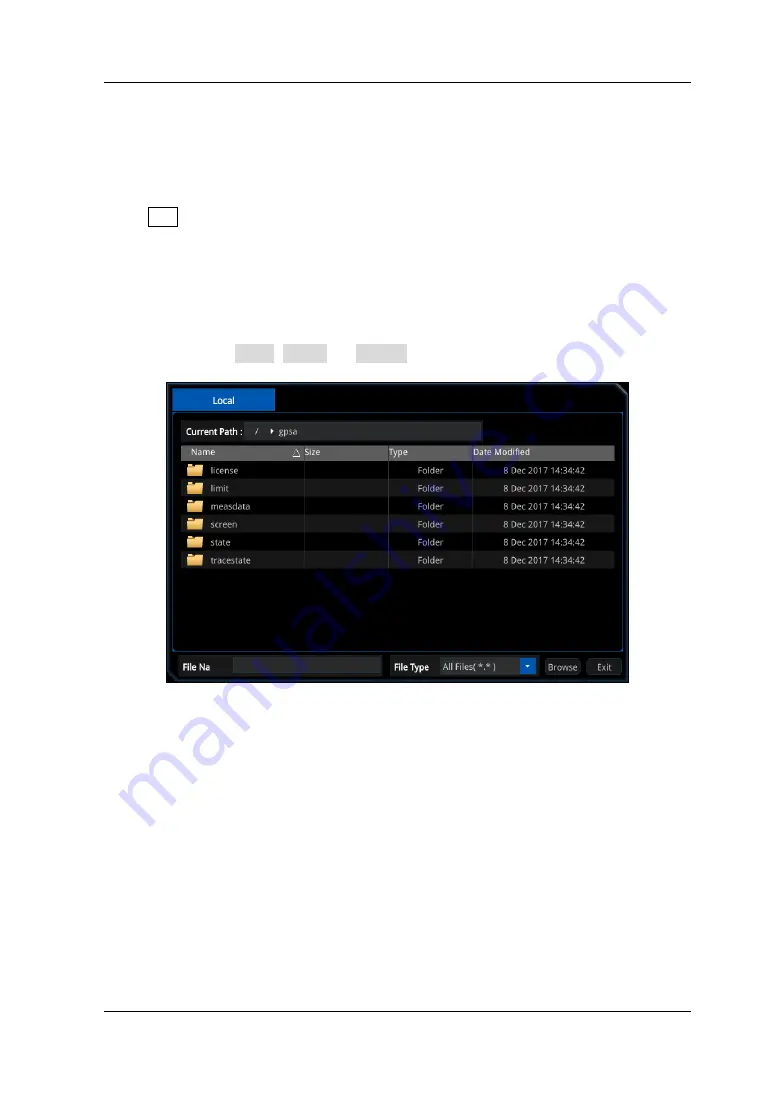
File Explorer 


Press the key to enter the file manager interface. You can use the touch gestures to 

tap the screen or use the mouse to click on the screen to select the corresponding 

file or folder. Displays all the files with the specified file types. When you select a file, 

you can press the CopyPaste, or Delete softkeys to copy, paste, or delete the 

specified file. 


Figure 2-21 File Manager 


The available file types include: State, Trace+State, Measurement Data, Limit, 

Screen Image, Amplitude Correction, and All (all the above file types). The 

descriptions for various file types are shown in the following table. 


Содержание RSA3000E Series

Страница 1: ...User Guide RSA3000E Series Real time Spectrum Analyzer Aug 2019 RIGOL SUZHOU TECHNOLOGIES INC...

Страница 2: ......

Страница 3: ...mation in this publication replaces all previously released materials Information in this publication is subject to change without notice RIGOL shall not be liable for either incidental or consequenti...

Страница 4: ...rectly If a probe is used the probe ground lead must be connected to earth ground Do not connect the ground lead to high voltage Improper way of connection could result in dangerous voltages being pre...

Страница 5: ...ate the instrument in a humid environment Do Not Operate in an Explosive Atmosphere To avoid personal injuries or damage to the instrument never operate the instrument in an explosive atmosphere Keep...

Страница 6: ...of important data Safety Terms on the Product DANGER It calls attention to an operation if not correctly performed could result in injury or hazard immediately WARNING It calls attention to an operat...

Страница 7: ...short circuit resulting from moisture or personal injuries ensure that the instrument is completely dry before connecting it to the power supply Environmental Considerations The following symbol indic...

Страница 8: ...used in education science corporate R D industrial production and other fields Main Features Ultra Real technology Frequency up to 3 GHz Displayed average noise level DANL 161 dBm typical Phase noise...

Страница 9: ...s of the RTSA s front panel keys Chapter 4 Functions of the Front Panel of EMI This chapter gives detailed function descriptions of the EMI s front panel keys Chapter 5 Functions of the Front Panel of...

Страница 10: ...Bold Square Brackets Bold For example Gen Output 50 4 Operation Procedures represents the next step of operation For example FREQ Center Freq indicates pressing FREQ on the front panel and then pressi...

Страница 11: ...System Language 1 6 Front Panel 1 7 Function Keys on the Front Panel 1 8 Utility Function Keys on the Front Panel 1 10 Front Panel Key Backlight 1 11 Front Panel Connector 1 12 To Use the Numeric Key...

Страница 12: ...arker Measurement 2 67 Marker 2 67 Marker To 2 74 Marker Function 2 76 Peak 2 80 Input Output 2 86 Input Impedance 2 86 Ext Gain 2 86 Ext Trigger2 2 86 Corrections 2 87 Demod 2 88 Demod Setup 2 88 Sho...

Страница 13: ...ger2 3 34 Shortcut Key 3 35 Auto Tune 3 35 Preset 3 35 User 3 38 Quick Save 3 39 Cont 3 39 Single 3 39 System Function 3 1 System 3 1 File 3 9 Recall 3 13 Save 3 15 Chapter 4 Functions of the Front Pa...

Страница 14: ...ecall 4 60 Save 4 63 Chapter 5 Functions of the Front Panel of VSA 5 1 Basic Settings 5 2 FREQ 5 2 SPAN 5 5 AMPT 5 8 Sweep and Function Settings 5 10 BW 5 10 Sweep 5 12 Trigger 5 13 Trace 5 22 Measure...

Страница 15: ...49 File 5 56 Recall 5 60 Save 5 61 Chapter 6 Remote Control 6 1 Remote Control Overview 6 2 Remote Control via USB 6 3 Remote Control via LAN 6 4 Chapter 7 Troubleshooting 7 1 Chapter 8 Appendix 8 1 A...

Страница 16: ......

Страница 17: ...ies its front and rear panel user interface as well as announcements during first use of the analyzer Contents in this chapter General Inspection Appearance and Dimensions To Prepare for Use Front Pan...

Страница 18: ...rier shall be liable for the damage to the instrument resulting from shipment RIGOL would not be responsible for free maintenance rework or replacement of the instrument 2 Inspect the instrument In ca...

Страница 19: ...Chapter 1 Quick Start RIGOL RSA3000E User Guide 1 3 Appearance and Dimensions Figure 1 1 Front View Unit mm Figure 1 2 Vertical View Unit mm...

Страница 20: ...d the supporting legs to use them as stands to tilt the instrument upwards for easier operation and observation You can also fold the supporting legs for easier storage or shipment when the instrument...

Страница 21: ...ltage range and you do not need to select the voltage range manually CAUTION To avoid electric shock ensure that the instrument is correctly grounded Turn on Checkout After connecting the instrument t...

Страница 22: ...L Chapter 1 Quick Start 1 6 RSA3000E User Guide To Set the System Language RSA3000E series spectrum analyzer supports multiple system languages You can press System Language to switch the system langu...

Страница 23: ...iption No Description 1 LCD 9 Numeric keypad 2 Menu softkeys 10 Tracking generator output 1 3 Back to previous menu item 11 Utility function key area 4 Function key area 12 Page up down key 5 Help key...

Страница 24: ...unit Enables preamp Sets the parameters such as resolution bandwidth RBW and video bandwidth VBW Sets the parameters such as input impedance external gain and External Trigger 2 Selects the RF calibra...

Страница 25: ...gnals automatically within full frequency range Restores the system to factory settings or user defined state Sets the system parameters Recalls the files Manages the files Saves the files User define...

Страница 26: ...s of Utility Function Keys on the Front Panel Locks all the keys except the Power key on the front panel Locks the touch screen of the instrument In the multi window display mode press this key to sel...

Страница 27: ...h the maximum amplitude and moves it to the center of the screen After the sweep is completed the backlight turns off 3 Tracking Generator When the tracking generator function is enabled the TG key is...

Страница 28: ...or stores the contents currently displayed on the screen to the USB storage device in jpg bmp or png format Mouse After the mouse is properly connected to the instrument you can use it to click on the...

Страница 29: ...mage to the tracking generator the reverse power cannot exceed 10 dBm when the frequency is lower than 10 MHz the reverse power cannot exceed 20 dBm when the frequency is greater than 10 MHz The rever...

Страница 30: ...ter Setting Figure 1 7 Numeric Keypad The numeric keypad consists of the following parts 1 Number Letter Multiplexing keys for numbers and letters They are used to directly input the desired number or...

Страница 31: ...er press this key to exit parameter input When you edit the filename with the on screen keyboard press this key to hide the on screen keyboard In multi touch test single touch test and keyboard test s...

Страница 32: ...e a highly stable frequency reference over temperature variations For order information of the option refer to the datasheet manual Note A 40 minute warm up is required for OCXO to reach its nominal f...

Страница 33: ...ss Input Output Ext Trigger2 to set it to be the external trigger input interface or use it to synchronize the trigger output interfaces of other test devices 8 TRIGGER IN Indicates the input terminal...

Страница 34: ...GPSA Mode Table 1 4 User Interface Icons No Name Description 1 Reference level Displays the reference level value 2 Measurement result Displays the current measurement results for the marker when no...

Страница 35: ...the currently selected measurement function 9 Working mode Displays the currently selected working mode 10 Function keypad Clicks the keypad to display the function keypad interface 11 Active function...

Страница 36: ...ent meanings The letter in blue indicates that the trace is updating The letter in gray indicates that the trace is not updated The letter with strikethrough and in gray color indicates that the trace...

Страница 37: ...ystem status Rmt indicates remote operation Ext indicates the external reference Uncal indicates that the measurement has not be calibrated PA on indicates that the preamp has been enabled 5 Trace ind...

Страница 38: ...1 The display of the trace indicator is shown in the following figure The first line displays the trace number The color of the number is the same as that of the trace The second line displays the tra...

Страница 39: ...isplay Frequency Meter Midspan Freq and Span 2 RIGOL Company logo 3 System status Rmt indicates remote operation Ext indicates the external reference Uncal indicates that the measurement has not be ca...

Страница 40: ...urement mode indicates continue indicates single 15 Meter display area Displays the histogram of the meter and its parameter information 16 Trace display area Displays the scanned spectral trace and t...

Страница 41: ...third line displays the detector type of each trace including P Positive Peak p Negative Peak C CISPR Average R RMS Average Q Quasi Peak and V Voltage Average The letter in blue in the third line dete...

Страница 42: ...the marker is displayed 2 RIGOL Company logo 3 System status Rmt indicates remote operation Ext indicates the external reference Uncal indicates that the measurement has not be calibrated PA on indica...

Страница 43: ...the currently selected menu name 12 Menu item Displays the menu item of the current function 13 Menu page number Displays the current page and the total number of pages 14 Trace4 window Displays the...

Страница 44: ...at the right corner 4 Under the Marker function you can only use the mouse to move a marker but unable to add a marker with the mouse Keyboard Operation Rule Connect the keyboard to the spectrum anal...

Страница 45: ...on the keyboard do not work for the menu operation Note 2 When the Caps Lock key is enabled every letter you type would be in uppercase even if you re not holding down the Shift key If disabled you ha...

Страница 46: ...rs horizontally to increase the span Stretch two fingers in the vertical direction to decrease the Y axis scale and pinch the fingers vertically to increase the Y axis scale 2 When operating on the Ma...

Страница 47: ...le the signal tracking function Press the corresponding menu key to enter the lower level menu and change the currently selected option The parameter type in the upper level menu will be changed when...

Страница 48: ...n be executed by touch gestures or clicking with the externally connected mouse Also you can connect to the keyboard and use the shortcut keys to perform the above menu operations For the matching rel...

Страница 49: ...the knob clockwise to increase or counterclockwise to decrease the parameter value at the specified step 1 Press FREQ Center Freq 2 Rotate the knob until the parameter is set to the desired value 800...

Страница 50: ...the numeric keys 4 Press F2 to select the desired unit MHz from the pop up menu For the matching relations between the front panel keys and the keyboard shortcut keys refer to Table 1 8 6 Use the mous...

Страница 51: ...information 3 Close the current help information Press any key on the front panel to close the help information currently displayed on the screen When the help information is displayed on the screen p...

Страница 52: ...power and remove the power cord 2 Use a small straight slotted screwdriver to pry out the fuse holder 3 Take out the fuse holder 4 Replace the old fuse with a specified fuse 5 Install the fuse holder...

Страница 53: ...lect multiple measurements For details refer to Chapter 2 2 RTSA RTSA provides the analysis function for the real time signal which can capture the complex signal seamlessly Select RTSA In this workin...

Страница 54: ...nge the center frequency in any working mode then the global center frequency will change with it Global CF Sets the global center frequency It is only available when you turn on the global center fre...

Страница 55: ...verage RMS Average and Average Vol are mutually exclusive You can at most select two among the three items Quasi Peak CISPR Average and RMS Average 4 Limit Sets the limits of the selected meter 5 Limi...

Страница 56: ...rigol com click License Activation to enter the Registered product license code interface Input the correct key serial number press System About System System Info to acquire the serial number of the...

Страница 57: ...e In the displayed menu select SCPI Panel Control Input the following option installation command in the displayed SCPI control panel SYSTem LKEY option info license info Wherein option info indicates...

Страница 58: ......

Страница 59: ...Front Panel of GPSA This chapter describes in detail the function keys on the front panel and their associated menu functions in the GPSA mode of RSA3000E Contents in this chapter Basic Settings Sweep...

Страница 60: ...time the frequency parameters are modified The frequency range of a channel can be expressed by either of two groups of parameters Start Frequency Stop Frequency start f stop f or Center Frequency Sp...

Страница 61: ...d be within the frequency range specified in the technical specifications of the analyzer In zero span mode the values of start frequency stop frequency and center frequency are the same so once one o...

Страница 62: ...meter Setting Table 2 2 Start Frequency Parameter Remarks Default center frequency span 2 Range 1 0 Hz to Fmax Unit GHz MHz kHz Hz Knob Step span 0 step span 200 span 0 step RBW 100 Min 1 Hz Left Righ...

Страница 63: ...ues of the center frequency start frequency and stop frequency but does not affect any hardware settings of the spectrum analyzer You can use the numeric keys the knob and the arrow keys on the front...

Страница 64: ...0 span 0 step RBW Min 1 Hz Left Right Arrow Key Step Up Down Arrow Key Step at 1 2 5 step CF Step Mode The CF step mode consists of Manual and Auto Remarks In Auto mode the CF step is 1 10 of the span...

Страница 65: ...ter frequency to keep the signal at the center of the screen If no marker is currently active when Signal Track is enabled the instrument will activate Marker1 execute a peak search automatically and...

Страница 66: ...the full span mode You can set the span to 0 Hz manually you can press the Zero Span menu item or run the SCPI commands to enter the zero span mode When you modify the span in non zero span mode both...

Страница 67: ...Track under FREQ Mkr CF Mkr CF Step Mkr Start Mkr Stop Mkr CF and Mkr Span under Marker To AMPT Sets the amplitude parameters of the analyzer You can modify these parameters to make the signals under...

Страница 68: ...is from 0 dB to 30 dB Therefore the input attenuation ranges from 0 dB to 50 dB When the set attenuation amount is greater than 20 dB fixed attenuator is preferred to be used by default When the maxi...

Страница 69: ...RF Preamp Sets the RF front end preamplifier to be on or off When the signal under test is a low level signal turning on the preamplifier can reduce the displayed average noise level so that you can d...

Страница 70: ...xis will automatically switch to the default unit Volts in Lin scale type The scale type does not affect the unit of Y axis If the Normalize function is enabled Log is selected to be the scale type by...

Страница 71: ...Setting Table 2 10 Maximum Mixing Level Parameter Remarks Default 10 dBm Range 50 dBm to 10 dBm Unit dBm dBm mV uV Knob Step 1 dBm Left Right Arrow Key Step Up Down Arrow Key Step 5 dBm Ref Offset Ad...

Страница 72: ...n the touchscreen For details refer to descriptions in Parameter Setting Note When Detector Type is Quasi Peak or the Filter Type is EMI the available values of RBW can only be 200 Hz 9 kHz 120 kHz or...

Страница 73: ...Setting Table 2 13 Span RBW Ratio Parameter Remarks Default 106 Range 2 to 10 000 Unit None Knob Step at 1 2 5 step Left Right Arrow Key Step Up Down Arrow Key Step at 1 2 5 step SPAN RBW Mode Sets t...

Страница 74: ...Hz Knob Step at 1 3 10 step Left Right Arrow Key Step Up Down Arrow Key Step at 1 3 10 step VBW Mode Sets the coupling mode of the Span RBW ratio Remarks When you set VBW Mode to Auto VBW is in auto...

Страница 75: ...RBW Ratio is in auto coupling state and its value is determined by auto rule value You can set VBW RBW Mode to Manual or directly set the VBW RBW ratio to change the coupling mode When you perform the...

Страница 76: ...l make a new sweep and measurement again You can use the numeric keys the knob and the arrow keys on the front panel to modify this parameter also you can modify it on the touchscreen For details refe...

Страница 77: ...creen In zero span mode the Sweep Time Mode menu is disabled and grayed out When the system exits the zero span mode the auto sweep coupling mode will restore to its previous state When RBW is smaller...

Страница 78: ...ne measurement Remarks If the instrument is in continuous sweep mode and no measurement function is enabled press this key to enter single sweep mode In this case if the trigger conditions are met the...

Страница 79: ...rigger conditions Press Single Measurement status Single sweep mode Single sweep mode Enter single sweep mode and wait for trigger condition Enter single sweep measurement mode and wait for trigger co...

Страница 80: ...1 Slope Sets the trigger polarity for External Trigger 1 to POS or NEG 2 Delay State Enables or disables the trigger delay function After the trigger delay function is enabled you can set the trigger...

Страница 81: ...h the instrument waits to start the sweep operation after the trigger signal that meets the trigger conditions is generated You can use the numeric keys the knob or arrow keys to modify this parameter...

Страница 82: ...eft Right Arrow Key Step Up Down Arrow Key Step at 1 1 5 2 3 5 7 5 step 4 Trigger Level Sets the trigger level in video trigger At this time the trigger level line and the trigger level value are disp...

Страница 83: ...s Table 2 22 Trigger Hold off Time Parameter Remarks Default 100 ms Range 100 s to 500 ms Unit s ms s ns ps Knob Step sync hold off time 100 Min 1 s Left Right Arrow Key Step Up Down Arrow Key Step at...

Страница 84: ...User Guide trigger signal triggers on the rising edge trigger delay trigger occurs trig holdoff auto trig trigger occurs trigger delay sweep measurement1 sweep measurement2 turn off trigger delay trig...

Страница 85: ...of the currently selected trace The system calculates the sampled data by a specific operation method according to the selected trace type The results will not be displayed unless you set Trace Update...

Страница 86: ...the maximum value of the sample data is displayed In this way the amplitude variation range of the signal is clearly shown 4 Sample For each trace point sample detector displays the transient level c...

Страница 87: ...harge time for the quasi detector is much shorter than the discharge time which can not only reflects the amplitude of the signal but also the time distribution of the signal Detector Auto Enables or...

Страница 88: ...eter unit is dB If a point in Op1 is a maximum trace value the difference the result of the subtraction is also a maximum trace value if the difference is less than or equal to 0 the resultant point i...

Страница 89: ...Note The trace math functions are mutually exclusive If you apply one math operation to a certain trace the last selected math operation function should be disabled Op1 Selects Operand 1 to be used fo...

Страница 90: ...ence Parameter Remarks Default 0 dB Range 170 dB to 30 dB Unit dB Knob Step 1 dB Left Right Arrow Key Step Up Down Arrow Key Step 5 dB Preset All Turns on Trace 1 and blanks all other traces This oper...

Страница 91: ...the touchscreen For details refer to descriptions in Parameter Setting Table 2 26 Tracking Generator Output Signal Amplitude Parameter Remarks Default 40 dBm Range 40 dBm to 0 dBm Unit dBm dBm mV uV K...

Страница 92: ...e analyzer will save the reference trace automatically after it completes the current sweep During saving the reference trace a prompt message will be displayed When the normalize function is enabled...

Страница 93: ...the numeric keys the knob and the arrow keys on the front panel to modify this parameter also you can modify it on the touchscreen For details refer to descriptions in Parameter Setting Table 2 29 Tr...

Страница 94: ...ed into two windows with the upper window the basic measurement window displaying the sweep trace and the lower window displaying the measurement results 1 Meas Off Disables the advance measurement fu...

Страница 95: ...press Meas Setup to set the corresponding parameters 7 C N Ratio Measures the power of the carrier and that of the noise with the specified bandwidth as well as their power ratio Select C N Ratio and...

Страница 96: ...des the measurement wizard At this time you can perform the VSWR measurement according to the wizard Press Meas Setup to set the corresponding parameters Tip The VSWR bridge and tracking generator are...

Страница 97: ...iltering and averaging processes select the log unit dB This average type is the most effective one for finding the low level signal that is close to the noise amplitude The formula is shown as follow...

Страница 98: ...rner of the trace to indicate whether the test passes or fails 2 Select Limit Selects the current limit line By default it is Limit1 3 Limit State Enables or disables the display of the limit line Whe...

Страница 99: ...the amplitude of the current point If the Rel Ampt is enabled edit the amplitude difference between the amplitude of the current point and the reference level Append Point Inserts an edit point Delet...

Страница 100: ...to settings in the current measurement mode will be set to Auto This operation does not affect other measurement modes In auto state the auto coupled parameters are changed with their coupled paramete...

Страница 101: ...mode average auto power type start line and stop line 1 Avg Number Specifies the number of times for averaging the measurement results You can use the numeric keys the knob or arrow keys to modify thi...

Страница 102: ...nals between the start line and stop line The detector type is set to Voltage Avg automatically RMS Displays the root mean square value expressed in W of the voltages of signals between the start line...

Страница 103: ...1 s Left Right Arrow Key Step Up Down Arrow Key Step at 1 1 5 2 3 5 7 5 step 7 Auto Couple When you enable Auto Couple function all the manual auto settings in the current measurement mode will be set...

Страница 104: ...fference between the upper channel and the main channel in dBc Lower displays the power of the lower channel and the power difference between the lower channel and the main channel in dBc Measurement...

Страница 105: ...s By default it is set to On 4 Main Chan BW Sets the bandwidth of the main channel and the power of the main channel is the power integral within this bandwidth You can use the numeric keys the knob o...

Страница 106: ...nel and that of the adjacent channels Adjusting this parameter will also adjust the distance between the upper lower channel and the main channel You can use the numeric keys the knob or arrow keys to...

Страница 107: ...el span Measurement Parameters average count average mode auto average channel frequency and channel span 1 Avg Number Specifies the number of times for averaging the measurement results You can use t...

Страница 108: ...e channel editing table when a channel is selected this menu displays the center frequency of the selected channel If you modify the frequency at this time the center frequency of the corresponding se...

Страница 109: ...e When no channel is selected in the channel editing table pressing this key can add a channel whose center frequency is the same as the value under Channel Freq and whose span is the same as the valu...

Страница 110: ...culate the bandwidth occupied by the power based on the specified power ratio Transmit Frequency Error indicates the difference between the center frequency of the channel and that of the spectrum ana...

Страница 111: ...te Selects whether to averaging the measurement results By default it is set to On 4 Max Hold Enables or disables max hold By default it is Off When Max Hold is enabled each measurement result is comp...

Страница 112: ...5 step 6 Power Ratio Sets the percentage the signal power takes up in the whole span power You can use the numeric keys the knob or arrow keys to modify this parameter you can also use the touch scre...

Страница 113: ...hin the span and then finds the two frequency points f1 and f2 at the left and right side of f0 at which the signal amplitude is X dB below the maximum amplitude The EBW equals to f2 f1 Measurement Pa...

Страница 114: ...ax Hold is disabled the current measurement result is displayed Max Hold and average measurement mode are mutually exclusive When Max Hold is enabled the average measurement mode will be automatically...

Страница 115: ...2 57 Table 2 45 X dB for EBW Measurement Parameter Remarks Default 10 dB Range 100 dB to 0 1 dB Unit dB Knob Step 0 1 dB Left Right Arrow Key Step Up Down Arrow Key Step 1 dB For details about the Au...

Страница 116: ...to the noise power Measurement Parameters average count average mode auto average offset frequency noise BW and carrier bandwidth 1 Avg Number Specifies the number of times for averaging the measureme...

Страница 117: ...knob or arrow keys to modify this parameter you can also use the touch screen to modify the parameter Table 2 47 Frequency Offset for C N Ratio Measurement Parameter Remarks Default 2 MHz Range 3 Hz t...

Страница 118: ...parameter you can also use the touch screen to modify the parameter Table 2 49 Carrier Bandwidth for C N Ratio Measurement Parameter Remarks Default 2 MHz Range 3 Hz to 1 GHz Unit GHz MHz kHz Hz Knob...

Страница 119: ...average count average mode auto average number of harmonics and sweep time 1 Avg Number Specifies the number of times for averaging the measurement results You can use the numeric keys the knob or arr...

Страница 120: ...meric keys the knob or arrow keys to modify this parameter you can also use the touch screen to modify the parameter Table 2 51 Number of Harmonics for Harmo Dist Measurement Parameter Remarks Default...

Страница 121: ...ase lower signal and base upper signal 3rd order lower intercept point power of base lower signal power of 3rd order lower signal power of base lower signal 3rd order upper intercept point power of ba...

Страница 122: ...he past N times N is specified in Avg Number 3 Avg State Selects whether to averaging the measurement results By default it is set to On 4 TOI Span This span is consistent with the span of the spectru...

Страница 123: ...indicates the ratio of maximum voltage to minimum voltage in standing wave pattern VSWR bridge and the tracking generator RSA3030E TG RSA3015E TG are required during measurement Two measurements have...

Страница 124: ...eight markers By default Marker1 is selected When a marker is selected you can set its state The selected marker is marked on the math trace The measurement result at the current marker is displayed i...

Страница 125: ...can read the amplitude and frequency of the point on the trace or the sweep time point Figure 2 14 Marker Remarks RSA3000E offers 8 markers Each time one marker or one pair of markers can be turned on...

Страница 126: ...currently a marker will be enabled at the center frequency of the current trace The readout resolution of the X axis frequency or time is related to the span To obtain a higher readout resolution red...

Страница 127: ...formation displayed in the screen and the functions concerning the marker will also be disabled Reference Marker Sets the reference marker for the current marker By default the reference marker is the...

Страница 128: ...z Range 0 to 3 GHz Unit Readout Frequency or 1 time the available unit is GHz MHz kHz or Hz Readout Time or Period the available unit is s ms s ns or ps Knob Step Readout Frequency or 1 time step span...

Страница 129: ...ference is zero the reciprocal is infinite and is displayed 4 Period If you select Period to be the readout type the Position and the Fixed marker modes display the reciprocal of the marker frequency...

Страница 130: ...will enable other markers except the Fixed or Off marker to move with it The fixed marker does not move along with other marker but if the fixed marker moves other non fixed markers will move with it...

Страница 131: ...Chapter 2 Functions of the Front Panel of GPSA RIGOL RSA3000E User Guide 2 73 Figure 2 15 Marker Table Marker All Off Turns off all the enabled markers and their related functions...

Страница 132: ...tion marker is selected the center frequency step will be set to the frequency of the current marker If Delta marker is selected the center frequency step will be set to the frequency difference betwe...

Страница 133: ...s set to the amplitude of the reference marker if the current marker is the Delta marker then the reference level is set to the amplitude of the Delta marker Mkr CF Sets the center frequency of the an...

Страница 134: ...points that are located on both sides of the current marker and with N dB fall N 0 or rise N 0 in amplitude as shown in the figure below Figure 2 16 N dB Bandwidth Measurement Remarks When the measure...

Страница 135: ...ied to Average RMS 1 Noise When the noise measurement function is enabled the measurement result of the Y axis is the average noise level normalized to 1 Hz within the frequency band 2 Band Power In n...

Страница 136: ...Auto the band span is 5 of the span or 5 of the sweep time When you select Manual you can press Band Span to set it Marker Counter Enables or disables the frequency counter function of the current ma...

Страница 137: ...s ns ps Knob Step gate time 100 Min 1 s Left Right Arrow Key Step Up Down Arrow Key Step at 1 1 5 2 3 5 7 5 step Gate Time Auto Turns on or off the auto gate time for marker counter Remarks Enables th...

Страница 138: ...the peak with a marker The peak search for the Next Peak Next Peak Right Next Peak Left or peaks in the peak table must meet the specified peak search condition When no peak meets the specified peak...

Страница 139: ...of the other one will be grayed out When the Cont Peak function is on if the current marker is off set the marker to Position mode and then execute the peak search operation Difference between Cont P...

Страница 140: ...ction Remarks When the peak excursion function is enabled press Peak Excursion to set it When the peak excursion function is disabled the Peak Excursion menu is disabled and grayed out 5 Threshold Lin...

Страница 141: ...Table Turns on or off the peak table By default it is Off When the peak table is turned on the display is split into a measurement window and a peak table display window The peak table will be displa...

Страница 142: ...the peaks defined by the peak criteria reading out based on the current sort setting in the peak table Display Line Displays the peaks meeting the peak criteria and whose amplitudes are greater than...

Страница 143: ...ine Sets the display line level to change its display location This line can be used as either the reference for you to read the measurement result or the threshold condition for the peaks displayed i...

Страница 144: ...75 Ext Gain Compensates for gain or loss in the measurement system outside the instrument Remarks The value does not affect the trace position but will modify the parameters such as reference level r...

Страница 145: ...nabled all the corresponding data will be used for amplitude correction Freq Interp Sets the interpolation type of the points between two points in the correction table during amplitude correction In...

Страница 146: ...ion is enabled the system will enable a marker automatically Place it at the center frequency and perform AM or FM demodulation at this frequency point RSA3000E provides an earphone jack and the demod...

Страница 147: ...s 4 Signal Gain State Sets the signal gain state to Manual or Auto 5 Signal Gain Sets the signal gain to adjust the signal energy When the signal amplitude is small the better demodulation effect can...

Страница 148: ...19 After Auto Search Remarks In the process of auto search the backlight of the Auto Tune key on the front panel turns on After the search is finished the backlight of the key turns off Some paramete...

Страница 149: ...Chapter 2 Functions of the Front Panel of GPSA RIGOL RSA3000E User Guide 2 91 When you enable the AMK function or the calibration signal in GPSA mode the Auto Tune function is disabled...

Страница 150: ...e items specified in Note 3 or user settings Parameter Name GPSA Parameter Value FREQ Center Freq 1 5 GHz Start Freq 0 Hz Stop Freq 3 GHz CF Step Auto 300 MHz Freq Offset 0 Hz Signal Track Off SPAN Sp...

Страница 151: ...Op2 Trace6 Offset 0 dB Reference 0 dBm TG 1 Output Off Amplitude 40 dBm Amplitude Offset 0 dB Normalize Off Reference Level 10 dB Reference Position 100 Reference Trace Off Mode Setup Global CF On 1 5...

Страница 152: ...e On Main Chan BW 2 MHz Adj Chan BW 2 MHz Chan Spacing 2 MHz Multichan Pwr Avg Number 10 Avg Mode Exponential Avg State On Channel Sheet Off Channel Freq 1 5 GHz Channel Span 3 GHz Occupied BW Avg Num...

Страница 153: ...Marker Trace Auto Trace1 Marker Freq 1 5 GHz Marker Readout Frequency Readout Auto On Line State Off Couple Markers Off Marker Table Off Peak Cont Peak Off Pk Pk Search Maximum Value Peak Threshold On...

Страница 154: ...define it as shortcut key for the defining method refer to the introduction in User Key After that press the shortcut key under any operation interface to quickly open and set the desired menu or func...

Страница 155: ...om User1 to User6 When Power On is set to Preset the specified preset type will be recalled at power on After the instrument starts press Preset on the front panel in any operation interface will reca...

Страница 156: ...meter Setting The following items can be set by the front panel keys the keyboard shortcut keys the externally connected mouse the touchscreen or remote operation 1 Mode Sets the mode of obtaining the...

Страница 157: ...ired gateway address The format of the default gateway is nnn nnn nnn nnn The range for the first segment nnn of the address is from 1 to 223 except 127 and the range for the other three segments is f...

Страница 158: ...amplitude is equal to the set value and the corresponding amplitude unit is the same as the Y axis unit You can use the numeric keys the knob and the arrow keys on the front panel to modify the displ...

Страница 159: ...umber Firmware Version Number Software Version 2 Option Info Displays the option information RSA3000E provides many kinds of options to meet various measurement requirements To purchase the correspond...

Страница 160: ...ects the analyzer to the external network by using the network cable If you do not have the right to access the Internet please ask the administrators to grant your right to access the external intern...

Страница 161: ...e front panel The definition method is as described below After that pressing User in any operation interface can quickly enable the defined function Press User Key to select On Open the function menu...

Страница 162: ...Select Read Only selects the messages that have been read 3 Select Unread Only selects the messages that have not been read 4 Delete Deletes the selected messages 5 Query All Views all the displayed m...

Страница 163: ...ou can use the touch gestures to tap the screen or use the mouse to click on the screen to select the corresponding file or folder Displays all the files with the specified file types When you select...

Страница 164: ...file or the folder might not be displayed normally in the file manager interface Copy Copies the currently selected file or folder Paste Pastes the file or folder When the current path has contained...

Страница 165: ...inting When Default is selected the page size depends on the printer currently connected 2 Quality Sets the printed screen quality 3 Color Sets the print color to Color Mono Inverse or Inverse Mono 4...

Страница 166: ...printer drive Then the printer is added 3 Select Device Selects the desired printer Import License In the file manager interface select a file to be imported and then press Import License to import t...

Страница 167: ...ss Recall to recall the file from a register or a file 2 Register1 through Register16 When any one of the items from Register1 to Register16 is selected the state of the specified register will be rec...

Страница 168: ...Limit to enter the limit recalling menu 1 Recall Press File Explorer to enter the file manager interface Select a file and then press Recall to recall the file 2 To Limit Selects the limit line file a...

Страница 169: ...ry The value of n is the existing maximum file number plus 1 For example if 3 files state1 sta state2 sta state5 sta exist in the current directory then the new filename for the file that you want to...

Страница 170: ...with the filename abc1 trs 2 Save As Press this key and then use the numeric keypad on the front panel to input the filename Then press Save to save the corresponding trace state file You can also to...

Страница 171: ...onding Measurement Data file You can also touch the screen or use the mouse to tap or click the Save As menu and then input the filename with the keypad 3 Save From Trace If the data to be saved are t...

Страница 172: ...d filename The default filename is determined by the following methods If you haven t input a filename by pressing the Save As key its default filename is screen n jpg Wherein n refers to the file num...

Страница 173: ...he existing maximum file number plus 1 If you have pressed the Save As key to input the filename abc then the file is saved to be abc csv After that press the Save key again another file is saved auto...

Страница 174: ......

Страница 175: ...easurement speed Frequency mask trigger Diversified and advanced composite display In general the high speed data stream in real time mode can be used in the following two ways to be served as the dat...

Страница 176: ...e span setting menu In this menu Span is by default selected Span Acq BW Sets the frequency range of the current channel Remarks When you modify the span the start and stop frequency will be modified...

Страница 177: ...you enable the auto scale function or modify the reference position the ref value will be modified accordingly Note that this menu is only valid in PvT measurement mode Table 3 2 Ref Value PvT Parame...

Страница 178: ...ment mode Auto Scale PvT Selects the setting mode for the horizontal scale of the PvT view Note that this menu is only valid in PvT measurement mode Remarks When you select Auto the auto scale functio...

Страница 179: ...u to restart measurement Note that this menu is only valid in PvT measurement mode Table 3 4 Ref Level PvT Parameter Remarks Default 0 dBm Range 250 dBm to 250 dBm Unit dBm dBm V mV V Knob Step For Lo...

Страница 180: ...rding to your needs Note When the filter type is set to Rectangular RBW is automatically set to RBW1 and RBW2 through RBW6 are invalid Filter Type Ratio1 1 024 point Ratio2 521 point Ratio3 256 point...

Страница 181: ...cording to the actual measurement requirements You can refer to the following table Window Function Spectral Leakage Amplitude Accuracy Frequency Resolution Gaussian Moderate Good Moderate Flattop Goo...

Страница 182: ...tep Up Down Arrow Key Step at 1 1 5 2 3 5 7 5 step Note 1 If a Density view exists the minimum acquisition time can be set to 32 ms if no Density view exists the minimum acquisition time can be set to...

Страница 183: ...ss this key to perform the continuous sweep or measurement operation This setting is global to all the activated traces and the detector types For details refer to Continue in Chapter 2 Single In RTSA...

Страница 184: ...ion after each trigger signal that meets the requirements generated a trigger Table 3 8 Acq Trigger Parameter Remarks Default 1 Range 1 to 8 192 Knob Step 1 Left Right Arrow Key Step Up Down Arrow Key...

Страница 185: ...waveform display range the trigger level line is displayed at the top or bottom of the waveform display area Table 3 10 Power Parameter Remarks Default 0 dBm Range 140 level offset to 30 level offset...

Страница 186: ...s 2 Mask Edit Press this key to enter the FMT editing interface You can use the front panel keys to set the FMT Besides you can also finger touch or use the keypad and mouse to set and edit the FMT pa...

Страница 187: ...e currently activated mask type b Navigation Selects the first line of the mask editing table c Frequency Sets the frequency of the mask point Its range is within the frequency range supported by the...

Страница 188: ...Selects the FMT file and imports it to the selected mask n New Mask Clears the currently activated mask and creates a default new mask o X Offset Sets the offsets of all the frequency points of the cu...

Страница 189: ...e trigger will occur when either mask meets the trigger criteria Enter Two states are required to initiate a trigger event The signal must be outside the mask and then passes into the mask The trigger...

Страница 190: ...st trace types are disabled and grayed out Trace2 through Trace6 The trace type can be set to Clear Write Max Hold and Min Hold The trace type Average is disabled The trace math operation function is...

Страница 191: ...All PvT In PvT mode turns on Trace 1 and blanks all other traces This operation does not affect the trace type trace detector and other states Clear All PvT Clears all traces in PvT mode All the trace...

Страница 192: ...e the mouse to select a specified window as the current window and maximize the current window If you select a different window its corresponding menu will be different Normal Measurement Interface Fi...

Страница 193: ...gative peak or average detectors the white trace obtains detector data from all the data within the acquisition time when using the Sample detector the last FFT was used To display the signal status w...

Страница 194: ...is supported In the Spectrogram view a white horizontal line represents the currently displayed trace In the Spectrogram mode display trace 1 indicates the latest trace In the view each horizontal lin...

Страница 195: ...ctrogram view zero time is the point where the first trace starts an acquisition meaning that each subsequent trace point is at a positive time that represents when that point was gathered relative to...

Страница 196: ...le Spectrogram view The combined Density and Spectrogram view display the traces the occurrences of all the signals within the acquisition interval time their corresponding frequency amplitude and tim...

Страница 197: ...the measurement interface is shown in the figure above Press Meas Setup to set the relevant parameters Remarks The PvT Spectrum view is displayed in multiple windows including PvT view and real time n...

Страница 198: ...ime normal view and spectrogram view In PvT Spectrogram view multiple windows have a coupling relationship You can use the mouse or touch the screen to display one of the windows in full screen The pa...

Страница 199: ...vance measurement function is a measurement analysis function specially customized for 2FSK signal When you enter the SSC function interface the screen is automatically split into two sections for dis...

Страница 200: ...number of times for averaging the measurement results The average value is displayed in a real time manner after each measurement is completed Table 3 12 Average Count Parameter Remarks Default 10 Ran...

Страница 201: ...the infinite mode Infinite mode shows the total number of times a frequency amplitude point appear during all the capture intervals since starting the measurement In the infinite mode the intensity f...

Страница 202: ...ue will compress the colors towards the higher end of the color bar and decreasing the nonlinearity value will compress the colors towards the lower end of the color bar Table 3 15 Curve Nonlinearity...

Страница 203: ...me The formula is as follows Trace Time Trace Number x Acquisition Time 3 Couple Marker Trace Sets whether to couple the marker to the selected trace Turn on a marker and set Marker Z to n The availab...

Страница 204: ...no red in Region D E When adjusting the reference hue you are adjusting the hue at the top of the color bar The bottom of the color bar shows the hue that is 240 degrees clockwise from the reference...

Страница 205: ...sables the Max Hold When the Max Hold is enabled the signal captured each time will be compared with the last captured signal whichever is the larger value will be displayed as the max hold trace 2 Re...

Страница 206: ...he measurement result display window Otherwise it indicates Fail At this time Fail is displayed in the measurement result display window Off A message indicates that test stops is displayed in the mea...

Страница 207: ...Only when you select the Spectrogram view can this menu be effective For details about the marker refer to relevant contents of Marker in Chapter 2 Marker To In RTSA mode the Marker To function in th...

Страница 208: ...75 Ext Gain Compensates for gain or loss in the measurement system outside the instrument Remarks The value does not affect the trace position but will modify the parameters such as reference level r...

Страница 209: ...1 to User6 Press Preset to recall the specified factory settings as shown in the following table except the items specified in Note 3 or user settings Parameter Name RTSA Parameter Value Non PvT PvT F...

Страница 210: ...Criteria Enter Active Mask Upper Frequency 1 4989950 GHz Amplitude 0 dBm Build From Trace Trace 1 X Offset 0 Hz Y Offset 0 dB X Axis Type Fixed Y Axis Type Fixed Trace Selected Trace Trace 1 Trace Ty...

Страница 211: ...ram Avg Number 100 Display Trace 1 Trace Selection TNum Couple Marker Trace On Ref Hue 0 Ref Hue Pos 100 Bottom Hue Pos 0 SSC Max Hold Off Mark Line1 Off 1 495 GHz Mark Line2 Off 1 505 GHz Pass Fail O...

Страница 212: ...Graticule On HDMI On HDMI Resolution 1280 720 60Hz LCD On LCD Backlight 100 Power Switch Default Beep Switch Off Volume 50 SCPI Display On User Key Off Language English Note 1 Not affected by Preset s...

Страница 213: ...s saving path is the currently defined in Quicksave Path The register storage does not support Quick Save Cont Press this key to perform the continuous sweep operation Single Press this key to perform...

Страница 214: ......

Страница 215: ...om User1 to User6 When Power On is set to Preset the specified preset type will be recalled at power on After the instrument starts press Preset on the front panel in any operation interface will reca...

Страница 216: ...hen the LAN parameter setting interface as shown below is displayed Figure 3 10 LAN Parameter Setting The following items can be set by the front panel keys the keyboard shortcut keys the externally c...

Страница 217: ...ble 4 Gateway Press Gateway and use the numeric keys to input the desired gateway address The format of the default gateway is nnn nnn nnn nnn The range for the first segment nnn of the address is fro...

Страница 218: ...peak table Remarks This line is a horizontal reference of which the amplitude is equal to the set value and the corresponding amplitude unit is the same as the Y axis unit You can use the numeric keys...

Страница 219: ...formation or the option information 1 System Info Model Serial Number Hardware Version Number Firmware Version Number Software Version 2 Option Info Displays the option information RSA3000E provides m...

Страница 220: ...ion about the components such as Linux and QT 5 Online Update Connects the analyzer to the external network by using the network cable If you do not have the right to access the Internet please ask th...

Страница 221: ...s key to adjust the volume of the beeper 4 User Key Defines an associated function for the User key on the front panel The definition method is as described below After that pressing User in any opera...

Страница 222: ...in the prompt message dialog box 1 Select All Selects all the displayed messages 2 Select Read Only selects the messages that have been read 3 Select Unread Only selects the messages that have not be...

Страница 223: ...terface You can use the touch gestures to tap the screen or use the mouse to click on the screen to select the corresponding file or folder Displays all the files with the specified file types When yo...

Страница 224: ...the folder might not be displayed normally in the file manager interface Copy Copies the currently selected file or folder Paste Pastes the file or folder When the current path has contained a file o...

Страница 225: ...rs 1 Page Size Sets the page size for printing When Default is selected the page size depends on the printer currently connected 2 Quality Sets the printed screen quality 3 Color Sets the print color...

Страница 226: ...urer of the printer the printer model and printer drive Then the printer is added 3 Select Device Selects the desired printer Import License In the file manager interface select a file to be imported...

Страница 227: ...to recall the file from a register or a file 2 Register1 through Register16 When any one of the items from Register1 to Register16 is selected the state of the specified register will be recalled Tra...

Страница 228: ...and recalls it to the selected trace Limit Press Limit to enter the limit recalling menu 1 Recall Press File Explorer to enter the file manager interface Select a file and then press Recall to recall...

Страница 229: ...alue of n is the existing maximum file number plus 1 For example if 3 files state1 sta state2 sta state5 sta exist in the current directory then the new filename for the file that you want to save sho...

Страница 230: ...with the filename abc1 trs 2 Save As Press this key and then use the numeric keypad on the front panel to input the filename Then press Save to save the corresponding trace state file You can also to...

Страница 231: ...You can also touch the screen or use the mouse to tap or click the Save As menu and then input the filename with the keypad 3 Save From Trace If the data to be saved are traces select the trace to be...

Страница 232: ...put a filename by pressing the Save As key its default filename is screen n jpg Wherein n refers to the file number of the filenames that are named based on the naming mode in the current file directo...

Страница 233: ...have pressed the Save As key to input the filename abc then the file is saved to be abc csv After that press the key again another file is saved automatically with the filename abc1 csv 2 Save As Pre...

Страница 234: ......

Страница 235: ...f the Front Panel of EMI This chapter describes in detail the front panel function keys of RSA3000E and their associated menu functions in EMI mode Contents in this chapter Basic Settings Sweep and Fu...

Страница 236: ...cy Meter It is used to set the frequency of the meter in frequency scan You can use the numeric keys the knob or arrow keys to modify this parameter you can also use the touch screen to modify the par...

Страница 237: ...s parameter you can also use the touch screen to modify the parameter Table 4 2 Midspan Freq Parameter Remarks Default 515 MHz Range 5 Hz to Fmax 5 Hz Unit GHz MHz kHz Hz Knob Step step RBW meter 2 Le...

Страница 238: ...an also use the touch screen to modify the parameter Table 4 4 Stop Frequency Parameter Remarks Default midspan frequency span 2 Range 10 Hz to Fmax Unit GHz MHz kHz Hz Knob Step step RBW meter 2 Left...

Страница 239: ...odify the span the start and stop frequency will be modified automatically if the midspan frequency remains to be unchanged You can use the numeric keys the knob or arrow keys to modify this parameter...

Страница 240: ...meet the mixer level limit When you increase the attenuation the reference level remains unchanged You can use the numeric keys the knob or arrow keys to modify this parameter you can also use the to...

Страница 241: ...rning on the preamplifier can reduce the displayed average noise level so that you can distinguish low level signals from the noise By default the preamp gain is 20 dB Y Axis Unit Sets the unit of the...

Страница 242: ...dB Unit dB Knob Step scale 1 step 1 dB scale 1 step 0 1 dB Left Right Arrow Key Step Up Down Arrow Key Step at 1 2 5 step Ref Offset Adds an offset value to the reference level to compensate for gains...

Страница 243: ...easurement standard is None and Gauss filter is selected the RBW range is as above When EMI filter is selected resolution bandwidth can only be 200 Hz 9 kHz 120 kHz or 1 MHz RBW Mode Meter Sets the RB...

Страница 244: ...series supports two kinds of RBW filters Gauss and EMI When the EMC measurement standard is CISPR the Filter Type Meter menu is grayed out and disabled By default EMI filter is selected When EMI is s...

Страница 245: ...hin the two scan ranges Selects Resume to resume scan search or measurement and start the operation from the scan point where you pause Clear List and Start After you press or tap this menu all the si...

Страница 246: ...ont Panel of EMI 4 12 RSA3000E User Guide Single Meter Sets the measurement mode of the meter to Single The meter performs a single measurement with the meter and then stops You can launch the meter b...

Страница 247: ...lope Sets the trigger polarity for External Trigger 1 to POS or NEG 2 Delay State Enables or disables the trigger delay function After the trigger delay function is enabled you can set the trigger del...

Страница 248: ...interval during which the instrument waits to start the sweep operation after the trigger signal that meets the trigger conditions is generated You can use the numeric keys the knob or arrow keys to...

Страница 249: ...ger hold off time 100 Min 1 s Left Right Arrow Key Step Up Down Arrow Key Step at 1 1 5 2 3 5 7 5 step Auto Trig State Enables or disables the auto trigger function Auto Trig Sets the time that the in...

Страница 250: ...Update and Trace Display to On Trace types include Clear Write Average Max Hold and Min Hold 1 Clear Write Sets the trace data to a minimum value and displays the real time scanned data of each point...

Страница 251: ...SPR standard 5 Average For each data point average see equation 2 9 all the sampled data within the corresponding time interval and display the result N i AV v N V 1 i 1 4 7 Wherein AV V is the averag...

Страница 252: ...ate are as follows Active Trace Update and Trace Display are On View Trace Update is Off and Trace Display is On Clear Trace Update and Trace Display are Off Back end Trace Update is On and Trace Disp...

Страница 253: ...f measurement is executed Table 4 15 Average Count Parameter Remarks Default 1 Range 1 to 10 000 Unit None Knob Step 1 Left Right Arrow Key Step 1 Up Down Arrow Key Step 1 2 Avg Type Selects the avera...

Страница 254: ...age status is set to Manual Limit Sets the parameters of limit lines After you press Preset the limit line measurement function is disabled but the data of the limit lines will be reserved The limit l...

Страница 255: ...nt limit line Freq Interpolation Sets the interpolation mode between two frequency points in the limit line table to Linear or Log Navigation Selects the first line of the limit line table Frequency E...

Страница 256: ...ber Checkbox indicates that the signal is marked Trc indicates the measured trace Freq indicates the frequency of the searched frequency point that meets the peak condition Peak Amp indicates positive...

Страница 257: ...ormed the difference between the detector amplitude of the currently selected measurement detector2 type and the limit line 1 to 6 is displayed If there is no measurement data is displayed CAvg Lim1 D...

Страница 258: ...he coordinate display of the currently selected signal to its previous display set before the Signal Zoom 11 Sort Signals Sorts the signal in the signal table according to frequency detector amplitude...

Страница 259: ...table Note The scan table currently displayed on the screen can be saved to the internal or external memory If needed you can recall it at any time Press Save to save it according to descriptions in...

Страница 260: ...nually set the RBW of the selected range Besides you can also tap the checkbox at the left side of RBW of the selected range in the pre scan setting list If the checkbox is checked with a tick and hig...

Страница 261: ...Sequence Selects the measurement sequence Remarks You need to select Start under Sweep Start Stop menu to start the selected measurement sequence If a scan sequence is currently executed then the Scan...

Страница 262: ...Detector 1 Detector 2 or Detector 3 2 Dwell Time Sets the dwell time of the selected detector 3 Detector Sets the type of the selected detector The available detector types include Pos Peak Quasi Pea...

Страница 263: ...Chapter 4 Functions of the Front Panel of EMI RIGOL RSA3000E User Guide 4 29 Meas Preset Restores the parameters associated with the current measurement to their factory default values...

Страница 264: ...e amplitude and frequency of each point on the trace via marker Figure 4 2 Marker Remarks RSA3000E offers 8 markers and only a single marker or one pair of markers can be turned on each time In the Ma...

Страница 265: ...sts currently a marker will be enabled at the midspan frequency If the current marker is found in the range where no trace is displayed a marker will be enabled at the midspan frequency and it will be...

Страница 266: ...Remarks Each marker can have another marker to be its reference marker If the current marker is a Delta marker the measurement result of the marker will be determined by the reference marker Any marke...

Страница 267: ...waveform display area If the marker is not visible in the selected area extend the marker line to the display area for better observation This function is useful for the marker outside the display are...

Страница 268: ...amplitude and limit delta to the signal table Remarks If the invalid marker measurement is executed then errors may occur and you cannot add the measurement results to the signal table The newly adde...

Страница 269: ...Detector Sets the type of the detector for marker measurement The available detector types include Pos Peak Quasi Peak CISPR Average RMS Average Average and Neg Peak You can also turn off the detector...

Страница 270: ...the marker measurement At this time the final measurement is performed according to the detector settings at the current marker frequency and the measurement results are displayed in the window If mu...

Страница 271: ...e and mark the peak with a marker The peak search for the Next Peak Next Peak Right and Next Peak Left must meet the specified peak search condition When no peak meets the specified peak search condit...

Страница 272: ...peak threshold function is enabled press Peak Threshold to set it When the peak threshold function is disabled the Peak Threshold menu is grayed out and disabled 3 Peak Excursion Sets the excursion o...

Страница 273: ...peak threshold and the peak area will be displayed at the left section Figure 4 3 Threshold Line 6 Search Mode Sets the peak search condition maximum value on the trace or the parameter that meets the...

Страница 274: ...et the input impedance to 75 Ext Gain Compensates for gain or loss in the measurement system outside the instrument Remarks The value does not affect the trace position but will modify the parameters...

Страница 275: ...enabled all the corresponding data will be used for amplitude correction Freq Interp Sets the interpolation type of the points between two points in the correction table during amplitude correction I...

Страница 276: ...the analyzer If needed you can recall it at any time After completing the correction data editing press Save to save it according to descriptions in Save Delete Correction Deletes the correction data...

Страница 277: ...ems from User1 to User6 Press Preset to recall the factory settings listed in the following table except items specified in Note 1 or user defined settings Parameter Name EMI Parameter Value FREQ Freq...

Страница 278: ...ell Time 10 ms Peak Hold Type Infinite Adjust Time 2 s Couple to Signal Off Couple to Marker Off Meas Setup Frequency Scan Avg Number 1 Avg Type Scalar Avg Auto Auto Test Limits Off Select Limit Limit...

Страница 279: ...ctor Detector 1 Dwell Time 200 ms Detector Pos Peak Limit for Delta Limit 1 Marker Selected Marker Marker 1 Marker Mode Position Reference Marker Marker 2 Marker Trace Trace 1 Marker Frequency 515 MHz...

Страница 280: ...nction menu you can define it as shortcut key for the defining method refer to the introduction in User Key After that press the shortcut key under any operation interface to quickly open and set the...

Страница 281: ...ny one of the items from User1 to User6 When Power On is set to Preset the specified preset type will be recalled at power on After the instrument starts press Preset on the front panel in any operati...

Страница 282: ...igure Figure 4 4 LAN Parameter Setting The following items can be set through the front panel keys shortcut keys on the keyboard externally connected mouse touch screen or remote interface 1 Mode Sets...

Страница 283: ...c keys to input the desired gateway address The format of the default gateway is nnn nnn nnn nnn The range for the first segment nnn is from 1 to 223 except 127 and the range for the other three segme...

Страница 284: ...the set value and the corresponding amplitude unit is the same as the Y axis unit You can use the numeric keys the knob and the arrow keys on the front panel to modify the display line level also you...

Страница 285: ...When disabled the meter window is not displayed in the user interface and only the spectral line window and the signal table window are displayed in the user interface 9 Meters Freq Line Enables or d...

Страница 286: ...erve the size of the characters If they do not change along with your gestures it indicates that problems occurred to the multi point touch function To exit the test press Esc for three consecutive ti...

Страница 287: ...analyzer Press the Year Month and Day softkeys respectively to set the date You can also press Date Format to select whether the date is displayed in YMD or MDY form Security Clear Press this key to p...

Страница 288: ...User Key to select On Open the function menu that needs to be defined For example press System Display Display Line Press User and the definition is finished At this time User Key turns off automatic...

Страница 289: ...55 3 Select Unread Only selects the messages that have not been read 4 Delete Deletes the selected messages 5 Query All Views all the displayed messages 6 Query Read Only views the messages that have...

Страница 290: ...terface You can touch the screen or use the mouse to tap or click on the screen to select the corresponding file or folder All the files with the specified file types are displayed When you select a f...

Страница 291: ...racters English letters or numbers If the filename or folder name contains other characters the file or the folder might not be displayed normally in the file manager interface Copy Copies the current...

Страница 292: ...en according to print parameter settings when the printer has been successfully installed and is in idle state Printer Setup 1 Printer Parameters 1 Page Size Sets the page size for printing When Defau...

Страница 293: ...rinter Inputs the IP address of the printer the manufacturer of the printer the printer model and printer drive Then the printer is added 3 Select Device Selects the desired printer Import License In...

Страница 294: ...file and then press Recall to import the file 2 Register 1 through Register 16 When any one of the items from Register 1 to Register 16 is selected the state of the specified register will be recalle...

Страница 295: ...press Recall to import the file 2 To Limit Selects the limit line file and recalls it to the selected limit line 3 Limit Directory Sets the limit directory to be recalled to User or Preloaded If you...

Страница 296: ...he signal table recalling menu Press File Explorer to enter the file manager interface Select a file and then press Recall to import the file Scan Table Press Scan Table to enter the scan table recall...

Страница 297: ...le directory The value of n is the existing maximum file number plus 1 For example if 3 files state1 sta state2 sta state5 sta exist in the current directory then the new filename for the file that yo...

Страница 298: ...ve As Press this key and then use the numeric keypad on the front panel to input the filename Then press Save to save the corresponding trace state file You can also touch the screen or use the mouse...

Страница 299: ...om Trace If the data to be saved are traces select the trace to be saved You can select any single trace from Trace1 to Trace3 4 Data Type Selects the measurement data type to be saved The data types...

Страница 300: ...data 4 Limits Selects the displayed limit line data to Full Data You can also select Off to turn off the display of the limit line data 5 Screen Sets the screen image of the report to Inverted or Nor...

Страница 301: ...ine to be saved You can select any single limit line from Limit1 to Limit6 Screen Image Press Screen Image to enter the screen saving menu 1 Save Press this key to save the current screen image in the...

Страница 302: ...e by pressing the Save As key its default filename is correction n csv Wherein n refers to the file number of the filenames that are named based on the naming mode in the current file directory The va...

Страница 303: ...signal table file You can also touch the screen or use the mouse to tap or click the Save As menu and then input the filename with the keypad Scan Table 1 Save Press this key to save the selected sca...

Страница 304: ...et Path Press the Set Path softkey to open the file explorer interface Select the corresponding path and then press OK to set the current path to be the quick save path 2 View Path Press the View Path...

Страница 305: ...f the Front Panel of VSA This chapter describes in detail the front panel function keys of RSA5000 and their associated menu functions in VSA mode Contents in this chapter Basic Settings Sweep and Fun...

Страница 306: ...meric keys the knob or arrow keys to modify this parameter you can also use the touch screen to modify the parameter Table 5 1 Center Frequency Parameter Remarks Default 1 GHz Range 1 562 kHz to Fmax...

Страница 307: ...lso use the touch screen to modify the parameter Table 5 3 Stop Frequency Parameter Remarks Default center frequency span 2 Range 3 125 kHz to Fmax Unit GHz MHz kHz Hz Knob Step step span 200 Min 1 Hz...

Страница 308: ...nge Fmax to Fmax Unit GHz MHz kHz Hz Knob Step step span 200 Min 1 Hz Left Right Arrow Key Step Up Down Arrow Key Step at 1 2 5 step CF Step Mode The CF step mode consists of Manual and Auto Remarks I...

Страница 309: ...nt adjusts the X axis reference value and X axis width to an optimal state At this time Reference and Width menus are grayed out and disabled When set to Manual you need to set the X axis reference va...

Страница 310: ...the frequency domain trace the X axis width can be set to be smaller than the span enabling you to zoom in on a portion of the measurement values For the time domain trace the X axis width can be set...

Страница 311: ...X axis scale reference value for the selected trace It can be set to Left Center and Right Copy X Scale Copies the X scale of the current trace to other traces The available ranges can be Trace1 thro...

Страница 312: ...is selected for the trace format the reference level is located at the top of the Y axis for other conditions the reference level is located in the middle of the Y axis The reference level is displaye...

Страница 313: ...ticule scale remains unchanged For other data sources if the trace format is Log Mag the default unit is dB if you select Wrap Phase or Unwrap Phase the default unit is deg Other trace format data are...

Страница 314: ...y of the amplitude then the rectangular window is recommended Hanning It is also called the cosine window Its main lobe is widened and lowered and its side lobe is reduced significantly In terms of le...

Страница 315: ...Guide 5 11 often used to truncate some non periodic signals such as the exponential decay signal Flat Top The flat top window has few low pass band fluctuations in the frequency domain As there are mi...

Страница 316: ...ft Right Arrow Key Step Up Down Arrow Key Step at 1 1 5 2 3 5 7 5 step Continue Sets the current sweep mode to continuous Single Sets the current sweep mode to single Remarks When the current sweep mo...

Страница 317: ...positive to trigger on a rising edge and negative to trigger on a falling edge 2 Delay State Enables or disables the trigger delay function After the trigger delay function is enabled you can set the...

Страница 318: ...trigger delay time 3 Delay Time Sets the time interval during which the instrument waits to start the sweep operation after the trigger signal that meets the trigger conditions is generated You can u...

Страница 319: ...rigger 3 Power Sets the trigger level of the IF power trigger When the signal meets the set trigger level value a trigger occurs When the data source is CaptureTime and the trace format is Log Mag dB...

Страница 320: ...ng displayed on the screen Upper only displays the upper mask Lower only displays the lower mask Both displays both the upper and lower masks 2 Edit Press this key to enter the FMT editing interface a...

Страница 321: ...currently activated mask type b Navigation Selects the first line of the mask editing table c Frequency Sets the frequency of the mask point Its range is within the frequency range supported by the an...

Страница 322: ...et Sets the offsets of all the frequency points of the currently activated mask o Y Offset Sets the offsets of all the amplitude points of the currently activated mask p Apply Offset Adds the X and Y...

Страница 323: ...t The signal must be outside the mask and then passes into the mask The trigger event occurs when the first non violating waveform is detected Leave Two states are required to initiate a trigger event...

Страница 324: ...e is the minimum time between two trigger signals Table 5 18 Trigger Hold off Time Parameter Remarks Default 100 ms Range 0 s to 500 ms Unit s ms s ns ps Knob Step trigger hold off time 100 Min 1 s Le...

Страница 325: ...trigger parameters is shown in the following figure Trigger Signal Trigger on theRising Edge Trigger Delay Trigger Occurs Trigger Delay Auto Trigger Trigger Occurs Trigger Delay Sweep Meas1 Sweep Mea...

Страница 326: ...dow Layout the trace order is displayed differently The selected trace window is highlighted as shown in the following figure Figure 5 3 Trace Display After activating the Selected Trace menu select t...

Страница 327: ...grayed out 4 Demod Error Sets the demodulation error measurement results of the selected trace 1 Error Vector Time Displays the vector difference between the IQ measurement time and IQ reference time...

Страница 328: ...he Trace Format menu is grayed out and disabled 7 RT Trace Press or tap the RT Trace menu and the real time trace of the signal is displayed in the selected trace window of the user interface When thi...

Страница 329: ...ye Length Sets the width of the eye diagram and which is displayed in the symbol period Note This menu is only valid when the trace format is Q Eye or I Eye Table 5 20 Eye Length Parameter Remarks Def...

Страница 330: ...eference signal recovered symbols and various error traces and summaries After selecting Digital Demod press Meas Setup to set the corresponding parameters of the digital demodulation BER Test Press t...

Страница 331: ...file in specific format from the File Explorer For details refer to Known Data 3 Symbol Information Displays the symbols after the vector signals are demodulated and compares them with the symbols in...

Страница 332: ...only displayed when you select FSK as the modulation format and the Ref Dev Mode is set to Manual Meas Interval Sets the number of symbols for analysis in digital demodulation Table 5 21 Meas Interva...

Страница 333: ...RRC Root Raised Cosine Gaussian Rectangular and User Defined Data 1 to Data 6 Remarks You can modify alpha cosine filter or BT Gaussian filter to define the shape and width of the cosine filter and G...

Страница 334: ...Bluetooth Other DECT and APCO 25 Alpha BT This parameter determines the characteristics of the Raised Cosine Root Raised Cosine and Gaussian filters used by the analyzer s digital demodulator These ch...

Страница 335: ...h is disabled 5 Sync Search Enables or disables the sync search function 6 Sync Pattern Sets the bit pattern for the sync search Press or tap the Sync Pattern menu to pop up Sync Pattern window as sho...

Страница 336: ...ml Press File Explorer to enter the file manager interface Select a file and then press Recall to import the file The XML file should comply with the following format requirements Syntax Value Range D...

Страница 337: ...ut 1 Single Window The user interface displays the waveform of the currently selected trace in one single window 2 LR Window The user interface displays the trace waveform or data in two windows If tr...

Страница 338: ...isplays trace 4 5 UDR Window The user interface displays the trace waveform or data in three windows If trace 1 trace 2 or trace 3 is selected before setting the window layout the upper left window di...

Страница 339: ...ude and frequency of a certain point on the trace via marker Figure 5 7 Marker Remarks RSA3000E offers 8 markers in VSA mode and only a single marker or one pair of markers can be turned on each time...

Страница 340: ...resolution of the X axis is related to the currently set X axis width To obtain a higher readout resolution reduce the width 2 Delta It is used to measure the difference between reference point and c...

Страница 341: ...of the marker will be determined by the reference marker Any marker cannot take itself to be the reference marker Marker Trace Selects the trace that the current marker marks It can be Trace1 Trace2...

Страница 342: ...rmat Marker Y is used to set the marker s quadrature component imaginary part of the Y value Couple Markers Enables or disables the couple marker function Remarks When this function is enabled moving...

Страница 343: ...Chapter 5 Functions of the Front Panel of VSA RIGOL RSA3000E User Guide 5 39 Figure 5 8 Marker Table All Markers Off Turns off all the enabled markers and their related functions...

Страница 344: ...ency of the current marker If Position marker is selected the center frequency step will be set to the frequency of the current marker If Delta marker is selected the center frequency step will be set...

Страница 345: ...tude at the current marker Given a Delta marker if the current marker is the reference marker then the reference value is set to the amplitude at the reference marker if the current marker is the Delt...

Страница 346: ...he band function will neither affect the frequency band parameters nor disable the marker Band Adjust Adjusts the bandwidth parameter for the band function 1 Band Span Sets the bandwidth of the signal...

Страница 347: ...ace is next lower than that of the current peak Next Higher Searches for and marks the peak whose amplitude on the trace is next higher than that of the current peak Next Peak Right Searches for and m...

Страница 348: ...sates for gain or loss in the measurement system outside the instrument Remarks The value does not affect the trace position but will modify the parameters such as reference level readout and the mark...

Страница 349: ...one of items from User1 to User6 Press Preset to recall the factory settings listed in the following table except items specified in Note 1 or user defined settings Parameter Name VSA Parameter Value...

Страница 350: ...as Signal Time Symbol Trace Format I Q Eye Length 2 Symbol Format Bin Trace Det Pos Peak Mode Setup Global CF Off 1 GHz Meas Measurement Function Digital Demod Meas Setup Mod Format 2FSK Ref Deviation...

Страница 351: ...lay On User Key Off Language English Note 1 Not affected by Preset settings User User defined shortcut key For some hard to find but commonly used function menu you can define it as shortcut key for t...

Страница 352: ...Quick Save Cont Press this key to perform the continuous sweep operation Single Press this key to perform the single sweep operation Selects Single and then the Single key on the front panel is illum...

Страница 353: ...one of the items from User1 to User6 When Power On is set to Preset the specified preset type will be recalled at power on After the instrument starts press Preset on the front panel in any operation...

Страница 354: ...igure Figure 5 9 LAN Parameter Setting The following items can be set through the front panel keys shortcut keys on the keyboard externally connected mouse touch screen or remote interface 1 Mode Sets...

Страница 355: ...keys to input the desired gateway address The format of the default gateway is nnn nnn nnn nnn The range for the first segment nnn is from 1 to 223 except 127 and the range for the other three segment...

Страница 356: ...Resolution The resolution supported by HDMI interface is 1280 720 60Hz 640 480 60Hz or 720 480 60Hz 4 LCD Enables or disables LCD Remarks If you are not updating data turning off LCD can improve the m...

Страница 357: ...int touch test interface Touch or use the mouse to make stretch or strike gestures on the screen if the corresponding traces are displayed then it indicates that the point on the touchscreen is valid...

Страница 358: ...e state screen files screen and measdata files measdata saved by users in all modes Executes the factory resetting operation Language RSA3000E supports multi language menu Chinese and English bulit in...

Страница 359: ...t go to the specified menu Messages Press this key and then a prompt message dialog box will be displayed You can press the corresponding front panel softkey to select to view all the messages the mes...

Страница 360: ...n the screen to select the corresponding file or folder Displays all the files with the specified file types When you select a file you can press the Copy Paste or Delete softkeys to copy paste or del...

Страница 361: ...contained a file or folder whose name is the same as the one that you want to paste after you perform the paste operation the original file or folder will be overwritten Rename Renames a file that has...

Страница 362: ...e print color to Color Mono Inverse or Inverse Mono 4 Orientation Sets the print orientation to Landscape or Portrait 5 Adjust Sets the print border to Adaptive Non Adpt and Hold Min 6 Counts Sets the...

Страница 363: ...E User Guide 5 59 Import License In the file manager interface select a file to be imported and then press Import License to import the file System Update Press this key to update the analyzer softwar...

Страница 364: ...ect a file and then press Recall to import the file 2 Register1 through Register16 When any one of the items from Register1 to Register16 is selected the state of the specified register will be recall...

Страница 365: ...is the existing maximum file number plus 1 For example if 3 files state1 sta state2 sta state5 sta exist in the current directory then the new filename for the file that you want to save should be sta...

Страница 366: ...e file is saved to be abc data After that press the Save key again another file is saved automatically with the filename abc1 data 2 Save As Press this key and then use the numeric keypad on the front...

Страница 367: ...filename The default filename is determined by the following methods If you haven t input a filename by pressing the Save As key its default filename is screen n jpg Wherein n refers to the file numb...

Страница 368: ...Inverted Quicksave Path Press the Quicksave Path softkey to enter the quick save path setting menu 1 Set the Path Press this key to open the file explorer interface and select the corresponding path...

Страница 369: ...r 6 Remote Control You can control RSA3000E series spectrum analyzer through USB or LAN remote interface This chapter introduces remote control and the control method Contents in this chapter Remote C...

Страница 370: ...l Instrument Software Architecture library For details about the SCPI commands and programming refer to RSA3000E Programming Guide 2 PC software You can use the PC software Ultra Sigma to send the SCP...

Страница 371: ...t up Ultra Sigma here we assume that you have installed Ultra Sigma properly and the software will automatically search for the resource currently connected to the PC You can also click to search for...

Страница 372: ...ide of the panel Select the desired resource and click to add the resource Note The IP address of the selected resource should be consistent with that of the LAN interface If you want to remove the re...

Страница 373: ...bpage Note If you want to view or modify the network settings of this instrument please click Network Settings and then a pop up window is displayed Input rigol rigol must be in lowercase form without...

Страница 374: ......

Страница 375: ...e use the specified fuse AC 250V T3 15A 2 One or more keys on the keyboard does do not respond and stuck keys are found 1 After you power on the instrument check whether all the keys are unresponsive...

Страница 376: ...alibration after the stated calibration period expires contact RIGOL or get paid service from authorized measurement agencies The analyzer provides self calibration function If required press System A...

Страница 377: ...Kit RSA3000E EMC Spectrum Analyzer PC Software Ultra Spectrum ASK FSK Demodulation Software RSA3000E ASK FSK Optional Accessories Include N SMA cable BNC BNC cable N BNC adaptor N SMA adaptor 75 50 a...

Страница 378: ...guarantees free replacement or repair for the defective product To get repair service please contact with your nearest RIGOL sales or service office There is no other warranty expressed or implied ex...

Страница 379: ...19 Density Spectrogram 3 21 DHCP 2 2 3 2 4 48 5 50 Display Line 2 4 3 4 4 50 Earphone 2 88 EBW 2 37 2 55 EBW X dB 2 56 Ext Gain 2 86 3 34 4 40 FFT Window 5 10 FM 2 88 FMT 3 11 3 12 5 16 Free Run 2 22...

Страница 380: ...filter 4 10 RBW mode 4 9 Readout 2 70 Ref Level 4 6 Ref Offset 4 8 Ref Position 5 7 Ref Value 5 5 5 8 Reference Level 2 9 Reference Level Offset 2 13 Reference Marker 2 68 5 36 Reference Position 2 35...

Отзывы: