background image

1.4.2

Operation Introduction

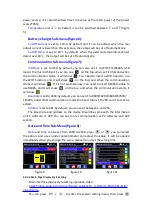
In the menu operation, the icon in red or cursor is the currently selected menu,

the icon in blue is not selected, press

to confirm or enter, press the encoder

potentiometer to cancel or return, press the direction button to move the cursor or
switch menu, rotate the encoder potentiometer to change the setting, the settings
will be automatically saved when returning from the menu page.

Press and hold the

0 button and power on to restore the factory settings, press and hold the 1 button

and power on to restore the factory calibration value, press and hold

and

power on to enter the boot mode.

1.4.2.1 Battery Charging Function Introduction

Battery charging operation video

https://drive.google.com/drive/folders/1g8v_l1X9uwRM1P4GPwKhnP4No

pKIUm1s?usp=sharing

After power on, at battery related information display area, external

temperature, capacity and energy will loop display. When there is output current:

capacity, energy will be automatically accumulated, and automatically cleared after

power off.

The green terminal is connected to the positive electrode of the battery, and the

black terminal is connected to the negative electrode of the battery. After the battery
is correctly connected, the battery charging indicator turns red

and the battery is

connected. Press ON/OFF to start charging, the battery charging indicator turns
green

. When the actual output current is lower than 10 mA (

charging cut-off

current value can be set by user

), the output will be shut down automatically. Battery

with protection board or low capacity needs to be charged with red and black
terminals. The charging voltage and current should be set on your own. When the
charging function is not in use, you can connect the green and black terminals with a
cable to prevent interference with the battery detection terminal and accidentally
turn off the output.

It is strongly recommended to use the original charger to charge the battery.

The charging function of this machine can only serve as a temporary replacement,

not for long-term use. There is a risk of fire and explosion during the charging

process. Non-professionals should not operate.

Содержание RD6006P

Страница 1: ...In order to let you know more about the full function of this product get a better experience and avoid misuse Please read this instruction carefully before using it Keep it for future reference Note This instruction is corresponding to firmware V1 34 the page and operation may be different under different firmware versions please pay attention when using it We do recommend you to download the lat...

Страница 2: ...troduction 9 1 4 2 1 Battery Charging Function Introduction 9 1 4 2 2 Main Page Output Voltage and Current Setting 10 1 4 2 3 Data Group Quick Storage and Call out 10 1 4 2 4 Keypad lock and unlock 11 1 4 2 5 System Setting 11 1 4 2 6 Main Page Display Style Setting 13 1 4 2 7 Storage Data Setting 14 1 4 2 8 System Information 14 Android APP Instruction 15 2 1 Mobile Phone APP Installation 15 2 1 ...

Страница 3: ...PP Installation 20 3 1 1 APP Download 20 3 2 Installation and Operation 20 3 2 1 APP Update 21 3 2 2 UI Instruction 21 3 2 3 APP Operation 22 3 2 3 1 Network Distribution 22 3 2 3 2 Proper Wi Fi Connection 23 3 2 3 3 APP Operation 23 PC Software Installation and Operation Instruction 24 4 1 Software Download 24 4 1 1 Unzip Files 24 4 1 2 Unzip Files 24 4 2 Software Operation 25 4 2 1 Software Conn...

Страница 4: ... 4 3 3 Advanced Function 28 4 3 4 RS485 Multiple Devices Communication 29 4 3 5 Firmware Update 29 4 3 6 Boot Logo Update 30 4 3 7 Version Update Detection 31 4 3 8 Language Setting 32 4 3 9 About 32 Appendix 34 Appendix 1 Common Battery Voltage Comparison Table 34 Appendix 2 Common Battery Voltage Comparison Table 35 ...

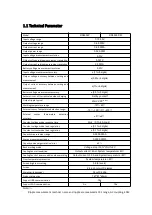
Страница 5: ...40 External sensor Temperature detection range 10 100 0 200 External sensor Temperature detection accuracy 3 6 Constant voltage mode response time 2ms 0 1A 5A Load Constant voltage mode load regulation 0 1 2 digits Constant current mode load regulation 0 1 3 digits Capacity measurement range 0 9999 99Ah Energy measurement range 0 9999 99Wh Capacity and energy statistical error 2 Buck working mode ...

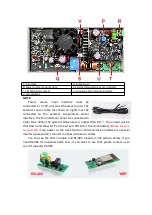
Страница 6: ...Support Android IOS APP Support multiple display interfaces 1 3 Panel Instruction 1 3 1 Front Panel A Power button B SHIFT Second function button C Quick storage button D Current Over current protection setting E Voltage Over voltage protection setting F Micro USB port G Power supply output negative terminal Battery charging negative terminal H Battery charging positive terminal Dedicated terminal...

Страница 7: ...ture sensor interface The fan interface cannot be connected to other fans When the system temperature is higher than 80 the output will be shut down and show OTP on the screen CR1220 is the clock battery Please prepare by yourself it can power on the clock function Communication interface is a special interface please don t connect to other modules or cables You can see the Wi Fi module and RS 485...

Страница 8: ...o set default boot display at section 1 4 2 6 Main Page Style Setting W Date Time X Button tune Y Button lock status Z Communication interface AA Actual output voltage value AB Actual output current value AC Output power AD Current data group AE Constant voltage Constant current status AF Protection status indication AG Battery charging indication AH Battery related information display area AI Ove...

Страница 9: ... accumulated and automatically cleared after power off The green terminal is connected to the positive electrode of the battery and the black terminal is connected to the negative electrode of the battery After the battery is correctly connected the battery charging indicator turns red and the battery is connected Press ON OFF to start charging the battery charging indicator turns green When the a...

Страница 10: ...ow when under constant current mode when the device works normally it will show at protection status indication when the actual output current value is higher than the over current protection value OCP the output will be cut off automatically and show when the actual output voltage value is higher than the over voltage protection value OVP the output will be cut off automatically and show when the...

Страница 11: ...https drive google com drive folders 121yIfNLh3O99AU4tUkxtC5q34XT3s nn1 usp sharing Press to lock or unlock the keyboard And the keypad will be automatically locked when communication starts there will be displayed on the top cannot unlock manually and the keypad will be automatically unlocked when the connection disconnected manually there will be displayed the keypad will be automatically unlock...

Страница 12: ...n set it on it will automatically turn on the output after booting Boot Logo is set to ON by default when boot the device it will show the boot logo first then enter the main interface when set it OFF it will enter the main interface directly Buzzer is set to ON by default it will show on the top and you can hear the beep when press the button When set it OFF it will show there will not be beep wh...

Страница 13: ... is not available now You need to insert RS485 module to use RS485 and it will show on the top and when the communication starts it will show Baudrate is set to 9600 by default you can set it to 9600 19200 38400 57600 115200 under WIFI communication mode the baud rate is 115200 and it cannot be edited Address is set to 001 by default you can set it between 1 and 255 The Baud rate and address on th...

Страница 14: ...13APYtlRAaMcKmStbWM8toB8oOW5wi 4ph usp sharing You can press to enter the system setting menu and then press button twice to enter the data storage setting menu as shown in figure12 Press the Enter button to enter the sub menu press the direction button to choose the data group the setting way is same as the operation in Section 1 4 2 2 1 4 2 8 System Information System information operation video...

Страница 15: ...e do recommend you to download the latest APP for better experience 2 1 1 APP Download You can download the APP in Google Play by searching RDPower You can also download the RD60XX APP zip file in this URL https drive google com drive folders 1V0l6P1sIJilN1yBOsTO9YGLVdkuO0cX9 usp s haring 2 2 Installation Introduction Android APP download and connection video instruction https drive google com dri...

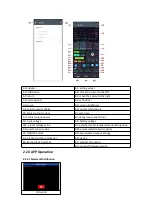
Страница 16: ...BI sync time AU actual output power BJ data group quick call out AV input voltage BK battery voltage AW preset voltage value BL external sensor temperature detecting value AX preset current value BM accumulated output capacity AY ON OFF button BN accumulated output energy AZ protection status indication BO device BA keypad lock indication BP product SN number BQ product firmware version 2 2 3 APP ...

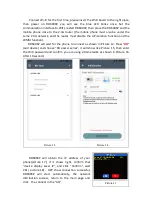
Страница 17: ...ction RD6006P will wait for the phone to connect as shown in Picture 14 Press AO add device and choose RD power series it will show like Picture 15 then enter the WiFi password and confirm you are using 2 4G network as shown in Picture 16 After 10 seconds Picture 15 Picture 16 RD6006P will obtain the IP address of your phone picture 17 if it shows right confirm that device display sever IP and cli...

Страница 18: ...nect Wi Fi first and then detect if it can be connected to APP and it may not be connected successfully if the phone is under screen lock status or the APP is running at the background If the IP address of the phone has changed you need to press the button and then press button to reset the net repeat 3 2 3 1 operation 2 2 3 3 APP Operation Android APP operation video https drive google com drive ...

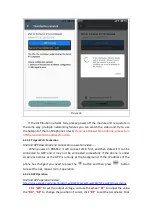
Страница 19: ...the same brand 2 Application permission requirements allow the necessary permissions when the APP is installed allow background running using Bluetooth operation on the folder reading the application list etc and also set the permissions of the APP after installation Allow background running never shut down when lock screen allow self starting it is used to prevent the system from forcibly exiting...

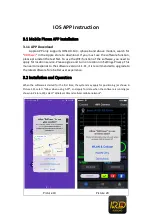
Страница 20: ...for location service Please agree and turn on location in Settings Privacy This manual corresponds to the software version 1 1 11 it is recommended to upgrade to the latest software for a better user experience 3 2 Installation and Operation When the software is started for the first time the system may apply for positioning as shown in Picture 19 select Allow when using APP and apply for data whe...

Страница 21: ... UI Instruction You can see the user interface as shown in Picture below BR connect disconnect CE screen brightness BS export data to mobile phone CF system temperature BT data curve CG data group quick call out BU actual output voltage CH sync time BV actual output current CI battery voltage BW actual output power CJ external sensor temperature detecting value BX input voltage measurement value C...

Страница 22: ...er on RD6006P you will see the blue LED blinks once Set the communication interface to WIFI restart RD6006P then place the RD6006P and the mobile phone close to the 2 4G router the mobile phone must also be under the same 2 4G network and the router must disable the AP isolation function and the WMM function RD6006P will wait for the phone to connect as shown in Picture 21 Press CQ to choose Netwo...

Страница 23: ...e connected to APP and it may not be connected successfully if the phone is under screen lock status or the APP is running at the background If the IP address of the phone has changed you need to press the button and then press button to reset the net repeat 2 2 3 1 operation 3 2 3 3 APP Operation IOS APP operation video https drive google com drive folders 1kwycXmbV_wkSYuT7KxuYsmXHV70KDyiq usp sh...

Страница 24: ...oes not support RD6006P and we do recommend you to download the latest software for better experience RD6006P digital power supply file download link https drive google com drive folders 1nyd7W_JdeQhPLhKdgG_iCRQ3mHZenb IU usp sharing 4 1 Software Download PC software download and basic operation video https drive google com drive folders 10Op21Q61xOzlPROqGrt0tuMTkzp00aQ Z usp sharing 4 1 1 Unzip F...

Страница 25: ...sYANsv8XAVhIZZi usp sharing Set the RD6006P communication interface to WiFi and restart RD6006P displays like picture 25 click WiFi Network on the PC software to pop up the WIFI configuration interface picture 27 click Initialize and wait for about 5 10 seconds after the RD6006P displays the local IP address as shown in picture 26 click Next and enter the WiFi name and password then click Network ...

Страница 26: ... the power supply button will be locked automatically the buttons will automatically unlock after 3 seconds of accidental disconnection and the CONNECT turns to DISCONNECT Click ON to turn on the output of the power supply and it will turn to OFF 4 3 Functions Introduction The PC software interface mainly has basic functions firmware upgrade Logo upgrade version update detection and language setti...

Страница 27: ... DM Serial Number DN Product Model 4 3 1 Basic Functions PC software operation video https drive google com drive folders 1rl CCOzbFlAONjRfrOpbNsK8rrCGVoKa usp s haring The basic functions of PC software voltage current preset data group quick call out calibration fine tuning brightness setting voltage and current curve exporting You can rotate the wheel or enter the value to set the voltage and c...

Страница 28: ... data According to the linear function y kx b the constant b is equivalent to the zero value the slope k is equivalent to the proportional value adjust this two values so that the data will be close to the real test value Set the output voltage at 1V adjust the output voltage zero point to make the multimeter display close to 1V and then set the output voltage at 30V adjust the output voltage prop...

Страница 29: ...ware Update Firmware update operation video https drive google com drive folders 19A8Rha_sWYuJ6nMGB7S9S7LuoNepe4by u sp sharing Press and hold and power on RD6006P enter the boot mode then connect it to computer there will be boot mode in the mode information text box then click Firmware Update a firmware update prompt will pop up on the interface and click Now to upgrade You can update the firmwa...

Страница 30: ... logo setting video https drive google com drive folders 1J0iOyxZ8DSJaDQD2xgrlukBwJBELQBzf usp sharing Click Start Logo Update a Logo upgrade prompt will pop up on the page please select a picture with a size of 320x240 and a resolution of 96dpi Some logo samples can be used in the installation package ...

Страница 31: ... Import and RD6006 will reboot automatically 4 3 7 Version Update Detection Click Software Update the software will automatically detect if there is a new version if so an update prompt will pop up on the interface ...

Страница 32: ...Click Language a language setting prompt will pop up on the interface you can choose Simplified Chinese English France and German 4 3 9 About Click About you can check the version number publish time and copyright Information ...

Страница 33: ......

Страница 34: ...echargeable Lithium Phosp hate Ba ttery 3 2 3 65 2 5 Electric bike electric tool Large discharge current rechargeable Lead Storage Battery 2 2 4 1 75 Car electric bike Inexpensive rechargeable Dry Battery 1 5 0 9 Widely used Inexpensive widely used not rechargeable NICD Battery 1 25 1 5 1 1 Toy Rechargeable Inexpensive Memory effect Ni MH Battery 1 2 1 4 0 9 Toy Shaver Rechargeable No memory effec...

Страница 35: ...Storage Battery 6 63 86 4 64V Lithium Phosph ate Battery 21 52 5 76 6 60V LiCoMnNiO2 17 51 71 4 Lithium Phosph ate Battery 20 50 73 Lead Storage Battery 5 52 5 72 48V LiCoMnNiO2 14 42 58 8 Lithium Phosph ate Battery 16 40 58 4 Lead Storage Battery 4 42 57 6 36V LiCoMnNiO2 10 30 42 Lithium Phosph ate Battery 12 30 43 8 Lead Storage Battery 3 31 5 43 2 24V LiCoMnNiO2 7 21 29 4 Lithium Phosph ate Bat...

Отзывы: