background image

3

53

Tak

ing P

ic

tur
es

 Memo ---------------------------------------------------------------------------------------------------------

•  The flash mode can also be set in [Flash Mode] of the 

A

 menu.

•  When [Underwater] is selected in the 

T

 mode, both an image with the flash used and an 

image with the flash not used can be taken.

 Caution -------------------------------------------------------------------------------------------------------

•  You cannot perform shooting while the flash is being charged.
•  The flash cannot be used in the 

B

 mode.

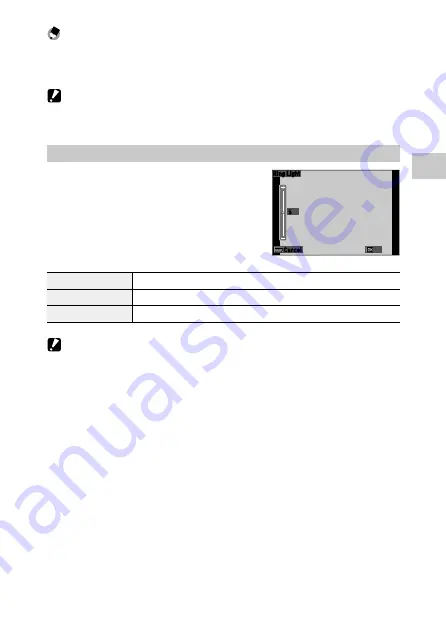
Using the Ring Light

Select [Ring Light] in Step 2 on p.52 and 

press 

d

 to set the brightness of the ring light. 

The settings for the ring light can be made in 

[Ring Light] in the 

A

 menu.

Select

[All], [Right], [Left], [High], [Low], [Off]

Brightness

[1] to [9]

LightningTime

[Always On], [Shutter 10s], [Shutter 20s], [Shutter 30s], [Shutter 60s]

 Caution -------------------------------------------------------------------------------------------------------

•  [Ring Light] cannot be selected in the following cases.

•  In the 

S

 mode, 

T

 mode, or 

V

 mode

5

Ring Light

Cancel

OK

Содержание WG-6

Страница 1: ...t basic operations such as turning the camera on performing shooting and playing back images Chapter 3 and later Read these chapters when you want to learn more about the different camera functions Th...

Страница 2: ...service experi ence for the product you have purchased we ask you to complete the user registration Visit the following website to complete the user registration http www ricoh imaging com registratio...

Страница 3: ...es without the consent of the copyright holder is prohibited Exemption from liability RICOH COMPANY assumes no liability for failure to record or display images as a result of product malfunction Radi...

Страница 4: ...ates and or other countries All other trademarks are the property of their respective owners This product uses the RICOH RT font designed by RICOH COMPANY LTD AVC Patent Portfolio License This product...

Страница 5: ...ormed The symbol alerts you to prohibited actions The symbol may be combined with other symbols to indicate that a spe cific action is prohibited Example Do not touch Do not disassemble Observe the fo...

Страница 6: ...e the affected area thoroughly with water then wash well with soap EYES If it gets in your eyes wash your eyes with clean water for at least 15 minutes and seek medical advice immediately INGESTION If...

Страница 7: ...uch as a kitchen be careful not to wet the inside of the camera Failure to observe this precaution could re sult in fire or electric shocks Q Q Do not use the camera near flammable gases gasoline benz...

Страница 8: ...e to observe this precaution could result in fire Q Q Do not allow the camera interior to get wet When operating the camera with wet hands be careful not to get the camera interior wet Failure to obse...

Страница 9: ...nu 24 B Movie Menu 25 C Playback Menu 26 D Customize Menu 27 E Setup Menu 29 2 Getting Started 31 Setting the Battery and a Memory Card 31 Inserting the Battery and a Memory Card 31 Charging the Batte...

Страница 10: ...ction 61 Setting the Image Atmosphere Image Tone 61 Setting the Sharpness Saturation Tone and Contrast 62 Imprinting the Date on Still Images 62 Taking Images with Clearer Details 62 Correcting a Rang...

Страница 11: ...3 Setting the Sound Volume 83 Power Saving Settings 84 Automatically Turning the Power Off 84 Dimming the Display 84 Setting the GPS 86 Displaying the GPS Information 87 Automatically Adjusting the Da...

Страница 12: ...ter AC U1 AC U2 109 Rechargeable Battery DB 110 109 Image Storage Capacity 110 Operating Environment 111 Using the Camera Abroad 112 Precautions for Use 113 Camera Care and Storage 116 Warranty Policy...

Страница 13: ...plug Macro stand O MS3 g USB cable I USB173 g Hand strap O ST104 g Operating Manual this manual g Regarding Waterproof Design MacroStand The macro stand is used to keep a distance of 1 cm between the...

Страница 14: ...mes and Functions of the Working Parts Ring light Speaker Remote control receiver Lens AF assist light Microphone Microphone Flash Strap eyelet Power button lamp Remote control receiver Strap eyelet S...

Страница 15: ...1 Introduction 13 USB terminal USB Type C Tripod screw hole Release lever Battery card cover HDMI micro output terminal Type D...

Страница 16: ...ls The icons in parentheses are used in the descriptions of this manual 10 12 13 9 7 8 5 4 1 2 3 6 11 1 Mode dial Changes the capture mode p 40 2 Shutter release button z Press to capture images Press...

Страница 17: ...n Delete button i Press to perform shooting in the green mode p 40 Whenafunctionisassignedtothebutton press to call the assigned function p 21 In the playback mode press to delete images p 39 9 Zoom b...

Страница 18: ...ty 23 Zoom bar Focus bar p 38 p 49 24 Date imprint p 62 25 World time p 97 26 Camera shake warning 27 GPS lock p 88 28 Conversion lens p 98 29 Grid guide p 82 30 Focus frame 31 Save destination folder...

Страница 19: ...nt file Total files 6 Data source 7 Face detection p 48 8 Folder number File number p 92 9 Shutter speed 10 Aperture value 11 ISO setting 12 Exposure compensation 13 Battery level p 17 14 Length of ti...

Страница 20: ...splay Displays the autofocus frame during range finding Display off Displays the autofocus frame and Live View only when z is pressed halfway Memo The grid style can be selected in Grid Guide Display...

Страница 21: ...t Keys Quick settings are possible by pressing abcd in the shooting mode The following functions can be activated a w Drive Mode p 56 b s Focus Mode p 47 c l Flash Mode p 52 Press and hold d x GPS On...

Страница 22: ...ng mode The mode switches to the ADJ mode and the icons for the assigned functions appear 3 Use cd to select a function The five functions assigned to the button can be selected 4 Press e The selected...

Страница 23: ...be activated by pressing the green button in the shooting mode By default Green Mode is assigned to the button You can perform shooting in the green mode by pressing the button p 40 Memo The function...

Страница 24: ...e ab to select a function to set and press d The settings for the selected setting item are displayed 5 Use ab to select a setting and press e The screen in Step 4 reappears Press f to return to the p...

Страница 25: ...display the most appropriate menus for the camera settings at that time set Cursor Poison Keeping to Off in the E menu Thesettingissavedevenafterthepoweristurnedoff Toresetthemenusettings selectamenu...

Страница 26: ...ng Light p 52 White Balance Auto WB Daylight Shade Cloudy Fl DL Color Fl DL White Fl CoolWt Fl WarmWt Tungsten Ring Light ManualWB p 54 Pix Track SR On Off p 63 Face Detection On Smile Assist Assist S...

Страница 27: ...justment Blue Black White Sepia Contrast Soft Standard Hard Date Imprint Date Date Time Time Off p 62 IQ Enhancer On Off p 62 B Movie Menu Recorded Pixels 4K 30fps FullHD 30fps HD 60fps HD 30fps p 60...

Страница 28: ...ecover File p 69 Resize Recorded Pixels L M S XS 2M 1M VGA Quality Level 8 9 0 p 72 Cropping p 73 Filter Small Face Filter 5 7 10 Ink Rubbing Filter 1 to 5 DigitalFilter B W Sepia ToyCamera Retro Colo...

Страница 29: ...hlight Cor Shadow Cor Sharpness Saturation Tone Adjustment Contrast OutdoorView p 81 START DATE TIME On Off p 82 Show folder at startup On Off Shut down Screen On Off Confirm Time 0 5sec 1sec 2sec 3se...

Страница 30: ...1 Introduction 28 Lens Adapter On Off WIDE p 98 Movie Button On Off p 45...

Страница 31: ...Green Yellow Guide Display On Off p 42 Cursor Poison Keeping On Off p 23 LCD Brightness 4 to 4 p 83 Power Saving Off 5sec 15sec 30sec 1min 2min p 84 OutdoorView 2 to 2 p 83 Power Button Lamp On Off p...

Страница 32: ...ussian Thai Korean Traditional Chinese Simplified Chinese Japanese p 36 Date Adjustment Date Format Y M D D M Y M D Y Date January 1 2019 to December 31 2045 Time 00 00 to 23 59 p 36 WorldTime SelectT...

Страница 33: ...PEN and slide the battery card cover to the right to open it 3 Make sure that the memory card is facing the right way and then push the card all the way in until it clicks To remove it press in the me...

Страница 34: ...d p 110 FlashAirCard AnSDmemorycardwithabuilt inwirelessLANfunction FlashAircard canbeusedwiththecamera When communicating using the FlashAir card set FlashAir Connection to On in the E menu If the wr...

Страница 35: ...USB terminal 3 Connect the USB cable to the USB power adapter 4 Plug the USB power adapter into a power outlet The power button lamp of the camera turns on and charging starts Depending on the batter...

Страница 36: ...d closing the battery card cover be sure to remove water and dirt such as sand adhering to the camera and avoid locations where dirt can enter the camera interior Use only genuine rechargeable battery...

Страница 37: ...er button lamp can be set to Off in Power Button Lamp of the E menu p 83 If no operations are made for about one minute default setting the camera turns off automatically to suppress battery drain The...

Страница 38: ...em and ab to change the value Press f to cancel the setting 3 Press e The date and time are set and the camera is ready to take a picture Memo If the battery is removed for about five days the date an...

Страница 39: ...rmatting the internal memory select Format Internal M 4 Use a to select Execute and press e The memory is formatted 5 Press e 6 Press f The shooting screen reappears Caution Do not remove the memory c...

Страница 40: ...mode is selected and the focus is adjusted When the subject cannot be in focus the red frame appears 4 Press z fully The image you have just taken is displayed on the monitor Instant Review and saved...

Страница 41: ...ured Images Review the captured image on the monitor 1 Press g The camera switches to the playback mode and the last image you took is displayed Sin gle image display 2 View an image The following ope...

Страница 42: ...ted scene p 41 V Digital Microscope Mode Turns the ring light on for shooting at a close focus distance of 1 cm to the subject The focus mode flash mode recorded pixels and aspect ratio are fixed to 1...

Страница 43: ...he following scenes can be selected HDR Interval Shooting Handheld Night Snap Interval Movie Night Scene High Speed Movie Underwater Surf Snow Underwater Movie Kids Landscape Pet Flower Sport Portrait...

Страница 44: ...et Interval TotalTime for Interval Movie Number of Shots and Start Delay A description of the selected scene is displayed on the screen in Step 3 If you do not want to display this description set Gui...

Страница 45: ...nu and press d The EV Comp screen appears 2 Use ab to select a compensation value The compensation value can be selected in the range of 2 0 3 Press e 4 Press f The shooting screen reappears Caution T...

Страница 46: ...on is enabled 2 Press the movie button Recording starts The recording time is displayed while record ing 3 Press the movie button again Recording stops Memo Regardless of the mode dial setting when th...

Страница 47: ...rding may be termi nated The flash cannot be used in the B mode When the function of the movie button has been changed in ADJ Button Setting 1 to ADJ Button Setting 5 of the D menu use z to start reco...

Страница 48: ...y back a movie The following operations are available a Plays back Pauses a movie cd Fast reverses Fast forwards playback b Stops playback 4 T 5 W Adjusts the sound volume e Switches the displayed inf...

Страница 49: ...the A menu focus ing is also performed for subjects in the macro range Macro Focuses on the subject at a distance of 10 to 60 cm from the camera 1cm Macro Focuses on the subject at a distance of 1 to...

Страница 50: ...detection method can be selected in Face Detection of the A menu On Detects human faces Smile Automatically performs shooting when the subject smiles Assist Flashes the ring light when a human face is...

Страница 51: ...at a fixed distance 1 Select MF in Step 2 on p 47 and press e The focus bar appears on the shooting screen 2 Use ab to set a focus distance When e is pressed and held the center of the screen is magn...

Страница 52: ...thod in AE Metering of the A menu Divide Meters exposure in multiple areas of the frame Center Meters exposure with emphasis on the center Spot Meters exposure within a narrow range Use this option wh...

Страница 53: ...ooting screen reappears Memo The adjustment range of AUTO can be set in AUTO Range of the A menu Caution Images taken with a higher sensitivity may appear grainy Depending on the ISO sensitivity setti...

Страница 54: ...conditions Flash Off Does not fire the flash Flash On Always fires the flash Auto R eye Fires the flash according to conditions while reducing the red eye phenom enon On Red eye Forces the flash to fi...

Страница 55: ...g charged The flash cannot be used in the B mode Using the Ring Light Select Ring Light in Step 2 on p 52 and press d to set the brightness of the ring light The settings for the ring light can be mad...

Страница 56: ...a setting AutoWB Adjusts the white balance automatically Daylight Used when shooting in daylight under clear skies Shade Used when shooting in shade Cloudy Used when shooting in daylight under cloudy...

Страница 57: ...ution The white balance may not be adjusted correctly for a subject that is mostly dark Setting the White Balance Manually 1 Select Manual WB in Step 2 on p 54 2 Aim the camera at a white subject such...

Страница 58: ...in the shooting mode The Drive Mode screen appears 2 Use ab to select a setting Self Timer10s Releases the shutter about 10 seconds after z is pressed Self Timer 2s Releases the shutter about 2 secon...

Страница 59: ...onds before the button is released as an image of 5184 3888 pixels Memory retrospective continuous shooting S Cont Performs continuous shooting for 16 or 25 still images after z is fully pressed and s...

Страница 60: ...cd to display the previous or next image Shooting Using the Remote Control Unit You can perform shooting using the optional remote control unit 1 Press w a in the shooting mode The Drive Mode screen a...

Страница 61: ...posure settings of 0 5 EV 0 EV and 0 5 EV 1 Press w a in the shooting mode The Drive Mode screen appears 2 Use ab to select A Bracket and press e The shooting screen reappears 3 Press z Three images a...

Страница 62: ...e file format for movies in the B menu Recorded Pixels Sets the number of recorded pixels 4K 30fps 3840 2160 FullHD 30fps 1920 1080 HD 60fps 1280 720 HD 30fps 1280 720 HDR Sets whether to perform the...

Страница 63: ...select a setting Bright Increases the values of Contrast Sharpness and Saturation to take sharp images Natural Takes images with a natural tone close to the actual color Vibrant Takes bright and gorg...

Страница 64: ...ed at the bottom right of the image based on the date set in the camera The date imprinting can be set in Date Imprint of the A menu Caution The imprinted date cannot be deleted The date cannot be imp...

Страница 65: ...y not be ef fective Reducing Blurring of Images To automatically reduce blurring of images set the following functions Still image mode Pix Track SR in the A menu Movie mode Movie SR or Movie SR in th...

Страница 66: ...are available abcd Moves the selection frame 5 W 4 T Switches between the 20 thumbnail display the 81 thumbnail display and the folder calendar display Green button Switches between the folder displa...

Страница 67: ...creen effects Interval Sets the image switching interval Interval cannot be set when Screen Effect is set to Random Screen Effect Sets the screen effects applied when images are switched Sound Effect...

Страница 68: ...Movies Images taken with M Cont or S Cont Protected images AutoImageRotation When Auto Image Rotation is set to On in the C menu the displayed image is rotated accord ing to the camera s orientation...

Страница 69: ...osing the battery card cover be sure to remove water and dirt such as sand adhering to the camera and avoid locations where dirt can enter the camera interior While the camera is connected to an AV de...

Страница 70: ...selected select Sel Indiv or Sel Range 20 thumbnail display or 81 thumbnail display Sel Indiv or Sel Range can be selected When Delete All is selected proceed to Step 5 3 Select the images to delete a...

Страница 71: ...ecuting Format Card or Format Internal M of the E menu Copying Images Images can be copied between the internal memory and the memory card 1 Insert a memory card 2 Select Image Copy in the C menu and...

Страница 72: ...is selected proceed to Step 4 4 Select Sel Indiv or Sel Range 5 Select the images to protect abcd Moves the selection frame e Selects Deselects an image When Sel Range is selected Selects the starting...

Страница 73: ...internal memory are displayed 4 Copy the captured images to the computer 5 Disconnect the camera from the computer when the copy is complete 6 Remove the USB cable from the camera Caution When openin...

Страница 74: ...lity will deteriorate Changing the Image Size Changing the Number of Recorded Pixels Resize 1 Display an image in the single image display of playback mode 2 Select Resize in the C menu and press d Th...

Страница 75: ...play an image in the single image display of playback mode 2 Select Cropping in the C menu and press d The Cropping screen appears 3 Specify the range to crop 4 T 5 W Changes the cropping size abcd Mo...

Страница 76: ...Small Face Filter 5 7 10 Ink Rubbing Filter 1 to 5 Digital Filter B W Sepia Toy Camera Retro Color Extract Color Color Empha sis HighContrast Starburst Soft Fish eye Miniature Brightness HDR Filter Wh...

Страница 77: ...and saves as new files Adding title picture Specifies the image to be used as the thumbnail for a movie For each editing method refer to the following Saving the Specified Frame as a Still Image 1 Sel...

Страница 78: ...ress e The movie is divided at the selected frame and saved as new movie files Caution The movies with a recording time of less than 2 seconds cannot be divided Specifying the Image to Be Used as the...

Страница 79: ...e is not changed Caution When the recording time of the movie reaches 26 minutes with the title image inserted the image cannot be inserted Correcting Red Eyes in Images You can correct red eyes in im...

Страница 80: ...ons A part of D menu settings Saving the Settings 1 Set the capture mode and all the necessary settings to save 2 Select Reg USER in the D menu and press d 3 Select U1 or U2 and press e The settings a...

Страница 81: ...to multiple cameras using the exported file You can export the settings in a memory card using Write and can import the settings to the camera using Read in Camera Settings File of the E menu Caution...

Страница 82: ...io Setting3 Setting Setting4 White Balance Setting5 Image Tone Quality Level AE Metering AF Face Detection Highlight Cor Shadow Cor Outdoor View 1 Select ADJ Button Setting 1 to ADJ Button Setting 5 i...

Страница 83: ...e AF Face Detection EV Comp Sharpness Saturation Tone Adjustment Contrast Outdoor View 1 Select Green Mode in the D menu and press d 2 Use ab to select a function and press e The green button function...

Страница 84: ...ART DATE TIME Displaysthecurrentdateandtimeuntilthecameraisoperatedafteritisturnedon Show folder at startup Displays the name of the current folder and the number of images in the folder until the cam...

Страница 85: ...situations Caution The LCD Brightness setting cannot be changed when OutdoorView is set Setting the Lamp You can set whether to turn the power button lamp on when the power is turned on in Power Butt...

Страница 86: ...to a computer During FlashAir connection Dimming the Display The camera dims or turns off the display automatically if no operations are performed during the set time The following settings can be se...

Страница 87: ...g of the T mode In the V mode In the C mode While a menu is displayed While the AC adapter is used Monitor Auto off Delay is not available in the following cases During shooting in Interval Shooting o...

Страница 88: ...sion Note that the camera may take a while to acquire the GPS information if it has not been used for an extended period or has been moved a great distance from where the GPS information was last acqu...

Страница 89: ...etailed information display in the shooting mode p 18 1 Electronic compass information azimuth 2 Electronic compass direction 3 GPS positioning status 4 GPS lock 5 Longitude 6 Latitude 7 Number of GPS...

Страница 90: ...ode p 18 Set GPS Lock to On in the D menu to enable the function to protect the acquired GPS informa tion The GPS information is protected when d is pressed on the shooting screen The information is u...

Страница 91: ...g stops Caution GPS Log is not available during the shooting in Interval Shooting or Interval Movie of the T mode This interval shooting cannot be performed during the GPS logging The logging interval...

Страница 92: ...the screen in Step 2 The log file cannot be deleted with Format Card in the Emenu Caution If the memory card is not available for recording the log file cannot be saved When the GPS information has no...

Страница 93: ...to imprint UTC Data Imprint Imprints the Universal CoordinatedTime Date Imprint of the A menu is disabled Heading Data Imprint Imprints the direction information Caution The imprinted GPS information...

Страница 94: ...this camera a folder is automatically creat ed and the captured images are stored in it Each folder name consists of a sequential number from 100 to 999 and a string of 5 characters The character str...

Страница 95: ...he text move the text selection cursor to 1 and press e The confirmation screen appears 6 After checking the setting press e Memo A folder with a new number is created when the next shooting is perfor...

Страница 96: ...umeric characters and _ can be entered The following operations are available abcd Moves the text selection cursor e Enters a character selected with the text selection cursor 4 Press e File Sequence...

Страница 97: ...ess d 2 Select On or Off and press e 3 Select Copyright Info and press d The text entry screen appears 4 Enter the copyright holder Up to 32 single byte alphanumeric charac ters and symbols can be ent...

Страница 98: ...mall Copyright Color Select from Orange White Black Red Blue Green and Yellow Caution The imprinted copyright information cannot be deleted The copyright information cannot be imprinted in the followi...

Страница 99: ...tination in Select Time Select Hometown to reset the date and time to the ones of your present location 3 Press d at Destination and set the daylight saving time If the daylight saving time is applied...

Страница 100: ...sion lens set Lens Adapter On to WIDE in the D menu Refer to the User s Manual provided with the lens for details Memo A commercially available 37 mm diameter filter can be attached to the lens This f...

Страница 101: ...the battery card cover be sure to remove water and dirt such as sand adhering to the camera and avoid locations where dirt can enter the camera interior Securely connect the power plug and AC plug co...

Страница 102: ...ated because the camera was not operated for a certain period of time Turn the camera back on p 35 The battery is exhausted Charge the battery p 33 The camera does not turn off The camera is malfuncti...

Страница 103: ...Adjust the brightness of the monitor in the E menu p 83 The monitor is off Press e to turn the monitor on p 18 An AV device is connected to the camera Remove the cable from the camera p 67 The camera...

Страница 104: ...white balance for shooting con ditions using auto white balance Include a white object with the sub ject or select the settings other than AutoWB for White Balance p 54 The monitor brightness changes...

Страница 105: ...on the monitor The inserted memory card is not formatted with this camera Insert a memory card formatted with Format Card of the E menu in this camera p 37 The memory card contacts are dirty Clean wi...

Страница 106: ...e battery p 33 The camera is malfunctioning Turn the camera back on p 35 Take the battery out and insert it again When the AC adapter is used reconnect it p 31 Date is not set correctly Date and time...

Страница 107: ...e inserted is locked Files cannot be stored You are trying to record a movie when the internal memory is set as the save destination and Recorded Pixels is set to 4K 30fps in the B menu Change the Rec...

Страница 108: ...Macro 0 01 to 0 3 m 0 03 to 0 98 ft intermediate portion of the zoom range Switchable to Infinity landscape Pan Focus and Manual Focus Effective Pixels Approx 20 megapixels Image Sensor 1 2 3 CMOS Re...

Страница 109: ...ash on Auto flash Red eye edit Flash on Red eye edit Flash Effective Range Wide angle Approx 0 2 to 5 5 m 0 66 to 18 ft when the ISO sensitivity is set to Auto Telephoto Approx 0 2 to 3 5 m 0 66 to 11...

Страница 110: ...Chinese Traditional Chinese GPS GPS GLONASS QZS Michibiki SBAS GPS display mode LAT LON UTM MGRS GPS lock GPS time adjustment GPS logging GPS data imprint UTC data imprint Electronic Compass Compass d...

Страница 111: ...50 to 104 F Dimensions 42 5 mm W 22 mm H 66 5 mm D excluding the power plug Weight Approx 40 g excluding the power plug Rechargeable Battery DB 110 NominalVoltage 3 6V Rated Capacity 1350 mAh 4 9Wh Op...

Страница 112: ...917 3 2 7 13 20 2088 3522 5488 1 1 9 15 24 2458 4140 6378 S 4 3 11 22 31 3146 5900 8138 3 2 13 25 35 3522 6556 9077 1 1 15 29 40 4214 7867 10728 XS 4 3 18 34 45 4816 9077 11801 3 2 20 37 51 5364 9834...

Страница 113: ...D 30fps HD 60fps High Speed Movie in the T mode Speed Class 4 or faster HD 30fps Speed Class 2 or faster If a movie is recorded with a memory card with which proper operation has not been confirmed th...

Страница 114: ...Do not use these products with electrical transformers as this could damage the camera Television Playback Captured images can be played back on the televisions and monitors equipped with a video inp...

Страница 115: ...and and mud adhering to the camera and avoid locations where dirt can enter the camera interior When the cover is opened water droplets may be on the inside of the cover In this case clean them out be...

Страница 116: ...g in visible con densation inside the lens or camera malfunction This can be avoided by placing the camera in a plastic bag to slow the temperature change and removing it only after the air in the bag...

Страница 117: ...en not in use be sure to remove the battery from the camera or the battery char ger A small amount of current can leak from the battery even when the power is off creating excessive discharge and maki...

Страница 118: ...f malfunction consult your nearest repair center The camera contains high voltage circuits Do not disassemble it Do not expose the camera to volatile substances such as thinner benzine or pesti cides...

Страница 119: ...it to maintain the waterproof function When the camera is frequently used in water in a sandy area or in a dusty room it is recommended to replace it every year Contact your service center to replace...

Страница 120: ...ore the camera can be returned to you owing to the complicated customs procedures required If the camera is covered by warranty repairs will be made and parts replaced free of charge and the camera wi...

Страница 121: ...reason able protection against harmful interference in a residential installation This equipment generates uses and can radiate radio frequency energy and if not installed and used in accordance with...

Страница 122: ...with the standards Records maintained continue to reflect the equipment being produced can be expect ed to be within the variation accepted due to quantity production and testing on the statistical b...

Страница 123: ...rence that may cause undesired operation Pour les utilisateurs au Canada Avis de conformit la r glementation d Innovation Sciences et D veloppement conomique Canada ISDE Cet appareil num rique de la c...

Страница 124: ...arise due to inappropriate waste handling If a chemical symbol is added beneath the symbol shown above in accordance with the Battery Directive this indicates that a heavy metal Hg Mercury Cd Cadmium...

Страница 125: ...ssing the URL http www ricoh imaging co jp english support declaration_of_conformity html and selecting the product applicable European importer RICOH IMAGING EUROPE S A S Parc Tertiaire SILIC 7 9 ave...

Страница 126: ...nging display 18 Charging the battery 33 Cloudy White Balance 54 Compass Calibration 90 Compass Heading 90 Confirm Time 38 Connection to a computer 71 Contrast 62 Cont Shoot 57 Copyright Info 95 Corre...

Страница 127: ...38 Intelligent zoom 39 Internal memory 32 Interval Movie Scene 41 Interval Shooting Scene 41 IQ Enhancer 62 K Kids Scene 41 L Landscape Scene 41 Language setting 36 LAT LON GPS 88 LCD Brightness 83 Le...

Страница 128: ...rd 31 Self timer 56 Sensitivity 51 Setting 51 Setup menu 29 Shade White Balance 54 Shadow Cor 63 Sharpness 62 Shooting menu 24 Show folder at startup 82 Shut down Screen 82 Single image display 39 Sli...

Страница 129: ...127 Wide conversion lens 98 Wind Suppression 60 World Time 97 Z Zoom 39...

Страница 130: ...rsey 07006 U S A http www us ricoh imaging com RICOH IMAGING CANADA INC 5560 Explorer Drive Suite 100 Mississauga Ontario L4W 5M3 CANADA http www ricoh imaging ca RICOH IMAGING CHINA CO LTD Room A 23F...

Отзывы: