4.
Switch the power interlock switch.
• After the main power switch to OFF the internal voltage left for a while. Therefore, wait for
about one minute before switching.
5.
Turn ON the main power switch of the print server.
Starting the Print Server
• When the power interlock function is enabled, the print server turns OFF/ON the power in tandem
with the printer’s operation.
• When the power interlock function is disabled, first turn ON the printer, and then turn ON the print
server. Otherwise, the print server will not work correctly.
When the power interlock function is disabled, start the print server in the following procedure:
1.
Turn ON the main power switch of the printer.
2.
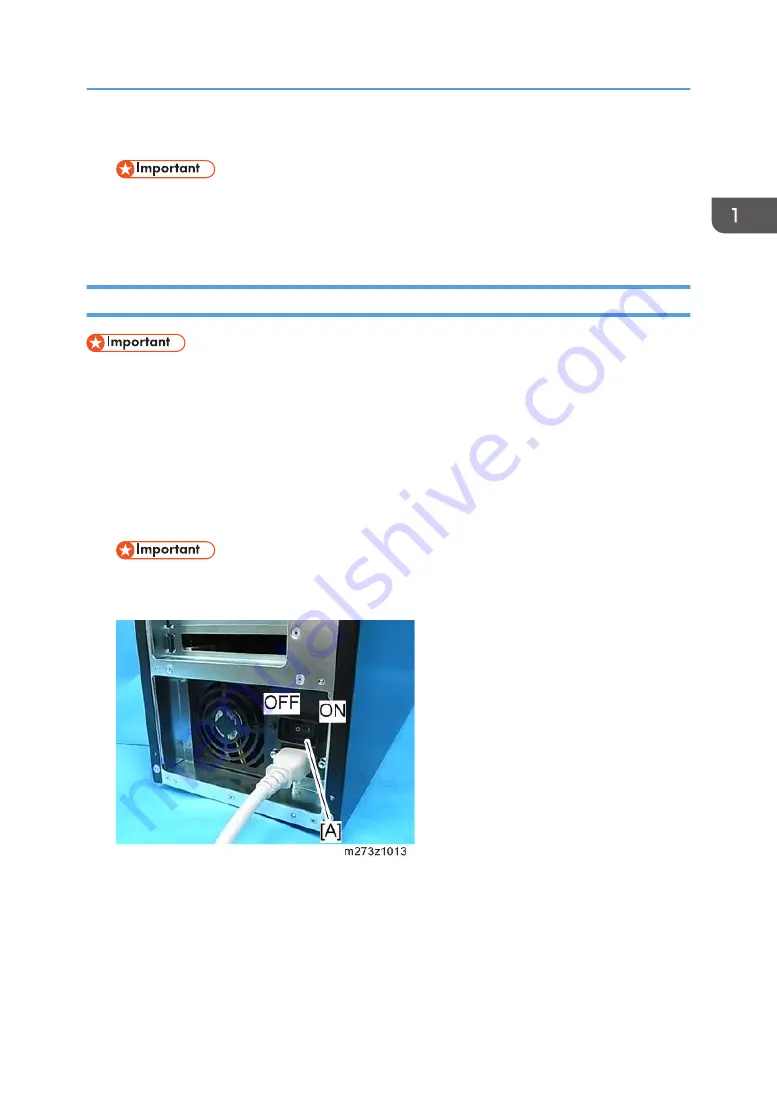
Turn ON the main power switch (rear side) [A] of the print server.
• Do not turn OFF the main power switch of the print server immediately after turning it ON.
Doing so may result in damage to the hard disk or memory, leading to malfunctions.
3.
Push down the power switch (front side) of the print server.
The power indicator lights up.
The [TotalFlow] icon appears on the home screen of the control panel of the printer.
General Operations for Servicing
27
Содержание TotalFlow R-60A
Страница 1: ...TotalFlow Print Server R 60A Machine Code M273 Field Service Manual June 2015...
Страница 2: ......
Страница 12: ...10...
Страница 23: ...2 Press User Tools Adjustment 3 Press Print Samples Machine Installation 21...
Страница 25: ...2 Press User Tools Adjustment 3 Press Ethernet Configuration Machine Installation 23...
Страница 27: ...6 After completing configuration of the network fields press OK Machine Installation 25...
Страница 38: ...2 Press User Tools Adjustment 3 Press Print Samples 1 Installation 36...
Страница 48: ...1 Installation 46...
Страница 75: ...4 Open the socket cover A 5 Open the socket cover A Unit Removal 73...
Страница 79: ...3 Power supply SW board A 2 Unit Removal 77...
Страница 80: ...2 Replacement 78...
Страница 85: ...2 Click Stop to suspend the printer operation 3 Click Maintenance Backing up Data Restoring Data 83...
Страница 93: ...3 Click Maintenance 4 Click Restore on the Disk Operations pod Backing up Data Restoring Data 91...
Страница 96: ...Partial restore select the items for restoring 3 Software Maintenance 94...
Страница 103: ...2 Click Stop to suspend the printer operation 3 Click Maintenance Updating System Software 101...
Страница 106: ...The print server automatically reboots after completing the update 3 Software Maintenance 104...
Страница 129: ...2 Click Maintenance 3 Click Trace Archive Traces 127...
Страница 136: ...3 Click Save Traces 4 Click OK You can describe the situation 4 Troubleshooting 134...
Страница 140: ...3 Click Start at Job Capture 4 Select the protocol that you send the job in Start Job Capture 4 Troubleshooting 138...
Страница 148: ...4 Select APPE Not CPSI at PDF jwob processor 4 Troubleshooting 146...
Страница 152: ...5 Detailed Section Descriptions 150...
Страница 155: ...5 Select IPDS and click OK 6 Write down the string that is shown at System Fingerprint IPDS 153...
Страница 161: ...3 Click Arrow Add at the Extended Features pod 4 Select the extended features that you want to activate IPDS 159...
Страница 166: ...MEMO 164 EN...


