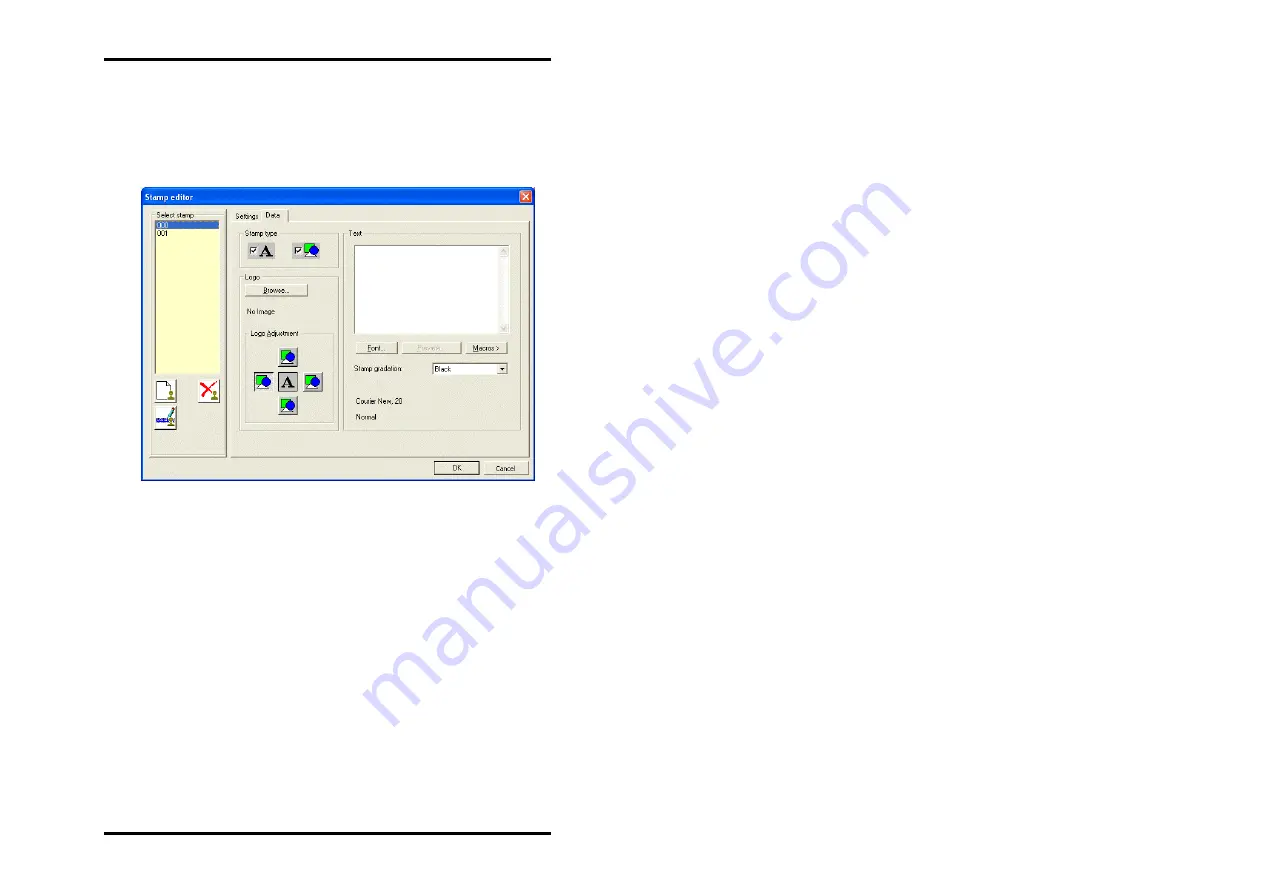
STAMP
EDITOR
"Data" tab
On the "Data" tab the user specifies the stamp text and logo.
You can also change the text and text attributes on this tab or
even change the logo:
•
Stamp type
Before you can begin to enter the settings or change the other
fields, you must first select the stamp type, whereby the two
symbols are clear: With the "A" you activate the "Text" field, with
the colored symbol you let the program know that there is a
logo and activate the "Logo orientation" field.
•
Text
In this text field you can enter the text to be "Printed" with your
stamp. In the text field you can edit in the same way as in com-
mon word processing programs. Change lines be entering re-
turn [
↵
], you can jump to the start and end of the rows using
the "Home" and "End" keys, and if your text is very long, use the
"CTRL + Home"and "CTRL + End" keys to move to the first or
last rows respectively..
•
Font
The "Font" button opens the usual WINDOWS dialogue for the
RW-480 CLIENTS 50
Содержание RW-480 PLOTCLIENT WIN
Страница 1: ...RW 480 CLIENTS...
Страница 7: ...CONTENTS Index 151 RW 480 CLIENTS 7...
Страница 11: ...Part I RW 480 PLOTCLIENT WIN RW 480 CLIENTS 11...
Страница 15: ...INSTALLATION a job example which you can send off straight away as the first print job RW 480 CLIENTS 15...
Страница 17: ...PROGRAM WINDOW Program window RW 480 CLIENTS 17...
Страница 77: ...Part II RW 480 WINPRINT RW 480 CLIENTS 77...
Страница 88: ...Part III RW 480 PLOTCLIENT HDI ADI RW 480 CLIENTS 88...
Страница 103: ...Part IV RW 480 PLOTCLIENT WEB RW 480 CLIENTS 103...
Страница 136: ...Part V RW 480 PLOTCLIENT MAC RW 480 CLIENTS 136...
Страница 142: ...Part VI RW 480 PLOTCLIENT LPR FTP RW 480 CLIENTS 142...
Страница 150: ...Part VII Appendix RW 480 CLIENTS 150...


