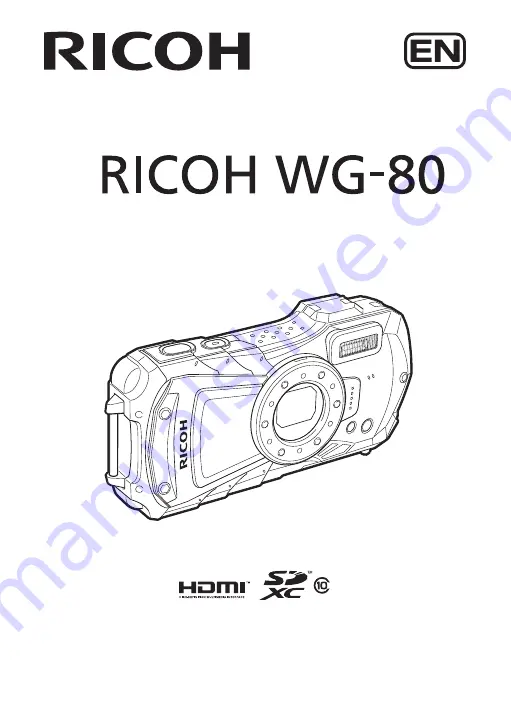
background image

Digital Camera

Start Guide

To ensure the best performance from your camera, please read this 
manual before using the camera.

Model:R06020

RICOH IMAGING COMPANY, LTD.

1-3-6, Nakamagome, Ohta-ku, Tokyo 143-8555, JAPAN
(https://www.ricoh-imaging.co.jp)

RICOH IMAGING EUROPE 
S.A.S.

Parc Tertiaire SILIC 7-9, avenue Robert Schuman - 
B.P. 70102, 94513 Rungis Cedex, FRANCE
(https://www.ricoh-imaging.eu)

RICOH IMAGING 
AMERICAS CORPORATION

2 Gatehall Drive Suite 204, Parsippany, New Jersey 
07054, U.S.A.
(https://www.us.ricoh-imaging.com)

RICOH IMAGING CANADA 
INC.

5560 Explorer Drive Suite 100, Mississauga, Ontario, 
L4W 5M3, CANADA
(https://www.ricoh-imaging.ca)

RICOH IMAGING CHINA 
CO., LTD.

Room A 23F Lansheng Building, 2-8 Huaihaizhong 
Road, Huangpu District, Shanghai, 200021, CHINA
(http://www.ricoh-imaging.com.cn)

https://www.ricoh-imaging.co.jp/english/

This contact information may change without notice.
Please check the latest information on our websites.

• Specifications and external dimensions are subject to change without notice.

58158

Copyright © RICOH IMAGING COMPANY, LTD. 2022

R01BAB22 Printed in Indonesia

1AG6P1P7308--

Содержание R06020

Страница 1: ...Digital Camera Start Guide To ensure the best performance from your camera please read this manual before using the camera Model R06020 ...

Страница 2: ... 3C LLC HDMI the HDMI logo and High Definition Multimedia Interface are trademarks or registered trademarks of HDMI Licensing LLC in the United States and or other countries This product supports PRINT Image Matching III PRINT Image Matching enabled digital still cameras printers and software help photographers to produce images more faithful to their intentions Some functions are not available on...

Страница 3: ... In this manual the term battery ies refers to any type of batteries used for this camera and its accessories The meanings of the symbols used in this manual are explained below We have paid close attention to the safety of this camera When using this camera we request your special attention regarding items marked with the following symbols In this manual the capture mode such as for taking still ...

Страница 4: ...llow the liquid crystal to get on your skin in your eyes or in your mouth Depending on your individual factors or physical condition the use of the camera may cause itching rashes or blisters In case of any abnormality stop using the camera and get medical attention immediately Warning Always use the USB power adapter exclusively developed for this camera with the specified power and voltage Using...

Страница 5: ...ater and get medical attention immediately Do not rub them Caution Only use the specified battery with this camera Use of other batteries may cause an explosion or fire Do not disassemble the battery Disassembling the battery may cause an explosion or leakage Remove the battery from the camera immediately if it becomes hot or begins to smoke Be careful not to burn yourself during removal Keep wire...

Страница 6: ... vibrations shocks or pressure take your camera to your nearest service center and have it checked The temperature range in which the camera can be used is 10 C to 40 C 14 F to 104 F The display will become black at high temperatures but will return to normal at normal temperatures The response speed of the display becomes slow at low temperatures This is due to the properties of the liquid crysta...

Страница 7: ...ed Do not bend the SD Memory Card or subject it to violent impact Keep it away from water and store away from high temperature Do not remove the SD Memory Card during formatting as this may damage the card and render it unusable The data on the SD Memory Card may be lost in the following circumstances We do not accept any liability for data that is deleted 1 when the SD Memory Card is mishandled b...

Страница 8: ...Operating the Menus 24 Menu List 26 Resetting to Default Settings Reset 29 Displaying the Clock Display 29 Taking Still Pictures 30 Taking Pictures 30 Using the Zoom 32 Setting the Shooting Mode 33 Using the Self timer 36 Setting the Shooting Functions 38 Using the Rec Mode Menu Items 38 Selecting the Flash Mode 39 Selecting the Focus Mode 40 Recording Movies 43 Recording Movies 43 Recording a Mov...

Страница 9: ...as optional accessories Camera RICOH WG 80 Strap O ST104 USB cable I USB157 or I USB170 Rechargeable lithium ion battery D LI92 USB power adapter Power plug Macro stand O MS1 Start Guide this manual Regarding Waterproof Dustproof and Shockproof Design ...

Страница 10: ...en Flash Microphone Self timer lamp Focus assist light Remote control receiver LED Macro Lights Speaker Display Tripod socket Battery card cover USB terminal Battery lock lever Terminal cover lock lever HDMI terminal Terminal cover Battery card cover lock lever Remote control receiver ...

Страница 11: ...Movie and High Speed Movie modes p 43 Q Mode Switches to A mode 3 W T button A Mode Changes the captured area p 32 Q Mode In single image display pressing f switches to 6 image display Pressing f again switches to 12 image display Press y to return to the previous display In single image display pressing y magnifies the image Press f to return to the previous display In 12 image display press f to...

Страница 12: ...isplay Selects an image in 6 or 12 image display a folder in folder display and a date in calendar display Adjusts the position of a frame or an image when you are using the Original Frame function 6 4 button A Mode Changes the information on the display p 12 Q Mode Changes the information on the display p 13 Returns zoom 6 or 12 image display to single image display Changes to 12 image display of...

Страница 13: ...display to the calendar display screen Switches from calendar display to the folder display screen In this manual the method for operating the four way controller is shown in illustrations such as in the ones below Macro stand Attaching the supplied macro stand O MS1 reduces camera shake during shooting in Digital Microscope mode Insert two clips into the slits in upper and lower sides of the LED ...

Страница 14: ... Intelligent Zoom icon p 32 2 Battery level indicator p 18 3 Face Detection icon 15 Date and time p 23 4 Date Imprint setting 16 World Time setting 5 EV Compensation 17 D Range Setting 6 Shutter speed A1 Focus frame p 30 7 Aperture B1 Recorded Pixels 8 Pixel Track SR icon B2 Quality Level 9 Memory status p 21 B3 White Balance 10 Remaining image storage capacity B4 AE Metering 11 Flash Mode p 39 B5...

Страница 15: ...button halfway the automatically selected shooting mode appears in A1 even when No Info is selected If there are overexposed highlight areas in the image they will blink red on the display and if there are underexposed shadow areas they will blink yellow Some indications may not appear depending on the shooting mode The display shows the shooting information of the image in playback mode The displ...

Страница 16: ...s in the image they will blink red on the display and if there are underexposed shadow areas they will blink yellow A guide indicator for each available button or key operation appears as follows on the display during operation A1 Face Detection icon A9 Volume icon A2 Playback mode B1 Shutter speed Q Still picture p 45 B2 Aperture K Movie p 45 B3 Histogram A3 Battery level indicator p 18 B4 Sensit...

Страница 17: ...ose the battery card cover Push down and slide the battery card cover with steady but gentle force in the opposite direction indicated by 2 The battery card cover may be difficult to close because the waterproof packing is very thick to prevent water from entering the camera To close the battery card cover push down on it toward the camera with your thumb where it says PUSH Then slide it until the...

Страница 18: ...he camera This camera uses a rechargeable lithium ion battery D LI92 Use of any other type of battery may damage the camera and cause malfunction Insert the battery correctly If the battery is incorrectly oriented malfunction may result Do not remove the battery while the camera is turned on When storing the battery for more than 6 months charge the battery for 30 minutes using the USB power adapt...

Страница 19: ...he direction shown by 1 slide the cover in the direction shown by 2 and open the cover in the direction shown by 3 3 Connect the USB cable to the USB power adapter 4 Connect the USB cable to the camera 5 Plug the USB power adapter into the power outlet The power lamp blinks while charging When charging is finished the power lamp turns off The terminal cover will not close while charging Leave the ...

Страница 20: ...when it starts to run down soon after being charged Replace it with a new battery If the camera is connected to the power outlet but the charging indicator fails to light the battery may be faulty Replace it with a new battery The time required to fully charge the battery is about 120 minutes max The charging time may vary depending on the ambient temperature and charging conditions The appropriat...

Страница 21: ...ed because the waterproof seal may peel off If the seal is not in the correct position the camera will not be waterproof The number of still pictures that can be stored varies depending on the capacity of the SD Memory Card and the selected number of recorded pixels and quality level p 51 The power lamp blinks while the SD Memory Card is being accessed data is being recorded or read Backing Up Dat...

Страница 22: ...cover Push down and slide the battery card cover with steady but gentle force in the opposite direction indicated by 2 If the battery card cover is not locked securely when you close it water sand or dirt may get into the camera The image file size varies depending on the number of recorded pixels and the number of images that can be saved on an SD Memory Card also varies Set the number of recorde...

Страница 23: ...taking any picture 1 Press and hold down the Q button The display turns on and the camera starts up in playback mode Taking Still Pictures 1p 30 Checking the SD Memory Card a The SD Memory Card is inserted Images will be saved on the SD Memory Card The SD Memory Card is not inserted Images will be saved in the built in memory r The write protect switch on the SD Memory Card is in the LOCK position...

Страница 24: ...ller 3 The frame moves to W Hometown 4 Press the four way controller 5 The W Hometown screen appears 5 Use the four way controller 45 to choose a city 6 Press the four way controller 3 The frame moves to DST Daylight Saving Time 7 Use the four way controller 45 to select O On or P Off 8 Press the 4 button The Initial Setting screen reappears 9 Press the four way controller 3 to select Settings com...

Страница 25: ... Use the four way controller 23 to change the month Change the day and year in the same manner Next change the time 9 Press the four way controller 3 to select Settings complete 10 Press the 4 button This confirms the date and time Setting the Date and Time If you press the 4 button in step 10 the camera clock is reset to 0 seconds To set the exact time press the 4 button when the time signal on t...

Страница 26: ...ress the 3 button in Q mode to display the W Setting menu Use the four way controller 45 to move between menus Operating the Menus SHUTTER SHUTTER MENU MENU MENU 38 38 P 07 34 07 34 07 34 REC Edit Edit Edit 10 100 003 0038 100 0038 02 02 2022 02 02 2022 02 02 2022 14 25 14 25 14 25 Movie MENU Recorded Pixels Movi SR e Exit Wind Suppression AWB MENU 1 4 12M Exit Rec Mode Image Tone Recorded Pixels ...

Страница 27: ...button function varies depending on the screen Refer to the guide indications Exit Exits the menu and returns to the original screen Returns to the previous screen with the current settings Cancel Cancels the current selection exits the menu and returns to the previous screen MENU MENU MENU ...

Страница 28: ...auto macro function O On Focus Assist For setting whether or not to use the focus assist light O On AE Metering For choosing the area of the screen that is metered to determine the exposure L Multi segment Sensitivity For setting the sensitivity AUTO 125 1600 AUTO ISO Range For setting the adjustment range when the sensitivity is set to AUTO 125 1600 EV Compensation For adjusting the overall brigh...

Страница 29: ...IQ Enhancer For setting whether to apply the IQ Enhancer process to an image O On Macro Light Set On Off or Brightness adjustment for the LED for macro photography O On Use the 9 Green mode to enjoy easy picture taking with standard settings regardless of the settings made from the A Rec Mode menu Assigning a frequently used function to the Green button enables you to go straight to the desired fu...

Страница 30: ...ting the time until the camera enters power saving mode 5 sec Auto Power Off For setting the time until the camera turns off automatically 3 min Quick Zoom ForchoosingwhethertousetheQuickZoom function when playing back images P Off Guide Display For setting whether to display explanations for selected items in Capture Mode Palette and Playback Mode Palette O On Reset For returning settings other t...

Страница 31: ... turned off press and hold down the 4 button to display the clock on the display 1 Press and hold down the 4 button The camera turns on and the clock appears on the screen The camera turns off automatically after approximately 10 seconds Pressing the power button turns the camera off immediately Resetting to Default Settings Reset Displaying the Clock Display Not to function the Clock Display by p...

Страница 32: ...display indicates the automatic focusing area When the camera detects a person s face the Face Detection function is activated and the face detection frame appears You can change the captured area by pressing the zoom button p 32 Right T Enlarges the subject Left W Widens the area that is captured by the camera 3 Press the shutter release button halfway The camera emits focus assist light in dark ...

Страница 33: ... to the fully depressed position This takes a picture f is displayed when the shutter release button is pressed halfway if there is a risk of camera shake Using the Shutter Release Button Poor focusing conditions The camera may not be able to focus under the following conditions In these cases lock the focus on an object the same distance away as the subject by pressing and holding the shutter rel...

Страница 34: ...or use The zoom ratio of the Intelligent Zoom varies depending on the number of recorded pixels The zoom bar is displayed as follows 1 You can zoom in to a maximum of 5x optically 2 The Intelligent Zoom range varies depending on the number of recorded pixels See the following table Recorded pixels and the maximum zoom ratio Using the Zoom Recorded Pixels Intelligent Zoom The zoom ratio includes th...

Страница 35: ...ng mode is selected and the camera returns to capture mode i 2 Not Available 5x optical zoom only V 2 Not Available 5x optical zoom only l Approx 22 5x Equivalent to approx 36x m Approx 36x same as digital zoom We recommend you use a tripod to prevent camera shake when taking pictures at high zoom ratios Pictures taken in the digital zoom range appear grainier than pictures taken in the optical zo...

Страница 36: ... single image delivering a wider dynamic range image Handheld Night Snap Minimizes camera shake for shooting at night or other low light settings C Movie For recording movies Sound is recorded at the same time p 43 High Speed Movie Captures frames for slow motion playback Digital Microscope Captures the bigger images of the closer objects a Landscape For capturing landscape views Enhances colors o...

Страница 37: ...ng kids Reproduces a healthy and bright skin tone e Pet For capturing images of moving pets Sport For a fast moving subject Tracks the subject until the picture is taken A Night Scene For night time images Use of a tripod or other support is suggested B Night Scene Portrait For images of people at night Use of a tripod or other support is advised S Fireworks For capturing fireworks Use of a tripod...

Страница 38: ...arpness White Balance etc are automatically set to the optimal settings for the selected mode In Digital Microscope mode Recorded Pixels can be selected from 12M 16 9 5M 16 9 4M 16 9 or 2M 16 9 The maximum magnification varies depending on the Recorded Pixels Some functions may not be available or may not function fully depending on the selected shooting mode The shutter speed tends to be slower w...

Страница 39: ...ile the self timer lamp is blinking when taking still pictures In C Movie Underwater Movie and High Speed Movie modes recording will start after ten seconds or two seconds Press the shutter release button halfway while the self timer is engaged to stop the countdown and press fully to restart the countdown Z cannot be selected while the 9 Green mode settings remain at default Select Z in another s...

Страница 40: ...n The camera returns to capture mode The setting is saved and the camera returns to the previous screen 3 Press the Q button When the A Rec Mode C Movie or W Setting menu is displayed from A mode the setting is saved and the camera returns to playback mode 3 Press the 3 button The changes are canceled and you can select a menu Using the Rec Mode Menu Items To Save the Setting and Start Taking Pict...

Страница 41: ...es for each shot regardless of the brightness c Auto Red eye This mode reduces the red eye phenomenon caused by the light from the flash being reflected in the subject s eyes The flash discharges automatically d Flash On Red eye This mode reduces the red eye phenomenon caused by the light from the flash being reflected in the subject s eyes The flash discharges regardless of the light conditions M...

Страница 42: ...n the area around the subject and or decreasing the subject distance and adjusting the lens to wider angle setting Setting the flash mode to c Auto Red eye or d Flash On Red eye is also an effective way of reducing red eyes Selecting the Focus Mode Standard This mode is used when the distance to the subject is from 50 cm to The camera is focused on the subject in the autofocus area when the shutte...

Страница 43: ... ask someone to take pictures for you or when taking pictures of the scenery through the window of a car or train The entire picture from the front to the back is focused s Infinity This mode is used for taking distant objects The flash is set to a Flash Off Manual Focus This mode lets you adjust the focus manually The available modes differ depending on the selected shooting mode The noise from f...

Страница 44: ...focus 5 Press the 4 button The focus is locked and the camera returns to capture mode After the focus is locked you can press the four way controller 5 again to display the indicator and readjust the focus The shooting mode and drive mode cannot be changed while the indicator is displayed To switch from to another focus mode press the four way controller 5 while the indicator is displayed MENU MEN...

Страница 45: ...vie Shake Reduction icon 3 Remaining recordable time 4 REC indicator blinks during recording 5 Focus frame does not appear during recording You can change the captured area by pressing the W T button T Enlarges the subject W Widens the area that is captured by the camera 3 Press the shutter release button fully Recording starts You can continue recording until the recorded movie time reaches 25 mi...

Страница 46: ...f before starting recording a movie When the Smile Capture function is activated movie recording starts automatically when the camera recognizes the subject s smile However the Smile Capture function may not work depending on the condition of the recognized faces and movie recording may not start automatically If this happens press the shutter release button to start movie recording When you use t...

Страница 47: ...he 4 button You can play back the movies you have taken The sound is played back at the same time 1 Enter Q mode and use the four way controller 45 to choose the movie you want to play back 2 Press the four way controller 2 Playback starts Playing Back Still Pictures To Play Back the Previous or Next Image To Delete the Displayed Image Playing Back a Movie 10 100 003 0038 100 0038 Edit Edit Edit 1...

Страница 48: ...splay with each press of the four way controller 4 For example when you reverse frames from the second frame to the 31st frame the first frame appears on the display and when you reverse frames from the 32nd to 61st the 31st frame appears 3 Press the four way controller 3 Playback stops 1 In Q mode press the four way controller 3 The Playback Mode Palette appears 2 Use the four way controller 2345...

Страница 49: ...al images on a TV OK Cancel 14 25 14 25 03 03 2022 03 03 2022 14 25 03 03 2022 OK MENU For continuously playing back images Screen or sound effects can be set OK Cancel OK MENU SHUTTER 10 02 02 14 25 38 38 Goes to the screen for selected playback function Closes the Playback Mode Palette and goes to A mode halfway or Press 10 02 02 14 25 10 02 02 14 25 100 0038 38 Edit 14 25 02 02 12 10 02 02 14 2...

Страница 50: ...to make from the kind and color of a frame Available to enter text All sides White Movie Edit Save as Still Image For saving one frame from a movie as a still picture Divide Movies For dividing a movie into two Adding title picture For adding a title picture to your movie Z Red eye Edit Attempts to edit out the red eye effect in image Success may vary n Resize Changes Recorded Pixels and Quality L...

Страница 51: ...four way controller 45 to choose the image you want to delete 2 Press the i button A confirmation screen appears 3 Use the four way controller 2 to select Delete 4 Press the 4 button The image is deleted Deleting a Single Image Protected images cannot be deleted 100 100 0017 0017 100 0017 OK OK OK Delete Cancel OK OK OK ...

Страница 52: ...t mode f in Original Frame mode Movie 1920 x 1080 30fps 1280 x 720 60fps M 1280 x 720 30 fps Sensitivity AUTO Manual ISO 125 200 400 800 1600 3200 6400 The sensitivity is fixed at AUTO 125 6400 in Digital SR mode File Formats Still JPEG Exif 2 3 DCF 2 0 PRINT Image Matching III Movie MPEG 4 AVC H 264 approx 60 fps 30 fps PCM system monaural sound Movie SR Movie Shake Reduction Image Tone Still Bri...

Страница 53: ...25 minutes Built in Memory 2 GB SD Memory Card C D E C D E 4608 x 3456 13 23 38 370 653 1078 3456 x 3456 15 30 46 435 853 1307 4608 x 2592 15 30 46 435 853 1307 6 3072 x 2304 23 43 69 653 1205 1921 3072 x 1728 27 53 76 778 1499 2119 f 2592 x 1944 27 53 76 778 1499 2119 2592 x 1464 36 69 99 1024 1921 2794 h 2048 x 1536 43 85 124 1205 2364 3415 i 1600 x 1200 69 124 167 1921 3415 4728 h 1920 x 1080 6...

Страница 54: ...pping Image Copy Image Rotation Digital Filter HDR Filter Original Frame Ink Rubbing Filter Collage Small Face Filter Movie Playback Edit Save as Still image Divide Adding title picture Red eye Edit Protect Start up Screen Focus Mode Autofocus Macro 1cm Macro Pan Focus Infinity Manual Focus Focus Type TTL contrast detection system by sensor Multiple 9 point autofocus spot automatic tracking change...

Страница 55: ... sec Time Function World Time 75 cities 28 time zones Clock Display Clock Display by holding down 4 button while camera is turned off for approx 10 sec Alarm Alarm with simultaneous display of the Clock Display at specified time Power Source Rechargeable lithium ion battery D LI92 Battery Life Image Storage Capacity Approx 300 pictures Recording capacity shows the approximate number of shots recor...

Страница 56: ...of the manufacturer or its representatives under all guarantees or warranties whether expressed or implied is strictly limited to the replacement of parts as hereinbefore provided No refunds will be made on repairs by non authorized service facilities Weight Approx 173 g approx 6 1 oz excluding battery and SD Memory Card Approx 194 g approx 6 8 oz including battery and SD Memory Card Accessories R...

Страница 57: ...ring the purchase of your camera for at least a year Before sending your camera for servicing please make sure that you are sending it to the manufacturer s authorized representatives or their approved repair shops unless you are sending it directly to the manufacturer Always obtain a quotation for the service charge and only after you accept the quoted service charge instruct the service station ...

Страница 58: ... in a particular installation If this equipment does cause harmful interference to radio or television reception which can be determined by turning the equipment off and on the user is encouraged to try to correct the interference by one or more of the following measures Reorient or relocate the receiving antenna Increase the separation between the equipment and receiver Connect the equipment into...

Страница 59: ...he standards Records maintained continue to reflect the equipment being produced can be expected to be within the variation accepted due to quantity production and testing on the statistical basis as required by 47CFR 2 909 Operation is subject to the following two conditions 1 This device may not cause harmful interference and 2 This device must accept any interference received including interfer...

Страница 60: ...ppropriate waste handling If a chemical symbol is added beneath the symbol shown above in accordance with the Battery Directive this indicates that a heavy metal Hg Mercury Cd Cadmium Pb Lead is present in the battery at a concentration above an applicable threshold specified in the Battery Directive For more information about collection and recycling of used products please contact your local aut...

Страница 61: ...website Operating Manual Download https www ricoh imaging com manuals In order to better serve you we request that you complete the user registration which can be found on our website Thank you for your cooperation https www ricoh imaging com registration Information on the Operating Manual Regarding User Registration ...

Страница 62: ...Memo ...

Страница 63: ...t a concentration above an applicable threshold specified in the Battery Directive For more information about collection and recycling of used products please contact your local authorities your waste disposal service or the point of sale where you purchased the products 2 In other countries outside the EU These symbols are only valid in the European Union If you wish to discard used products plea...

Страница 64: ...ICOH IMAGING CANADA INC 5560 Explorer Drive Suite 100 Mississauga Ontario L4W 5M3 CANADA https www ricoh imaging ca RICOH IMAGING CHINA CO LTD Room A 23F Lansheng Building 2 8 Huaihaizhong Road Huangpu District Shanghai 200021 CHINA http www ricoh imaging com cn https www ricoh imaging co jp english This contact information may change without notice Please check the latest information on our websi...

Отзывы: