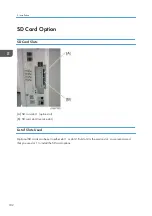
• * When using wireless LAN (IEEE802.11 b/g/n:2.4-GHz band), this radio product uses the 2.4-
GHz band. Check that industrial, scientific and medical devices using the same frequency bands,
such as a microwave oven and cordless telephone, are not used nearby.
• If there is interference, communication may become unstable. Check that there are no devices likely
to cause interference in the surrounding area.
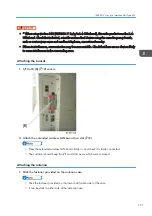
Attaching the boards
1.
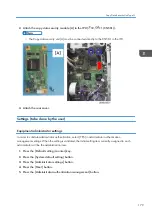
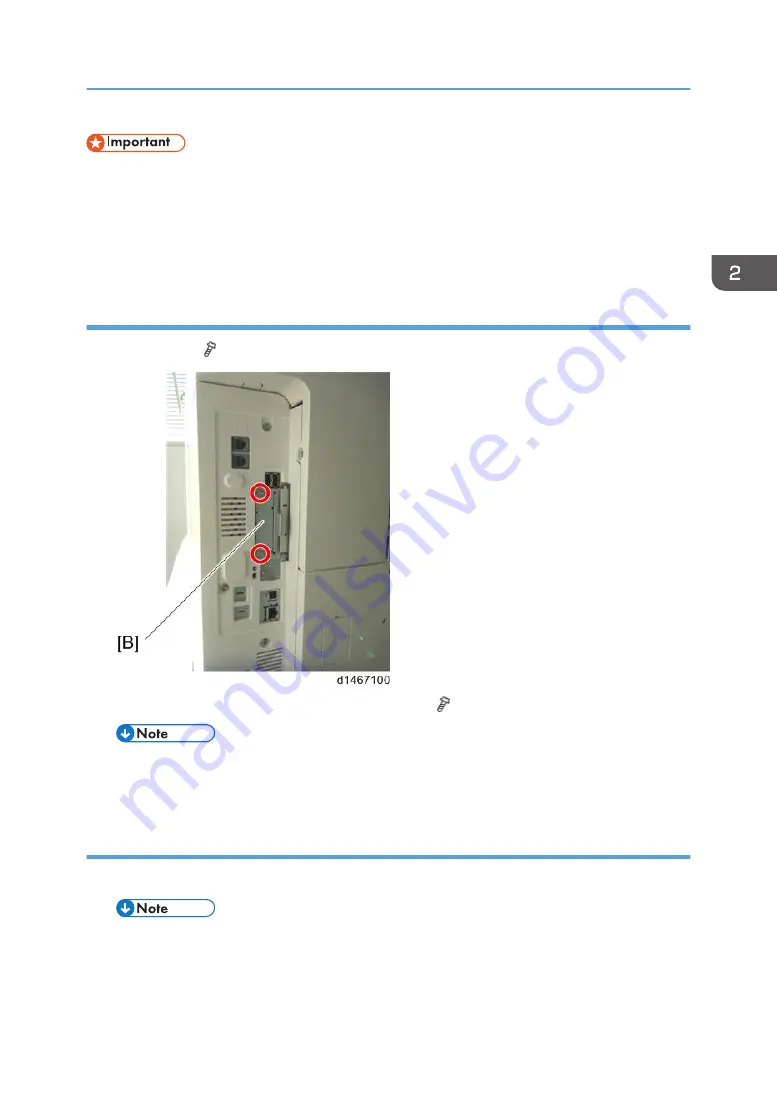
I/F slot B [B] ( ×2) covers.
2.
Attach the extended wireless LAN board to a slot ( ×2)
• Press the extended wireless LAN board firmly in, and check it is firmly connected.
• The customer should keep the I/F card slot covers which were removed.
Attaching the antenna
1.
Stick the fastener provided on the antenna case.
• Stick the fastener provided on the lower half (cable side) of the case.
• It can be stuck to either side of the antenna case.
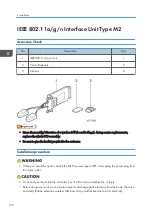
IEEE 802.11a/g/n Interface Unit Type M2
171
Содержание MET-C1
Страница 1: ...Model MET C1 Machine Code D176 D177 Field Service Manual September 2013 Subject to change ...
Страница 2: ......
Страница 22: ...20 ...
Страница 50: ...1 Product Information 48 ...
Страница 57: ...4 Input the password 5 Press OK Main Machine Installation 55 ...
Страница 58: ...6 Confirm the Password 7 Press OK 2 Installation 56 ...
Страница 59: ...8 Change the Administrator 1 login password 9 Input the password 10 Press OK Main Machine Installation 57 ...
Страница 60: ...11 Confirm the password 12 Press OK 13 Cycle the power OFF ON 2 Installation 58 ...
Страница 65: ...2 Remove the orange tape and retainers on the outside Main Machine Installation 63 ...
Страница 72: ... When moving the machine do not press against the ADF 2 Installation 70 ...
Страница 95: ...7 Upper left cover A 1 8 Left rear cover A 2 1 Bin Tray BN3110 93 ...
Страница 96: ...9 Inverter tray A tray support rod cover B 1 10 Paper output cover A 1 2 Installation 94 ...
Страница 102: ...3 Attach the part B to the shift tray A 4 Paper output tray A 2 Installation 100 ...
Страница 104: ...9 Paper output cover A 1 10 Attach the shift tray feeler A 2 Installation 102 ...
Страница 113: ...5 Upper left cover A 1 6 Left rear cover A 2 Internal Finisher SR3130 111 ...
Страница 115: ...10 Paper output cover A 1 11 Connector cover A 12 Paper output lower cover A 3 Internal Finisher SR3130 113 ...
Страница 116: ...13 Upper rear inner cover A 2 14 Install a screw A removed in step 12 2 Installation 114 ...
Страница 126: ...9 Attach the front right cover A provided inserting the claws 1 10 Insert the hopper A 2 Installation 124 ...
Страница 140: ...26 Attach the upper inside cover A and finisher B 27 Secure the finisher x 1 Accessory No 8 2 Installation 138 ...
Страница 149: ...15 Install the scanner heater A 2 16 Route the harness while inserting into the claw Anti Condensation Heater 147 ...
Страница 156: ...14 Re install the connecter cover 1 15 Reassemble the machine 2 Installation 154 ...
Страница 167: ...18 Close the right cover Smart Card Reader Built in Unit Type M2 D739 36 165 ...
Страница 216: ...5 Output the system setting list to make sure that the memory unit is recognized properly 2 Installation 214 ...
Страница 220: ...3 Preventive Maintenance 218 ...
Страница 227: ...2 Belt A 3 Front cover A Exterior Covers 225 ...
Страница 237: ...2 Waste Toner Cover A Reverse Tray 1 Reverse Tray A Exterior Covers 235 ...
Страница 243: ...3 Operation panel A 6 2 Board A 1 Operation panel page 240 2 Operation panel lower cover A 6 Operation Panel Unit 241 ...
Страница 244: ...3 Harness guide A 2 4 Bracket covers A B 4 Replacement and Adjustment 242 ...
Страница 250: ...Replacement procedure 1 Operation panel arm bracket page 240 2 Bracket A 6 5 USB 2 4 Replacement and Adjustment 248 ...
Страница 251: ...3 LCD panel unit A Operation Panel Unit 249 ...
Страница 258: ...2 SIO unit A 2 7 3 Bracket A 4 3 4 Replacement and Adjustment 256 ...
Страница 259: ...4 Spring A 5 Scanner motor unit A 2 1 6 Scanner motor A 2 Scanner Unit 257 ...
Страница 266: ...8 Wire clamp A 1 9 Wire fixing bracket A spring B 1 10 Wire pulley A 1 1 4 Replacement and Adjustment 264 ...
Страница 271: ...6 Rear frame A 6 7 Move to the set position of the fixing pin for the first carriage Scanner Unit 269 ...
Страница 272: ...8 Wire clamp A 1 9 Wire fixing bracket A spring B 1 10 Scanner drive gear A 1 4 Replacement and Adjustment 270 ...
Страница 284: ...3 Remove the PCDU cover A Y x 1 B M x 1 C C x 1 D K x 1 4 Replacement and Adjustment 282 ...
Страница 291: ...Imaging Temperature Sensor Thermistor 1 Open the controller box page 317 2 Connector A PCDU 289 ...
Страница 292: ...3 Imaging temperature sensor harness guide A and Imaging temperature sensor B 2 4 Replacement and Adjustment 290 ...
Страница 297: ...2 Image transfer front cover A 1 3 Release the lock A and open the right cover B Image Transfer Unit 295 ...
Страница 308: ...4 Replacement and Adjustment 306 ...
Страница 309: ...Fusing Entrance Sensor 1 Open the right cover page 293 Image Transfer Unit 307 ...
Страница 316: ...3 ITB contact and release sensor A 4 Replacement and Adjustment 314 ...
Страница 328: ...3 Harness guide A 2 4 Toner transport motor unit C A 1 5 Hopper C A 4 Replacement and Adjustment 326 ...
Страница 329: ...M 1 Controller box page 317 2 Harness guide A 2 3 Toner transport motor unit M A 3 Drive Unit 327 ...
Страница 330: ...4 Hopper M A Y 1 Harness guide page 327 2 Toner transport motor unit Y A 3 4 Replacement and Adjustment 328 ...
Страница 331: ...3 Hopper Y A Toner End Sensor 1 Hopper page 325 2 Toner end sensor A Drive Unit 329 ...
Страница 341: ...2 Transport screw unit for K A claw 1 Drive Unit 339 ...
Страница 347: ...2 Fusing lower cover A 4 Fusing Front Cover 1 Fusing unit page 340 Fusing Unit 345 ...
Страница 350: ...6 Left frame A 4 4 7 Side plate A 1 4 Replacement and Adjustment 348 ...
Страница 360: ...2 Fusing shield drive motor unit A 2 1 3 Fusing shield drive motor A 2 4 Replacement and Adjustment 358 ...
Страница 363: ...3 Harness A 1 3 4 Paper exit sensor unit A 1 1 Paper Exit 361 ...
Страница 365: ...3 Reverse sensor A Reverse Motor 1 Paper exit unit page 359 2 Gear A Paper Exit 363 ...
Страница 367: ...2 Fusing exit sensor unit A 1 1 1 3 Fusing exit sensor A Paper Exit 365 ...
Страница 369: ...3 Paper feed guide plate A 4 1st paper feed unit A 2 1 2nd Paper Feed Unit 1 Duplex unit page 383 Paper Feed 367 ...
Страница 370: ...2 Pull out the 2nd paper tray A 3 Transport guide A 1 4 Harness guide A 1 4 Replacement and Adjustment 368 ...
Страница 380: ...5 By pass tray A 4 3 4 4 Replacement and Adjustment 378 ...
Страница 381: ...By pass Paper End Sensor 1 Open the by pass tray A 2 By pass paper end sensor cover A By pass Tray Unit 379 ...
Страница 386: ...4 Open the 1st paper feed tray A and 2nd paper feed tray B 5 Cover A 1 4 Replacement and Adjustment 384 ...
Страница 388: ...2 Harness guide A 4 3 Duplex by pass motor unit A 3 1 3 4 Duplex By pass Motor A 2 4 Replacement and Adjustment 386 ...
Страница 391: ...2 Harness guide A 1 3 Duplex exit sensor unit A 1 Duplex Unit 389 ...
Страница 392: ...4 Duplex exit sensor A 1 4 Replacement and Adjustment 390 ...
Страница 405: ...4 Open the controller box A 6 5 Imaging IOB A 5 14 HVP_TTS 1 Open the controller box page 402 Electrical Components 403 ...
Страница 410: ...1 Power supply box page 405 2 HVP_CB A 4 1 4 Replacement and Adjustment 408 ...
Страница 412: ... There are two claws on the bracket A Release them in a downward direction 4 Replacement and Adjustment 410 ...
Страница 419: ...Power Box Cooling Fan 1 Rear cover page 230 2 Power box cooling fan A 2 Fans Filters 417 ...
Страница 446: ...5 Troubleshooting 444 ...
Страница 448: ...Controller self diagnosis flowchart 5 Troubleshooting 446 ...
Страница 449: ...Self Diagnostic Mode 447 ...
Страница 450: ...5 Troubleshooting 448 ...
Страница 451: ...Self Diagnostic Mode 449 ...
Страница 622: ...When SC549 is displayed Troubleshooting Flowchart 5 Troubleshooting 620 ...
Страница 628: ...When SC670 is displayed Troubleshooting Flowchart 5 Troubleshooting 626 ...
Страница 629: ...Jam Detection Jam Display When a jam occurs cause positions will blink Jam Detection 627 ...
Страница 630: ...Sensor Locations 5 Troubleshooting 628 ...
Страница 637: ...Image Quality When an abnormal image is generated Image Quality 635 ...
Страница 641: ... 4 TLC 8A N4 for EU AA CHN 5 DHB is a service option Fuse position Electrical Component Defects 639 ...
Страница 642: ...5 Troubleshooting 640 ...
Страница 647: ...Model MET C1 Machine Code D146 D147 D148 D149 D150 Appendices 8 April 2013 ...
Страница 648: ......
Страница 650: ...2 ...
Страница 687: ...MEMO 39 ...
Страница 688: ...MEMO 40 EN ...


