


Set up, install, and configure
24
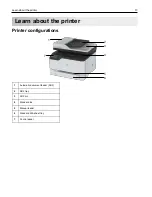
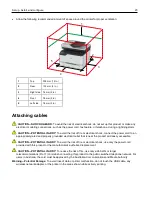
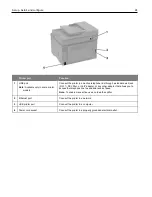
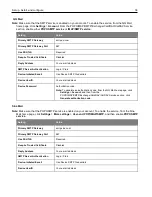
Printer port
Function
1
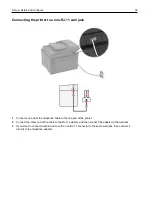
LINE port
Note:
Available only in some printer
models.
Connect the printer to an active telephone line through a standard wall jack
(RJ-11), DSL filter, or VoIP adapter, or any other adapter that allows you to
access the telephone line to send and receive faxes.
Note:
To enable manual fax, use a corded fax splitter.
2
Ethernet port
Connect the printer to a network.
3
USB printer port
Connect the printer to a computer.
4
Power cord socket
Connect the printer to a properly grounded electrical outlet.
Содержание M C240FW
Страница 142: ...Maintain the printer 142 2 Pull out the print cartridge tray 3 Remove the used print cartridge ...
Страница 147: ...Maintain the printer 147 Scanner glass pad ADF glass Scanner glass 3 Close the scanner cover ...
Страница 201: ...Troubleshoot a problem 201 Below the fuser area Duplex unit 3 Close the door ...
Страница 235: ... 2021 Ricoh Co Ltd M995 7040A AU EN US EN GB EN ...


