


4. Replacement and Adjustment
General Cautions
Notes on the Main Power Switch
The main power button of this machine has been changed to a push-button switch (push button) from the
conventional rocker switch. The push switch has characteristics and specifications different from the
rocker switch. Care must be taken when replacing and adjusting parts.
Characteristics of the Push Switch (DC Switch)
Power is supplied to the machine even when the main power switch is turned OFF.
The push switch in this machine uses DC (direct current). Therefore, if the AC power cord is
connected to an electrical outlet, power is supplied to the controller board and other modules even
when the main power is turned OFF. When replacing the controller board, not only this board, it
will damage other electrical components.
So, when performing maintenance work such as replacing parts, in addition to turning off the main
power with the push switch, always unplug the AC power cord.
When you disconnect the power cord from the AC wall outlet, inside the machine there is still
residual charge.
When you disconnect the power cord from the AC wall outlet, inside the machine for a while there
is still residual charge. Therefore, if you remove boards in this state, it can cause a blown fuse or
memory failure.
-- How to remove the residual charge inside the machine--
After you unplug the power cord from the AC wall outlet, in order to remove the residual charge
from inside the machine, be sure to press the main power switch. Thus, the charge remaining in the
machine is released, and it is possible to remove boards.
33
Содержание Aficio MP 171
Страница 1: ...Model Gim P1a Machine Code M171 Field Service Manual September 2014 ...
Страница 2: ......
Страница 14: ...12 ...
Страница 34: ...3 Preventive Maintenance 32 ...
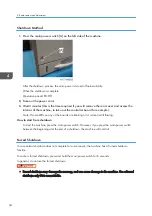
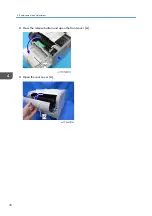
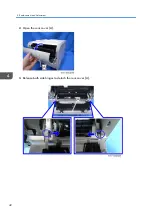
Страница 40: ...2 Press the release button and open the front cover A 3 Open the rear cover A 4 Replacement and Adjustment 38 ...
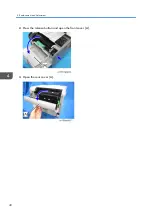
Страница 42: ...2 Press the release button and open the front cover A 3 Open the rear cover A 4 Replacement and Adjustment 40 ...
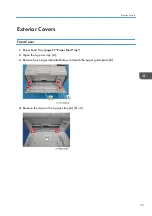
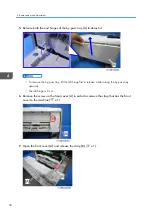
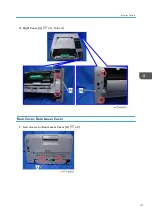
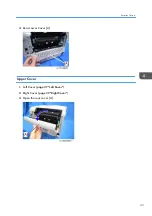
Страница 44: ...2 Open the rear cover A 3 Release both side hinges to detach the rear cover A 4 Replacement and Adjustment 42 ...
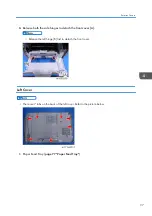
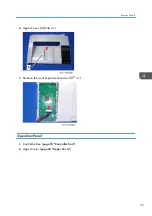
Страница 48: ...3 OPU Board x 7 4 Replacement and Adjustment 46 ...
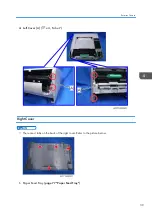
Страница 57: ...PCDU PCDU 1 Press the release button and open the front cover A 2 Hold the grip to pull the PCDU A out PCDU 55 ...
Страница 59: ...2 Hold the grip to pull the toner cartridge A out Toner Cartridge 57 ...
Страница 105: ...2 Rear Cover Switch A x 1 Hook Electrical Components 103 ...
Страница 106: ...4 Replacement and Adjustment 104 ...
Страница 120: ...5 System Maintenance 118 ...
Страница 166: ...MEMO 164 EN ...
Страница 167: ...Model Gim P1a Machine Code M171 Appendices September 2014 ...
Страница 168: ......
Страница 186: ...2 Appendices Preventive Maintenance Tables 18 ...
Страница 259: ...MEMO 91 ...
Страница 260: ...MEMO 92 EN ...