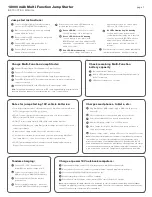
Charge smartphones, tablets, etc:
Plug Multi-device USB charge cable to USB 5V-2.1A port on
battery (3)
Choose appropriate connector and plug into your device
Press/release Multi-Function battery power button (8)
Monitor charge via charge icon or LED on device
When charge is complete, Multi-Function battery continues to
safely trickle charge devices
Remove charge cable — battery LEDs shut off in about 35 seconds
Note:
Use 2.1A port for larger devices like t smartphones, music players,
small tablets, etc. Use 1A port for smaller devices like smartphones, music
players & small tablets. Use included Multi-device USB charge cable or USB
cable included with your own device. Multi-device USB charge cable can charge
more than one device at a time via one USB port using either the Apple 30-pin,
8-pin, or micro-USB connectors. Charge times may take longer in this mode.
Notes for jump starting 12V vehicle batteries:
• For best performance when starting vehicles, use Multi-Function Jump Starter
at 75% charge capacity (3 LEDs) or higher.
• DO NOT connect jump start cable clamps to wrong +/- battery terminals —
RED = (+) positive / BLACK = (-) negative
• DO NOT connect jump starter RED/BLACK cable clamps together
• Make sure Multi-Function Jump Starter cable clamps are connected securely
to battery terminals
• Always remove clamps within 30 seconds after motor starts
• Check battery terminals for rust, dirt and corrosion before using Multi-Func-
tion Jump Starter — clean if necessary to avoid poor performance
• DO NOT jump start again after 3 attempts to avoid damaging Smart Jump
Starter / Check for other vehicle issues
1
2
3
4
5
6
Check remaining Multi-Function
battery capacity
Tap/release power button (8)
Battery LEDs illuminate showing remaining charge capacity
in 25% increments
LEDs shut off in about 35 seconds.
Charge Multi-Function Jump Starter:
Connect Dual voltage AC wall adapter to AC wall outlet, or
Connect DC car adapter to cigarette lighter port in vehicle
Connect round-pin cable to Multi-Function Jump Starter input port (4).
Four LEDs (9) flash in 25% increments and remain solid when corresponding
capacity is reached.
When fully charged, all 4 solid LEDs shut off - Remove charge cable.
Note:
For optimum performance, make sure all LEDs have stopped flashing and remain solid
to ensure full charge capacity. Total recharge time (0% - 100%) = about 6 hours.
3
5
4
1
2
1
2
3
18000 mAh Multi-Function Jump Starter
INSTRUCTION MANUAL
page 2
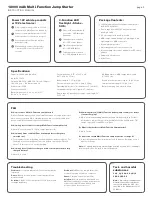
Connect intelligent jump start cables to jump
start socket (1) on Multi-Function Battery
Blue connector plug must be secure and fully
seated within the socket
Be sure red/green LED indicators on jump start
cable module are OFF
Connect RED cable clamp to positive (+)
battery terminal on vehicle
Connect BLACK cable clamp to negative (-)
battery terminal on vehicle
When connected, check LED indicators on
module and proceed as follows:
Green LED ON
- connection is correct /
circuit is working - OK to start vehicle
Green LED flashes with buzzing
- vehicle battery is low - press/hold
BOOST button on module until green LED
illuminates - release button - start vehicle
within 30 seconds
Red LED ON with buzzing
– connection
error – remove clamps and replace as
mentioned in steps 4 & 5 – when green
LED is on, OK to start vehicle
No LEDs illuminating/No buzzing
– vehicle battery may be damaged –
confirm jump start clamps are connected
correctly - press/hold BOOST button on
module until green LED illuminates -
release button - start vehicle within 30
seconds
When motor starts, remove clamps immediately
from battery terminals - leave motor running
Jump start instructions:
1
6
A
B
C
2
3
4
5
D
7
Tandem charging:
Connect AC or DC car adapter to
Multi-Function battery charge port (4).
Connect electronic device(s) to either
USB port (2)(3) on Multi-Function battery.
Press/release Multi-Function battery
power button.
Device(s) begin recharging — when fully
charged, Multi-Function battery recharges.
Charge or power 19V notebook computers:
Plug round-pin charge cable to 19V-3.5A output port on Multi-Function battery (6).
Select notebook connector, connect to round-pin charge cable and plug into computer port.
Press/release Multi-Function battery power button (8).
Monitor charge/power via icon or LED on computer.
When finished, remove charge cable — battery LEDs shut off in about 35 seconds
Note:
8 interchangeable notebook connectors are included. See chart for computer compatibility. Some notebooks,
like Apple, use proprietary connectors and are not compatible. Connector sizes under same brand or same series may
also vary. Check your own connector size for compatibility.
3
3
4
5
4
1
1
2
2


