7
4.2)
Coiling.
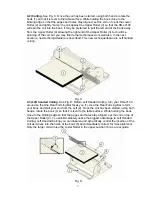
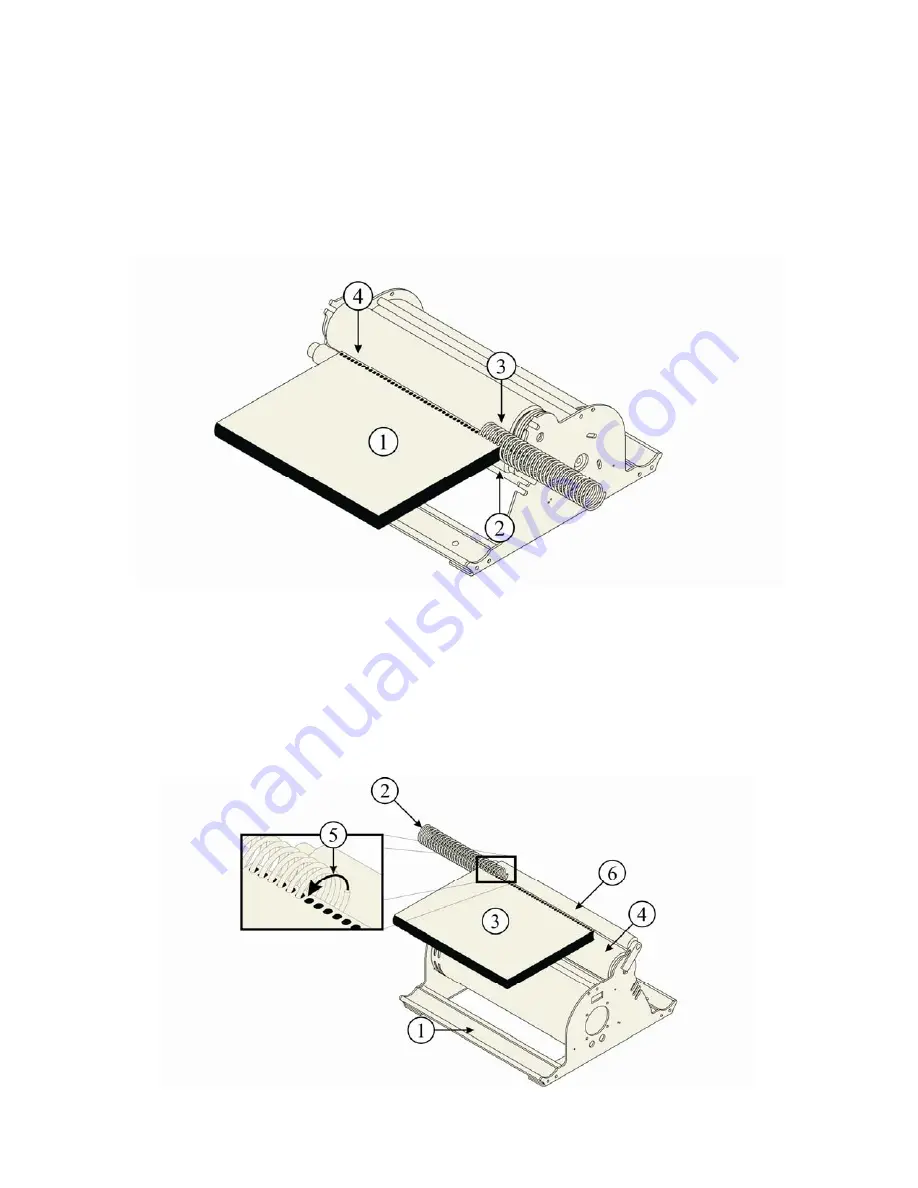
See Fig. C. Once the coil has been started, using both hands, rotate the
book (1) so that it is level to the table surface. While holding the book close to the
binding edge so that the pages and holes stay aligned, set the coil on top of the Lower
Roller (2) and lightly “bump” the coil against the Upper Roller (3) so that the HD-e4100
will spin the coil into the book. It may be preferred to pull the left end of the book away
from the Upper Roller (4) allowing the right end of the Upper Roller (3) to do all the
spinning of the coil, but you may fined other techniques work well also. In the next
section a new technique/feature is described. This new technique/feature is Left handed
coiling.
Fig. C
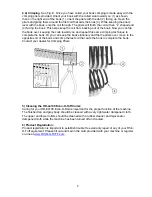
4.3) Left handed Coiling. See Fig. D. Before Left Handed Coiling, turn your HD-e4100
around so that the Rear Forming Bar faces you (1). Use the Rear Forming Bar to form
your book and start your coil from the Left (2). Once the coil has been started, using both
hands, rotate the book (3) so that it is level to the table surface. While holding the book
close to the binding edge so that the pages and holes stay aligned, set the coil on top of
the Upper Roller (4). You will immediately notice the biggest advantage to Left Handed
Coiling; Left Handed Coiling you can observe and dynamically control the insertion of the
coil as it dives into the holes of the book (5) and immediately correct for miss alignment.
Only the larger coil will use the Lower Roller in the upper position (6) as a rear guide.
Fig. D
Содержание Econ-O-Roll HD-e4100
Страница 10: ...10 Part 941005 12 06 ...


