Maintenance
Reflexomat XS — 02.16.2022 - Rev. A
English — 25
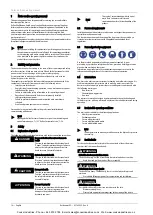
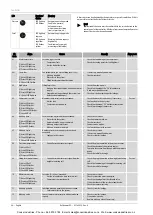
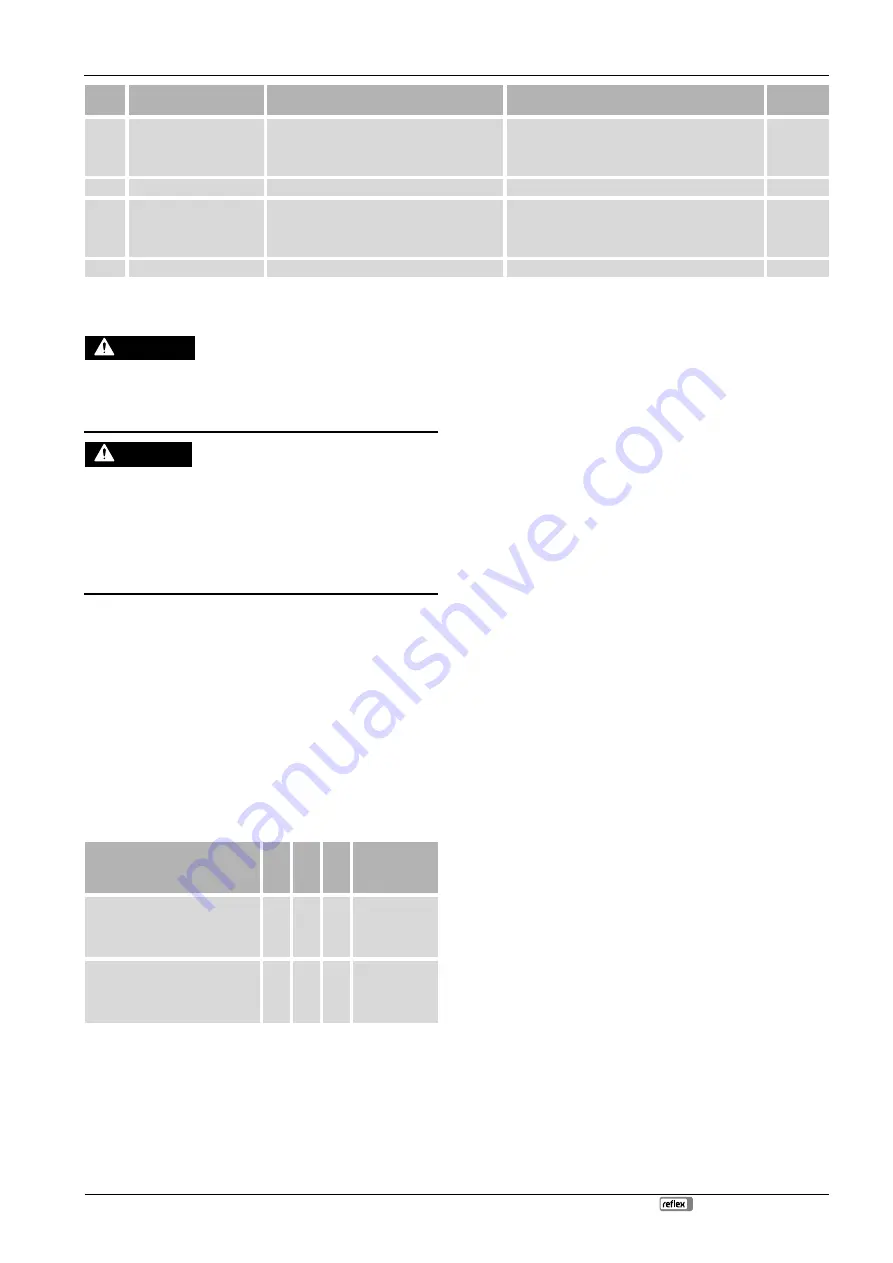
ER
Code
Alarm
Causes
Remedy
Alarm reset
19
Stop
˃
4 hours
[4] Stop LED lights up
[5] Error LED flashes
•
Device is in Stop mode for more than 4 hours. •
Reset using the SmartControl app.
"Service"
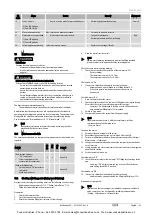
20
Max. make-up quantity
Max. set make-up quantity exceeded
•
Set make-up quantity correctly.
-
21
Maintenance recommended
[1] Auto LED lights up
[5] Error LED lights up
•
Maintenance interval exceeded.
•
Carry out maintenance.
•
Reset maintenance counters in the app.
"App"
24
Softening/demineralisation
Soft water capacity used up
•
Replace the cartridge (Fillsoft).
-
10
Maintenance
CAUTION
Risk of burns
Escaping hot medium can cause burns.
•
Maintain a sufficient distance from the escaping medium.
•
Wear suitable personal protective equipment (safety gloves and
goggles).
DANGER
Risk of serious injury or death due to electric shock.
If live parts are touched, there is risk of life-threatening injuries.
•
Ensure that the supply cable to the device is disconnected and secured
against being switched back on.
•
Ensure that the system is secured and cannot be reactivated by other
persons.
•
Ensure that installation work for the electric connection of the device is
carried out by an electrician, and in compliance with electrical locally
applicable electrical engineering regulations.
The device is to be maintained annually.
•
The maintenance intervals depend on the local operational conditions.
An indication that the annual service is to be performed after the set device
operating time has elapsed is given in the form of a warning. The warning is also
displayed in the app. The maintenance interval must be reset using the app.
Use "manual mode" for maintenance
Note!
Arrange for maintenance tasks must be carried out only by specialist
personnel or Reflex Customer Service.
10.1
Maintenance schedule
The maintenance schedule is a summary of maintenance tasks to be carried out
regularly.
Activity
Che
ck
Wa
it
Clea
n
Interval
Check for leak tightness.
•
"CO" compressor.
•
Screw connections of the
compressed air connections.
x
x
Annually
Check switching points.
•
Cut-in pressure "CO" compressor.
•
Low water.
•
Make-up with water.
x
Annually
10.2
Checking switching points (during vessel draining)
Prerequisite for checking the switching points are the following correct settings:
•
Minimum operating pressure P
0
,
•
Filling level measurement in the primary vessel.
Preparation
1.
Switch to Automatic mode.
2.
Close the cap valves upstream of the vessel.
3.
Record the indicated filling level (value in %) from the app.
4.
Drain the water from the vessel.
Note!
During vessel draining, continuously monitor the filling level and
pressure values in the app and check the switching points.
Check the cut-in pressure during draining
5.
Check the cut-in and cut-out pressure of the compressor "CO".
(Factory setting)
–
The compressor cuts in at P
0
+ 0.3 bar.
–
The compressor cuts out at P
0
+ 0.4 bar.
Check make-up "On"
6.
If necessary, check the make-up display value in the app.
–
Automatic make-up is switched on at a filling level of 8 %.
–
If the cut-in point is reached, automatic make-up is to be
deactivated.
Check low water "On"
7.
Drain more water from the vessel.
8.
Check the display value of the "Low water" filling level message in the app.
Ensure that the vessel is completely empty for this purpose.
–
Low water "On" is displayed in the app or as an LED on the device
once a minimum filling level of 5% is reached.
9.
Switch to Stop mode.
10. Completely disconnect the system from the power supply.
Note!
The membrane is defective if, with the vessel empty, air flows
continuously out of the draining valve.
-> Replace vessel
Switch on the device
11. Reconnect the power supply to the system.
12. Ensure that the automatic make-up is switched off or shut off.
13. Perform a calibration to calibrate the weight measuring cell by (Setting
Maintenance
Calibration)
14. Change to automatic mode and wait until the compressor has reached its
cut-off pressure.
15. Slowly open the cap valves upstream of the vessel and secure them against
unauthorised closing.
16. Activate automatic make-up.
Check low water "Off"
17. Check the display value for the low water "Off" filling level message in the
app.
–
Low water "Off" is displayed in the app or as an LED on the device
once a filling level of 8% is reached.
Check make-up "Off"
18. If necessary, check the make-up display value in the app.
–
Automatic make-up is deactivated at a filling level display of 12 %.
Maintenance is completed.
Note!
Alternatively, the functioning of the individual components (solenoid
valve, compressor) can be checked by switching in manual mode.
(Setting
Maintenance
Manual mode).
Cooke Industries - Phone: +64 9 579 2185 Email: [email protected] Web: www.cookeindustries.co.nz


