background image

25

Chapter 3: Using the Recorder’s Features

Watching one channel while you record another channel to the Digital Media Recorder

If you want to watch another channel while you’re recording, you need to make sure you’ve connected an RF signal splitter (go to page 4 for
details), and do the following:

1. Make sure the Digital Media Recorder and the TV are on. Tune the TV to the appropriate Video Input Channel (if you need help, go 

to page 16).

2. Using the Digital Media Recorder’s channel buttons, tune to the program you want to record. Press the RECORD button.

3. If the remote that came with your Digital Media Recorder operates your TV, just press the TV button and use the channel up and down

buttons to go to  a different channel.

If the remote doesn’t operate your TV, use the TV’s remote control to change channels.

Notes: 
The remote that came with your Digital Media Recorder is a programmable Universal remote that can be programmed to operate many brands and
models of TVs. Go to page 19 if you want to program the remote).

You won’t be able to pause live TV when you’re recording one channel, and watching another channel.

Record continuously so the program will appear as one title in the Video menu.

Recording from the GUIDE Plus+ on-screen programming guide

You can schedule recordings from the GUIDE Plus+ on-screen programming guide.

1. If the program guide isn’t on the TV, press the GUIDE button on the remote control (the listings guide appears).

2. Use the remote control’s arrow button to highlight the program you want to record.

3. Press the 3 button on the remote.

Note: The 3 button corresponds to the GUIDE Plus+ System’s action buttons and says record next to it. DON’T press the RECORD button.

4. To change the frequency of the recording (one time, daily, weekly, etc.), go to the GUIDE Plus+ Schedule menu (see page 30 for more info). 

Note:
If recording that you set up through the GUIDE Plus+ system conflicts with a timer recording that you set up via the Digital Media Recorder’s
Recording menu, the Timer recording you set up in the Digital Media Recorder’s Recording menu system will be recorded instead of the one you
scheduled through the GUIDE Plus+ system.

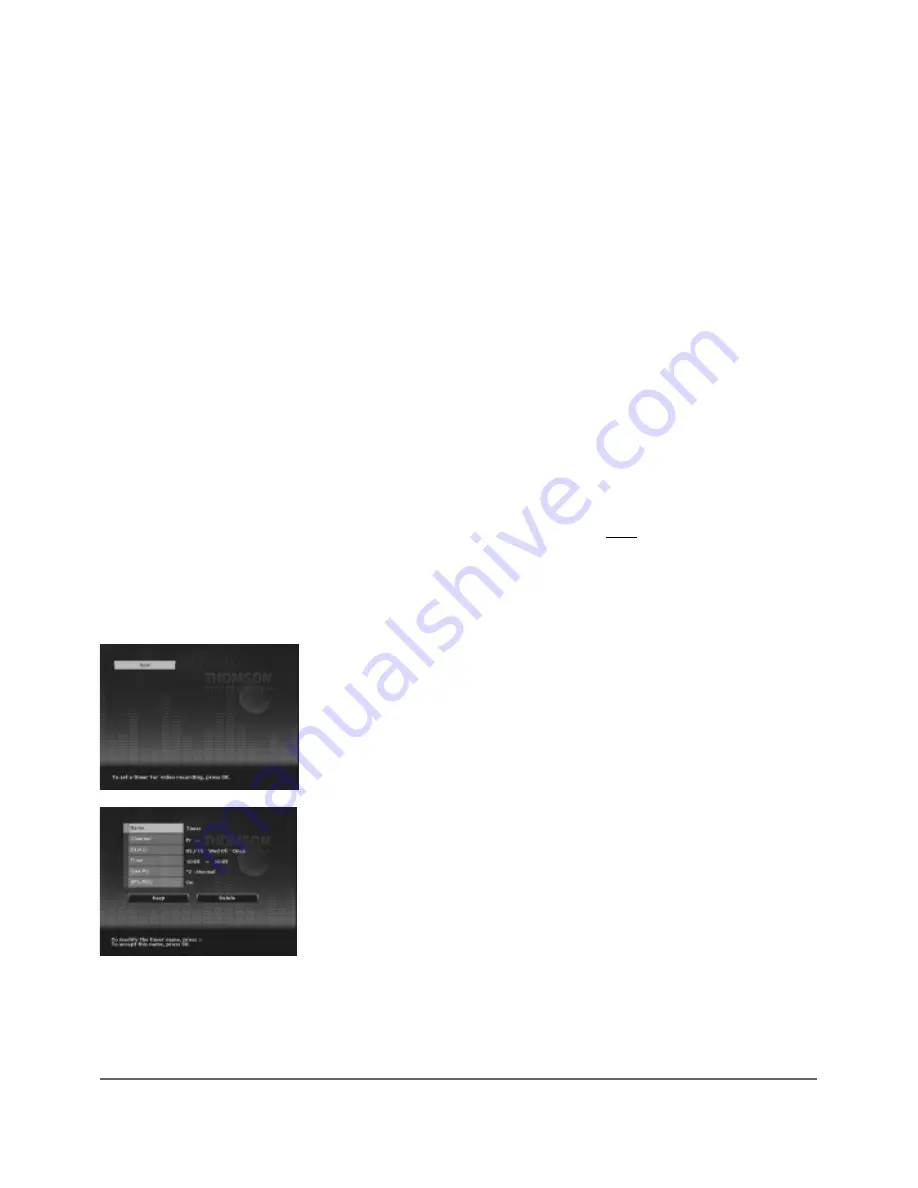
Setting up timer recordings to record programs automatically

1. From the Digital Media Recorder’s main menu, use the remote’s arrow buttons to highlight
Recording, and press the OK button.

2. Highlight Timer, and press OK.

3. If necessary, highlight New, and press OK.

4. If you want to give the Timer a name, highlight Name and press the OK button (the on-screen
keyboard appears — follow the on-screen instructions to name the timer).

5. Highlight the Channel field and use the number buttons on the remote to enter the channel
number, and press OK.

6. Highlight Day and use the number buttons to enter month and day. To change the frequency
(once, daily, weekly, etc.), press the right arrow button.

7. Use the number buttons to enter the time you want to start recording. Press the right arrow
button to change the a.m./p.m. setting. Use the number buttons to enter the time you want the
Digital Media Recorder to stop recording. Press the right arrow button to change a.m./p.m. setting.

8. You can change the quality of the recording by pressing the right arrow button. The better the
quality, the more space the recording takes up on the Digital Media Recorder’s hard disk drive. Press
OK to confirm the quality recording setting.

9. When you’re finished, highlight Keep and press the OK button.

Note: The Digital Media Recorder’s clock must be set in order for Timer Recordings to work properly.

Содержание Scenium DRS7000N

Страница 1: ...User s Guide DRS7000N Digital Media Recorder User s Guide ...

Страница 2: ...communications However there is no guarantee that interference will not occur in a particular installation If this equipment does cause harmful interference to radio or television reception which can be determined by turning the equipment off and on the user is encouraged to try to correct the interference by one or more of the following measures Reorient or relocate the receiving antenna Increase...

Страница 3: ...1 Regional Coding 32 Using Different Menus 32 How to Load and Play Discs 32 Search Options 33 Playback Options 33 Using the On Screen Info Display 34 Time Display 35 Selecting a Title 35 Selecting a Chapter 35 Selecting Subtitles 35 Repeat Feature 36 Changing the Audio Language 36 Changing the Camera Angle 37 Play Mode Feature Audio CD only 37 IntroScan Audio CD only 38 PlayBack Control PBC Video ...

Страница 4: ...usical or sound content only MP3 discs are CDs that contain MP3 files This player is also capable of playing CDs that contain JPEG files Video CD discs Like DVD video discs Video CDs contain picture and sound content The difference is the amount of information that can be stored on the disc VCDs typically have lower picture and sound quality than DVD discs Some discs may not be compatible due to l...

Страница 5: ...e use the following chart to determine which connection is best for you Turn to the appropriate page for specific instructions Components Cables Needed Connection Go to Title Coaxial TV VCR 4 Audio video S Video optional Coaxial TV VCR 6 Audio video cable box S Video optional Coaxial TV satellite 8 Audio video receiver S Video optional Connecting an audio receiver After you connect the Digital Med...

Страница 6: ...n the connection shown above follows To watch one program while you record another To play a disc or a show you ve recorded to the Digital Media Recorder s hard disk drive To play a videotape Tune the TV to its Input 1 channel or Vid 1 channel Tune the Digital Media Recorder to the channel you want to record and press RECORD Use the buttons on the TV or the TV s remote control to tune to the chann...

Страница 7: ... CABLE ANTENNA For more information about the other INPUT jacks on the back of the Digital Media Recorder go to page 54 Connect the Digital Media Recorder to the TV 4 You need to connect cables to the Digital Media Recorder s OUTPUT jacks to the TV s INPUT jacks in order to see the content from the Digital Media Recorder whether it s a TV program something you recorded to the hard disk drive or a ...

Страница 8: ...rogramming is a regular TV show a program you saved to the Digital Media Recorder s hard disk drive a videotape you re playing in the VCR or a disc you re playing in the Digital Media Recorder If you don t know how to access Video Input Channels on your TV go to page 16 for help A general explanation based on the connection shown above follows To watch one program while you record another To play ...

Страница 9: ...s step and proceed to step 3 3 Connect the Digital Media Recorder to the TV You need to connect cables to the Digital Media Recorder s OUTPUT jacks to the TV s INPUT jacks in order to see the content from the Digital Media Recorder whether it s a TV program something you recorded to the hard disk drive or a disc you re playing 3a Connect the audio cables A set of audio video cables was packed with...

Страница 10: ...he one pictured here The back of your satellite receiver might look different than the one pictured here 1 1 2b 2b 2a 2a 3b 3b 3a 3a 4 4 To watch TV satellite programming To watch TV satellite programming with the Digital Media Recorder turned off Note You won t be able to pause programming or record to the Digital Media Recorder To play a disc or a show you ve recorded to the Digital Media Record...

Страница 11: ...o the corresponding Audio Input jacks on your TV sometimes labeled AUDIO IN L and R 3b Connect the video cable The cables you use for the video determine the quality of the picture you ll see on your TV when you re playing DVDs For more information about cables and signal quality go to page 56 Connect the video cable yellow to the OUTPUT COMPOSITE VIDEO jack on the back of your Digital Media Recor...

Страница 12: ...s 1 Connect the left and right audio cables to your audio video receiver and to the OUTPUT AUDIO L left white and R right red jacks on the back of your Digital Media Recorder 2 If you have a Dolby Digital or DTS receiver use one of the DIGITAL AUDIO jacks to connect the receiver to the Digital Media Recorder You must also adjust the Digital Output setting go to page 45 for information Note The DIG...

Страница 13: ...f the remote sensor that s on front of the cable box or satellite receiver Some cable boxes and satellite receivers have the remote sensor labelled but some don t If you see the remote sensor label on your cable box or satellite receiver go to step 7 sometimes it s labeled IR or remote or sensor If you don t see a remote sensor label on your cable box or satellite receiver go to step 3 3 Turn off ...

Страница 14: ...roscan just press the INPUT button to get to the Video Input Channel Note You can program your remote to operate most brands of remote controllable TVs Instructions are on page 19 2 Press the DVD button on the remote control to put it in the correct mode and turn on the Digital Media Recorder OPEN INPUT LIVE ANTENNA DVD ON OFF TV VCR AUDIO AUX SAT CABLE CH ANGLE MUTE CH ZOOM GO BACK OK INFO GUIDE ...

Страница 15: ...ows are on TV in your area In order to see program listings you need to complete the following steps a First identify your TV s location Use the arrow buttons to select your country and press OK Use the number buttons on the remote to enter your zip code or postal code and press OK b The next series of screens asks you about your cable setup Follow the on screen instructions If you don t have a ca...

Страница 16: ...Digital Media Recorder will perform a box test follow the on screen instructions 5 Channel Search The Digital Media Recorder automatically scans the signal coming through the cable connected to the RF ANTENNA CABLE INPUT or the INPUT jacks and prepares the channel list The channel list determines what channels appear when you press the channel up and down buttons A progress indicator appears on th...

Страница 17: ...ad of data is complete you should leave your Digital Media Recorder off overnight If you use a cable box be sure to leave it on Downloads occur several times a day The Digital Media Recorder must be turned off for the GUIDE Plus system data to download The Universal Remote Control packed with the Digital Media Recorder operates most RCA GE Proscan and Scenium TVs It is also capable of being progra...

Страница 18: ...a Recorder s Menu System page 41 Since this product can do a lot of neat stuff there are many on screen menus Chapter 5 describes the menus and why you would want to use them Chapter 6 Additional Information page 49 If you re having trouble go to Chapter 6 It includes troubleshooting information the product s warranty accessories you might want to purchase and an overview of the jacks and controls...

Страница 19: ...o operate your TV Programming the remote to operate other components Graphics contained within this User s Guide are for representation only Some of the menu screens buttons and display messages might be different in your product than they appear in this book The on screen help text provides the most current operational information ...

Страница 20: ...ons as a Satellite Receiver button AUDIO Must be programmed in order to operate some brands and types of audio equipment AUX Program a second TV VCR satellite receiver or cable box to this button CH Goes to the next channel in the channel list Advances to the next chapter or track when you re playing discs CH Goes to the previous channel in the channel list Goes back to the preceding chapter or tr...

Страница 21: ...the screen so you can zoom in on details Find out if the remote can operate your TV This remote control is designed to operate most RCA GE and Proscan TVs 1 Press the TV button 2 Press the ON OFF button if the TV turns on or off this remote will operate the TV 3 If that doesn t work you can try programming the remote by following the instructions below Programming the Remote to Operate your TV The...

Страница 22: ...062 1071 1072 1073 1162 1181 1207 1088 1130 1131 1132 1133 1134 1183 1219 1235 Magnavox 1004 1006 1008 1019 1062 1068 1069 1075 1076 1077 1088 1130 1131 1132 1133 1134 1183 1219 1235 Majestic 1083 Marants 1062 Marantz 1004 1006 1062 1078 Megatron 1006 1059 Memorex 1001 1006 1082 1083 1162 MGA 1004 1005 1006 1019 1022 1051 1079 1080 1082 Midland 1054 1151 1171 1172 1181 Mitisubishi 1004 1005 1006 1...

Страница 23: ...uarter 2011 Hi Q 2023 Hitachi 2055 2056 2057 2107 2111 2120 2122 Instant Replay 2021 JCPenney 2009 2010 2011 2013 2014 2021 2022 2055 2056 2058 2059 2060 2107 2118 JCL 2021 Jensen 2055 2056 2111 JVC 2009 2010 2011 2018 2111 2123 Kenwood 2009 2010 2011 2016 2018 2111 2123 KLH 2061 Kodak 2014 2021 Lloyd 2026 Logik 2061 LXI 2014 Magnavox 2021 2022 2062 2063 2104 2105 2108 2124 Magnin 2013 Marantz 200...

Страница 24: ...53 Antronix 5008 5009 Archer 5008 5009 5010 Cabletenna 5008 Cableview 5008 Colour Voice 5012 5013 Comtronic 5014 Contec 5016 Eastern 5017 GC Electronics 5009 GE 5000 5001 Gemini 5018 5019 General Instrument 5003 Hamlin 5020 5021 5022 5028 5035 5045 Hitachi 5003 Jerrold 5003 5018 5023 5024 5046 5053 Magnavox 5025 Memorex 5026 Movie Time 5027 NEC 5005 NSC 5027 Oak 5016 5029 Panasonic 5048 5052 Phili...

Страница 25: ... of RF Splitter Record a program to the hard disk drive while you play another program from the hard disk drive What you can t do Record a program while you re pausing live TV Save a program to the hard disk drive once you ve paused it Record copyrighted production DVD movies to the hard disk drive Simultaneously record programs content to the Digital Media Recorder s hard disk drive from two chan...

Страница 26: ...u must watch the program continuously you can t change channels and then come back later because the hard disk drive records the signal continuously i e if you pause channel 13 for 5 minutes change to channel 6 and watch it for 15 minutes that is exactly what is stored on the hard disk drive the 5 minutes of channel 13 you paused and the 15 minutes of channel 6 Once a program is paused you can t s...

Страница 27: ... to it DON T press the RECORD button 4 To change the frequency of the recording one time daily weekly etc go to the GUIDE Plus Schedule menu see page 30 for more info Note If recording that you set up through the GUIDE Plus system conflicts with a timer recording that you set up via the Digital Media Recorder s Recording menu the Timer recording you set up in the Digital Media Recorder s Recording...

Страница 28: ...ia Recorder The amount of time it takes for the files to copy varies Copying music or pictures from a compact flash card You must use a Class Compatible Mass Storage Device for purchasing information go to page 59 in order to copy files via the USB input Note The USB input is not compatible with computer networking devices and is only designed to be used with compatible card readers 1 Connect the ...

Страница 29: ... files in the folder appear Notes Only true MP3 files can be played and or copied Some MP3 players use software that converts MP3 files to other formats such as MPX The Info Display isn t available for MP3 files Playing back Pictures JPEG files that you ve saved to the hard disk drive Follow the instructions for Playing back programs you ve recorded above but choose Pictures from the main menu ins...

Страница 30: ...tton the Listings Guide appears by default 3 Use the left and right arrow buttons to access other menus in the Menu bar Notes The GUIDE Plus system screens illustrated in this book are representations of what you are likely to see Not all channels programs and GUIDE Plus information depicted will be available in your area New features and options can be downloaded to the GUIDE Plus system so these...

Страница 31: ...tings Sort The Sort menu lets you browse programs by different categories such as Sports Movies or Children s programs alphabetical order A B C is the default listing when you access the Sort menu When the programs are listed on the screen after you ve sorted by a category use the Action buttons to schedule a watch timer or a record timer Listings Guide The Listings Guide appears each time you ent...

Страница 32: ...motional information box You can view a list of all advertisements and promotions by selecting the Promotions menu from the Menu bar Schedule The Schedule menu allows you to alter the timers you have scheduled via the Schedule menu To change a Watch or Record Timer highlight the program and use the Action buttons Remove Press the 1 button on the remote to remove the program from the Schedule menu ...

Страница 33: ...o Display Playing MP3 discs Viewing JPEG files Graphics contained within this User s Guide are for representation only Some of the menu screens buttons and display messages might be different in your product than they appear in this book The on screen help text provides the most current operational information DVD PVRpart2_8 26 8 26 02 10 09 AM Page 31 ...

Страница 34: ...ing the On screen Info Display Playing MP3 discs Viewing JPEG files Graphics contained within this User s Guide are for representation only Some of the menu screens buttons and display messages might be different in your product than they appear in this book The on screen help text provides the most current operational information ...

Страница 35: ...OSE button the disc tray opens 3 Place a disc gently into the tray with the disc s label facing up double sided discs have content on both sides so you can place either side up 4 Press the OPEN CLOSE or PLAY button The disc tray closes The Digital Media Recorder reads the disc s table of contents and then one of three things happens depending on how the disc was programmed The disc starts playing ...

Страница 36: ...N button on the remote the disc automatically repeats the last 10 seconds of the movie Similarly press the ADVANCE button to go forward approximately 30 seconds Playback options Many of your Digital Media Recorder s playback features are accessed through the Info Display described on pages 32 through 37 Additionally with some discs you can use the Zoom Feature to see details of an image Zoom 1 Whi...

Страница 37: ...vailable for the disc you re playing The invalid symbol appears on the screen when you press a button that doesn t have any function To make the Info Display disappear from the screen press INFO on the remote control Time display page 35 Chapter page 35 Audio page 36 Angle page 37 Title page 35 Subtitles page 35 Repeat page 36 Text will appear here as you highlight different icons to help you use ...

Страница 38: ...t to go to in that title You must use two digits for each field For example if you enter 01 35 12 playback will start one hour 35 minutes and 12 seconds into the title Note For Audio CDs the time displayed refers to the track that s playing Selecting a Title on DVDs or a Track on CDs Some discs contain more than one title For example there might be four movies on one disc each movie might be consi...

Страница 39: ...at Don t fast forward you must let the disc play in standard playback mode to set the B point the ending point of the segment Press OK to set the B point the segment you marked will play repeatedly until you turn off the Repeat feature 4 To turn off the Repeat feature highlight the Repeat icon and press the up arrow button on the remote until Repeat Mode Standard appears at the bottom of the Info ...

Страница 40: ...ch you want the tracks on the CD to play There are three Play Modes Standard the tracks play in the same order as listed on the CD starting with track 1 This is the default play mode Random the tracks on the CD play in a random order Program the tracks play in the order you designate To use the Program play mode you must set up the order in which you want the tracks to play in the Digital Media Re...

Страница 41: ...rs 2 Use the arrow buttons to highlight the IntroScan icon 3 Press OK the first 20 seconds of each track starts playing Playing Video CDs VCDs Playback Control PBC Use the arrow buttons to highlight the Playback Control icon Press the up or down arrow button to go back and forth between On and Off Playback Control enables you to access the VCD s menu if it has one ...

Страница 42: ...on t be able to use your Digital Media Recorder while MP3 or JPEG files are being saved to the hard disk drive Note There isn t an Info Display when playing MP3 files Chapter 4 Playing Discs MP3s Playing MP3 Discs MP3 MPEG 3 which stands for Motion Picture Experts Group Layer 3 meaning the third layer of information is a format used to compress digital audio Since the audio is compressed it takes ...

Страница 43: ...es There isn t an Info Display when you re playing JPEG files You can t play other types of pictures in the Digital Media Recorder only JPEG files If the Digital Media Recorder isn t reading the disc one or more of the files might be too large Recommended size is less than 2MB megabytes Saving JPEG files to the hard disk drive 1 Press MENU the main menu appears 2 Highlight Disc and press OK 3 High...

Страница 44: ...nu Recordings Menu Setup Menu Memory Card Menu Using the Parental Control Feature Graphics contained within this User s Guide are for representation only Some of the menu screens buttons and display messages might be different in your product than they appear in this book The on screen help text provides the most current operational information ...

Страница 45: ...e 43 for details Video shows you the programs that are stored on the Digital Media Recorder s hard disk drive the content you ve recorded Video refers to content that has both audio and video like a TV show Go to page 44 for details Music lists the files and folders of MP3 music you ve copied to the Digital Media Recorder s hard drive Go to page 44 for details Pictures lists files and folders of J...

Страница 46: ...up a smaller portion of the screen vertically The movie might appear with black bars at the top and bottom of the screen 16 x 9 Choose this setting if your Digital Media Recorder is connected to a widescreen TV If you choose this setting and you don t have a widescreen TV the images on the screen might appear distorted due to vertical compression If you play a disc recorded in 4 x 3 format on a wi...

Страница 47: ...s stored on the hard drive rename them or delete them For more information about JPEG files go to page 40 Recordings The Recordings menu contains special settings for recording to the hard disk drive Timer Sets up automatic recordings Timer recordings are especially useful when you have a favorite program that you want to record every week and or every day If you use a cable box the cable box must...

Страница 48: ...o Stereo SAP Second Audio Program If you select SAP and the program you record is available with SAP audio both SAP and mono audio will be recorded During playback you can decide which audio you want to play SAP on the right channel or Mono on the left channel Languages Selects different languages for on screen menus subtitles and audio language of certain discs Display the language that appears w...

Страница 49: ...n screen instructions Note In order for Timer Recordings to work you must set the clock to the correct time and date Channel List Enables you to change what channels are accessed when you press the Digital Media Recorder s channel up and down buttons if you delete a channel from the channel list you can still access it by using the number buttons on the remote GUIDE Plus Enables you to change sett...

Страница 50: ...e and press OK 5 To return to the previous menu press the left arrow button Once the player is locked you ll need to enter the password everytime you access the menu Note The player is shipped without any rating limits set You need to set Ratings Limits go to page 48 for instructions in order for the player to prevent people from playing discs with certain ratings Using Parental Controls You can s...

Страница 51: ... that is rated To set Ratings 1 From the Digital Media Recorder s main menu select Setup and press OK the Setup menu items appear 2 Since Parental Control is already highlighted just press OK the Parental Control menu items appear 3 Highlight Rating Limits and press OK the 8 level rating list appears 4 Use the up and down arrow buttons to move the bar to the rating level you find acceptable Rating...

Страница 52: ...ation of Input Jacks and Cables Limited Warranty Accessory Information Graphics contained within this User s Guide are for representation only Some of the menu screens buttons and display messages might be different in your product than they appear in this book The on screen help text provides the most current operational information ...

Страница 53: ... the remote The menu is displayed in a foreign language The Language menu Player Menus is set to that language Go to the Setup menu and choose Languages in Spanish shown as Idiomas in French as Langues Display option Highlight the language you prefer and press OK Disc won t eject When you put a disc into the player the player may take up to 15 seconds to read the disc You won t be able to eject th...

Страница 54: ...t not all High Definition Televisions HDTVs and multimedia monitors use progressive scan Subtitle and or audio language is not the one selected from the initial setting If the subtitle and or audio language does not exist on the disc the disc s priority language will be selected instead Set the subtitle and or audio language manually through the Info Display or the Digital Media Recorder s menu sy...

Страница 55: ...MP3 FILES The following recommendations can t be taken as a guarantee that the Digital Media Recorder will play MP3 recordings or as an assurance of sound quality Certain technologies and methods for MP3 file recording on CD R discs prevent optimal playback of these files on your product Make sure the file is a true MP3 file You can only play true MP3 files in the Digital Media Recorder some produ...

Страница 56: ...vents for cleaning Wipe the cabinet with a soft cloth Formation of Condensation Due to sharp changes in temperature and humidity condensation may form if warm air comes in contact with any cold parts inside the player When condensation forms inside the player the player may not operate correctly If this occurs leave the player at room temperature until the inside of the player becomes dry and oper...

Страница 57: ... TV Explanation of Jacks from left to right RF ANTENNA IN Connect an RF Coaxial cable from an off air antenna cable box or cable outlet to this jack The cable is sending the programming from the source to the DVD Recorder Our connections show the cable coming from an RF Splitter which enables you to watch one program on TV while you record another to your Digital Media Recorder s hard drive INPUT ...

Страница 58: ...rder STANDBY ON Turns the digital media recorder on and off INPUT Accesses different Video Input Channels the channel to which you tune the DVD Recorder so you can see the signal coming from a component that is connected with cables to the different Input Jacks on the DVD Recorder For example if your camcorder is connected to the Audio and Video Input jacks on the front of the Digital Media Record...

Страница 59: ...coaxial cable the type used to plug the cable feed into a TV S VIDEO R L AUDIO OUT VIDEO OUT Component Video Y Pb Pr Jacks and Cables The Y Pb Pr jacks provide optimum picture quality because the video is separated into three signals two signals are dedicated to the color portion of the image and the other signal is dedicated to the black and white part of the image To ensure maximum picture quali...

Страница 60: ... not received within 14 days the suggested retail value of the unit will be charged to your credit card This amount will be credited less a handling fee if the unit is subsequently received 4 Ship your defective unit back to us using the replacement unit s carton Shipping instructions will be included on the carton along with your SR number which will allow you to easily ship the unit back to us M...

Страница 61: ... CREATE A GUARANTY OR IN ANY WAY INCREASE THE SCOPE OF THIS WARRANTY REPAIR OR REPLACEMENT AS PROVIDED UNDER THIS WARRANTY IS THE EXCLUSIVE REMEDY OF THE CONSUMER THOMSON MULTIMEDIA INC SHALL NOT BE LIABLE FOR INCIDENTAL OR CONSEQUENTIAL DAMAGES RESULTING FROM THE USE OF THIS PRODUCT OR ARISING OUT OF ANY BREACH OF ANY EXPRESS OR IMPLIED WARRANTY ON THIS PRODUCT THIS DISCLAIMER OF WARRANTIES AND L...

Страница 62: ...sa MasterCard or Discover Card ready and call the toll free number listed below Use this number only to place an order for accessory items 1 800 338 0376 You can buy some accessories on line at www rca com OPEN INPUT LIVE ANTENNA DVD ON OFF TV VCR AUDIO AUX SAT CABLE CH ANGLE MUTE CH ZOOM GO BACK OK INFO GUIDE CLEAR MENU 1 2 3 4 5 6 7 8 9 0 AGAIN ADVANCE REVERSE FORWARD PLAY RECORD PAUSE STOP VOL ...

Страница 63: ...This page intentionally left blank ...

Страница 64: ...This page intentionally left blank ...

Страница 65: ...OM 1590938A Rev 1 082602 Please do not send any products to the Indianapolis address listed in this manual or on the carton This will only add delays in service for your product Thomson multimedia Inc 10330 North Meridian Street Indianapolis IN 46290 THOMSON Visit our website at www rcascenium com ...

Отзывы: