background image

Содержание MMC101

Страница 1: ......

Страница 2: ...the screen Such images include network Iogos phone numbers and video games This damage is not covered by your warranty Extended viewing of channels displaying these images should be avoided Cable TV Installer This reminder is provided to call your attention to Article 820 40 of the National Electrical Code Section 54 of the Canadian Electrical Code Part 1 which provides guidelines for proper groun...

Страница 3: ...nitor and a VCR 10 Viewing the VCR Input Channel 10 Monitor VCR and a Satellite Receiver 11 Viewing the Components 11 Monitor VCR Satellite Receiver and a DVD Player 12 Viewing the Components 12 A V Receiver Speakers 13 S VGA Video Inputs S VGA1 S VGA2 14 S VGA1 Input Connection Examples 15 Viewing the S VGA1 Input 15 S VGA2 Input Connection Example 16 Viewing the S VGA2 Input 16 Front Inputs 17 U...

Страница 4: ...el autotuning 24 LabeltheChannels 25 WhatNow 25 Using the Remote 27 Remote Buttons 28 Using the INPUT button 29 Programming the Remote 29 Testing the Remote 29 Programming the Remote 30 Using Automatic Code Search 30 Using Direct Entry 30 Using the remote to control a device 31 Modes of Operation 31 Front Panel 31 Remote Control Codes 32 Menus and features 33 Menus and Control Panels 34 Menus 34 E...

Страница 5: ...tings Limits Screen 42 Blocking Age based Ratings 43 Viewing Age based Ratings 44 Blocking Specific Content Themes 44 Viewing Specific Content Themes 45 V Chip Movie Rating Limit 46 Blocking Movie Ratings 46 Viewing Movie Ratings 46 V Chip Unrated Program Block 47 Channel Block 47 Front Panel Block 47 Lock Unlock Parental Controls 47 PIP Picture in Picture Operation 48 PIP Buttons 48 Using the PIP...

Страница 6: ...n screen is not centered 53 Horizontal or diagonal lines on screen 53 Black Box appears on the screen 53 No sound picture okay 54 Can t select certain channel 54 Turns off while playing 54 Noisy stereo reception 54 No picture no sound but TV is on 54 Sound okay picture poor 54 Care and Cleaning 54 RCA MultiMedia Monitor Limited Warranty 55 Radio Interference 59 Index 60 4 ...

Страница 7: ...emote The remaining sections discuss the menus and features and include a Reference section which contains troubleshooting tips care and cleaning instructions accessory ordering information and your warranty CONNECTIONS SETUP V V V Check out the notesthat have been added throughout the manual in these Tip Boxes There are some important tips that will help you get the most from your monitor 5 ...

Страница 8: ...urges Connect all components before plugging any power cords into the wall outlet Turn off the monitor and or component before connecting or disconnecting any cables Make sure all antennas and cables are properly grounded Refer to the Important Safeguards sheet packed with your monitor ANTENNA CABLE IN The ANTENNA CABLE IN jack lets you connect a screw on or push on antenna or cable lead Use this ...

Страница 9: ...nect the video jacks This method separates the video signals into two separate signals one for color the other for brightness This helps prevent the signal from degrading and results in a sharper image V_OEO AUDIO L R _ VIDEO _ _ENL RC_ED VIEW 0 0 RCA cable S Video cable You can use audio video and s video jacks to connect devices such as VCRs Satellite receivers DVD players Laserdisc players Camc...

Страница 10: ...ks to connect devices such as compatible AN receivers compatible recording equipment PCwith a compatible graphics card AUDIO COMPONENT VIDEO INPUTS These jacks let you connect a compatible DVD player Unlike a single video input component video maintains the video signal as three separate signals The component video connection provides optimum quality The audio jacks provide stereo sound It is esse...

Страница 11: ...nal speakers INT sends audio only to the monitor s internal speakers Audio Output Tips You may want to adjust the monitor s tone control and audio processor settings to enhance the audio output when connecting an A V receiver to the Variable output jacks You can turn off the monitor s internal speakers by using the Speaker control in the Audio menu See the Audio Menu section for more information R...

Страница 12: ... on the VCR 2 Connect a coaxial cable to the VCR s antenna output and to the ANTENNA CABLE INPUT jack on the monitor 3 Use RCA cables to connect the VCR s audio video output to the INPUT 1 input on the monitor Viewing the VCR Input Channel 1 Turn on the monitor and the VCR 2 Press the TV button on the remote control 3 Press INPUT on the remote to scroll through the video inputs Direct Channel Tuni...

Страница 13: ...nput on the monitor If your satellite receiver has an S Video output you can make the video connection by using the S Video jacks instead RECEIVER Viewing the Components 1 Turn on the monitor and the component s you want to view 2 Press the TV button on the remote control 3 Press the INPUT button on the remote control to scroll through the video inputs The VCR can be viewed on the VID 1 input chan...

Страница 14: ... 3 input on the monitor If your DVD player has an S Video output you can make the video connection by using the S Video jacks instead Component Video If your DVD player has a component video output we recommend you use the component video input on the monitor instead of the standard video or s video connection fDVDPLAYER Viewing the Components 1 Turn on the monitor and the component s you want to ...

Страница 15: ...e control VARIABLE provides variable level audio output Volume levels are controlled by the volume controls on the monitor and monitor remote control 2 Use speaker wire to connect the monitor to external speakers The EXTIINT switch beside the jacks let you turn the monitor s internal speakers on or off EXT sends audio to external and internal speakers INT sends audio only to the monitor s internal...

Страница 16: ...sive Make sure that you appropriately adjust the display properties for your computer You can change the picture mode settings for the S VGA inputs by using the Picture Mode menu To access the Picture Mode menu press TV and then FETCH on the remote Computer Text is the default setting for the S VGA 1 input This input and setting is recommended for most PC connections when viewing text and graphics...

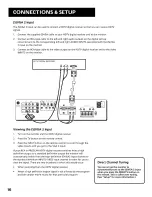
Страница 17: ... the monitor B_PUTER i cableStereo mini jack OO OO E The S VGA 1 input supports DDC2B and VESA DPMS when using an appropriate cable We recommend using the VGA cable supplied with this monitor BACK OF COMPUTER t Viewing the S VGA 1 Input 1 Turn on the monitor and the computer 00 0 2 Press the TV button on the remote control 3 Press the INPUT button on the remote control to scroll through the video ...

Страница 18: ...he remote control 3 Press the INPUT button on the remote control to scroll through the video inputs until you get to the VGA 2 input If your RCA or PROSCAN HDTV digital receiver switches from a high definition output to a standard definition output the monitor will automatically switch from the high definition S VGA2 input channel to the standard definition INPUT2 VlD2 input channel in order for y...

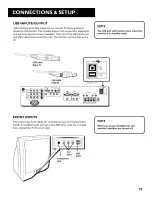
Страница 19: ... monitor acts as a hub to the PC I NOTE 1 The USB port will function even when the monitor is in standby mode USB cable type A USBcable type B _lc r i_L i IErqLARGED VIEW 1 _ FRONT INPUTS The monitor has front inputs for convenience one set of audiolvideo inputs a headphone jack and two client USB ports Look for a hinged door and gently lift the cover open NOTE When you plug in headphones the moni...

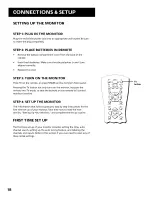
Страница 20: ...on not only turns on the monitor but puts the remote into TV mode so that the buttons on the remote will control monitor functions STEP 4 SET UP THE MONITOR The information that follows gives you step by step instructions for the first time set up of your monitor Take time now to read the next section Setting Up Your Monitor and complete the set up routine FIRST TIME SET UP The first time set up o...

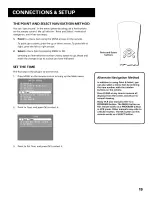
Страница 21: ...ve indicated SET THE TIME The first step in the setup is to set the time I Press MENU on the remote control to bring up the Main menu 2 Point to Time and press OK to select it Point and Select buttons Alternate Navigation Method In addition to using Point Select you can also select a menu item by entering the item number with the number buttons on the remote Press CLEAR at any time to remove all d...

Страница 22: ...NEL SEARCH The next step of the setup routine autoprograms channels into the channel list 1 Press MENU bring up the Main menu and then select Channel 2 From the CHANNEL menu shown below select Auto Channel Search The monitor will begin searching for channels and give you a progress report When the channel search is complete press OK on the remote to go back to the Channel menu 20 ...

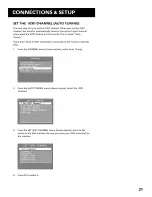
Страница 23: ...on the remote This is called Auto Tuning If you don t have a VCRI component connected to the monitor skip this step I From the CHANNEL menu shown below select Auto Tuning 2 From the AUTO TUNING menu shown below select Set VCR1 Channel 3 From the SET VCRI CHANNEL menu shown below point to the choice in the that matches the way you have your VCR connected to the monitor 4 Press OK to select it 21 ...

Страница 24: ...nt connected to the monitor skip this step 1 From the CHANNEL menu shown below select Auto Tuning 2 From the AUTO TUNING menu shown below select Set VCR2 Channel 2 Set VCR2 Channel 3 From the SET VCR2 CHANNEL menu shown below point to the choice in the that matches the way you have your VCR connected to the monitor 1 Not connected 4 Press OKto select it 22 ...

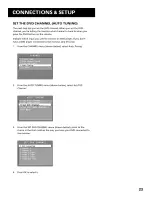
Страница 25: ...dicate which input you used to connect an DVD player If you don t have a DVD player connected to the monitor skip this step 1 From the CHANNEL menu shown below select Auto Tuning 2 From the AUTO TUNING menu shown below select Set DVD Channel 3 From the SET DVD CHANNEL menu shown below point to the choice in the that matches the way you have your DVD connected to the monitor 4 Press OK to select it...

Страница 26: ... satellite receiver a cable box or a digital set top converter If you don t have one of these components connected to the monitor skip this step 1 From the CHANNEL menu shown below select Auto Tuning 2 From the AUTO TUNING menu shown below select Set SAT CABLE Channel 3 From the SET SAT CABLE Channel menu shown below point to the choice in the that matches the way you have your satellite receiver ...

Страница 27: ... can be time consuming feel free to skip this step and come back to it later 2 Use the left and right arrows to point to the three different areas of the control panel called fields 3 Use the up and down arrows to scroll through the numbers and letters and select Yes or No in the Normal List field You may wish to refer to the call letters listed in your newspaper s TV section for ideas on labellin...

Страница 28: ......

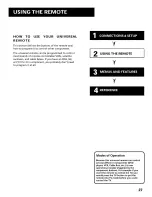
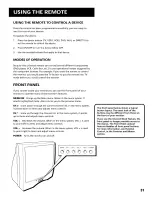
Страница 29: ...e boxes If you have an RCA GE or PROSC_AN component you probably don t need to program it at all 2 V USING THE REMOTE V V Modes of Operation Because this universal remote can control several different components DVD player VCR Cable Box etc it uses operational modes triggered by the component buttons For example if you want the remote to control the TV you would press the TV button to put the remo...

Страница 30: ...nd the monitor will wait 30 seconds before returning you to the original channel Press repeatedly to add more time CH or CH v Scans up or down through the current channel list Press once to change the channel up or down press and hold to continue changing channels VOL or VOL Decreases or increases the monitor s volume FETCH Brings up Picture Mode choice list Computer text or Video when tuned to VG...

Страница 31: ...CA ProScan and GE components use the WHO button to toggle through available channel lists and user profiles USING THE INPUT BUTTON Use the INPUT button to scroll through the available input channels and view components you have connected to the moniton 1 Press TV to place the remote in TV mode Make sure that the component you want to view is turned ON 2 Press INPUT to tune to an available input ch...

Страница 32: ...til the device turns off or you have searched through all of the codes There are 20 total sets of codes If the device does not turn off after pressing PLAY 20 times then the remote cannot control that particular device If the device you want to control doesturn off 1 Press and release REVERSE then wait 2 seconds Repeat this step until the device turns back ON 2 To finish press and hold STOP until ...

Страница 33: ...res MENUIOK Brings up the Main menu When in the menu system it selects highlighted items Also returns you to the previous menu CH v Scans down through the current channel list In the menu system it points down to items and adjusts menu controls CH Scans up through the channel list In the menu system it points up to items and adjusts menu controls rOE Decreases the volume When in the menu system VO...

Страница 34: ...14 2021 Ltoyd 2002 2026 Legik 2061 LXI 2014 Megnavox SO21 2022 2062 2063 2104 2108 2124 Magnin 2013 Marantz 2009 2010 20tl 2016 2018 2021 2058 2062 2064 Marta 2014 Masushita 2021 MEI 2021 Memorex 2002 2011 2013 2014 2021 2023 2026 2104 2131 MGA 2029 2065 2113 MGN Technology 2013 Midland 2053 Minolta 2066 2056 2107 Mitsubishi 2029 2066 2066 2065 2066 2067 2069 2070 2071 2072 2073 2074 2108 2113 212...

Страница 35: ...e features and menus of your monitor beginning with some information on using menus and control panels Each menu is then outlined and special features are detailed in order to help you get the most from your monitor V V MENUS AND FEATURES V 33 ...

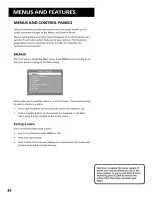
Страница 36: ...ain menu Menus take you to another menu or a control panel There are two ways to select a choice in a menu Point with the MOVE arrows and then select with MENU or OK Press a number button on the remote For example in the Main menu press 3 to go straight to the Screen menu Exiting a menu There are three ways to exit a menu Point to Go Back and press MENU or OK Press 0 on the remote Press CLEAR The ...

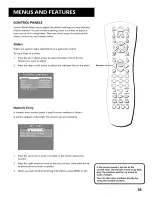
Страница 37: ...der Numeric Entry A numeric entry control panel is used to enter numbers or letters A pointer appears underneath the column you are changing Arrows VCR_ ON 0FF TV DVD VC_2 AUX DI_ECTV MUTE SIqp FETCH GO BACK GUIDE INFO MENU CLEAR I_EVERSE _LA FORWARI R CORD STOP PAUSE PIp SWA_2 CHCTI_L WHO OO 1 2 3 Press the up arrow to enter a number in the column above the pointer Press the right arrow to move t...

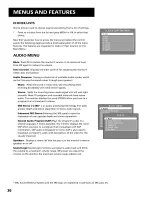
Страница 38: ...annels Most TV programs and recorded materials have stereo audio The monitor displays the word STEREOwhen you tune to a program that is broadcast in stereo SRS Stereo SRS is an audio processing technology that adds greater depth and stereo separation to stereo audio signals Enhanced SRS Stereo Enhances the SRSsignal to give the impression of even greater depth and stereo separation Second Audio Pr...

Страница 39: ...ays a choice list that lets you turn on the feature that automatically corrects the color of the picture This is especially useful for tracking realistic flesh tone colors as you switch from channel to channel Choose On or Off depending on your preference Auto Color is not available for VGA or component video Color Warmth Displays a choice list that lets you set one of three automatic color adjust...

Страница 40: ...ing captioning information If you are unsure of the differences among the modes you may prefer to leave the closed captioned mode set to CC1 which displays complete text of the program in the primary language in your area Picture Tilt Your monitor has an extra large picture tube which makes it vulnerable to the effects of the Earth s magnetic field You may need to adjust the picture tilt Use the l...

Страница 41: ...the Normal list are available when you scan up and down using the CH buttons Use the up and down arrows to indicate whether the channel number indicated is included Yes or is not included No in the Normal channel list Channel Labels Use the up and down arrows to enter a six character label for up to 45 channels Hold the button down to scroll quickly through the characters Auto Tuning Displays a ch...

Страница 42: ...2 INPUT 3 or Front Input jacks of the monitor and you want the monitor to tune to VID1 VID2 VID3 or FRNT input channel when you press the specified component button if you connect S video cables the channel marker displays SVID1 SVID2 or SVID3 Component Input DVD only Choose this if your DVD player is connected to the 3 component video jacks on the back of the monitor and you want the monitor to t...

Страница 43: ... the table below Age Based Description and Content Themes for Age Based Ratings Rating TV MA Mature Audience Only Specifically designed to be viewed by adults and may be unsuitable for children under 17 it contains one or more of the following content themes graphic violence V explicit sexual activity S or crude indecent language L TV 14 Parents Strongly Cautioned Contains some material that many ...

Страница 44: ...nd OK on your remote to change the status of a TV program rating or content theme from View to Block The following sections give you more details about how to change the status of TV program limits The Ratings Limits Screen Below is an example of where items are located within the Rating Limits screen Rating Field Lets you seIect from a list of age based ratings you can block or view Rating Status...

Страница 45: ...til TV PG appears since the highest rating you want the child to watch is TV G 4 Use the right arrow to move the yellow highlight to the rating status field 5 Press the up or down arrow to toggle between View and Block The status for the rating listed to the left and all higher ratings automatically changes to Block and B Rating status field When you change the status of a rating to Block the syst...

Страница 46: ...me for higher rated programs as well For example if you do not want your child to watch programs that have adult language L rated TV PG or higher then you could block out all programming TV PG and above containing adult language To block program content 1 Determine the lowest level of content you do not want the child to watch 2 3 4 5 Use the left and right arrows to highlight the Rating Field Use...

Страница 47: ...wn arrows to scroll through the age based ratings until the rating whose content theme you want to change to View appears 4 Press the right arrow to move the yellow highlight to a particular content theme status such as the B under language L corresponding with TV 14 5 Press the up or down arrows to change its status back to V Your child would then be able to watch programs with TV 14 adult langua...

Страница 48: ...ratings you must set NR to view separately to view NR movies 3 4 Press MENU or OK to return to the menu or exit the screen If Parental Controls are not locked you must lock them so the movie rating limits will take effect See the section Locking Parental Controls I You must remember to Lock Parental Controls for ratings limits to take effect J Viewing Movie Ratings After you block movie ratings yo...

Страница 49: ...annel Block If you do not the channel block will not take effect FRONT PANEL BLOCK Selecting this option lets you block disable or unblock enable the monitor s front panel The remote still tunes to any channel Front Panel Block can Keep children from watching TV when the parent is not present Keep small children from playing with the buttons When using this as a Parental Control method you should ...

Страница 50: ...tch channel control between the PIP window and the main picture USING THE PIP FEATURE While you may use PIP in different ways this basic PIP scenario should get you started While watching the TV follow these steps to use your VCR to supply the picture for PIR 1 Press the PIP button on the remote The PIPwindow appears on the screen 2 Turn on theVCR 3 4 S Press the TV button then press WHO INPUT unt...

Страница 51: ...bles If you use a cable box you may need extra equipment Contact your cable company for more information To see a different picture in the PIP window you must connect another video source like a VCR This connection requires audio video cables CHANNEL MARKER There are several indicators that come up when you press the TV INFO PIPor SWAP button This display is called the Channel Marker 12 01 Display...

Страница 52: ......

Страница 53: ...ormation that you don t have to know to use your monitor but may want to refer to from time to time It includes a specification sheet some connection examples a troubleshooting section the limited warranty an accessories order form and an index V V 51 ...

Страница 54: ...attslCh Dbx Broadcast Stereo Yes Second Audio Program Yes Srs I Sound Retrieval System Enhanced Speakers 2 2 25 X 5 High Compliance Channel Tuning Capability 181 Single tuner Picture in picture Yes Pip Swap And Move Yes Channel Labeling Yes Parental Control Yes Stereo Headphone Jack 3 5mm Stereo Mini jack Front AIV Input Composite L Mono l Right Universal Remote Backlit Plug Play Compatibility VES...

Страница 55: ...t in TV Mode Press the TV button so remote will control monitor Maybe batteries in remote are weak dead or installed incorrectly Try replacing batteries Note if you remove the batteries you may have reprogram the remote to control other components Remove batteries and hold number 1 for at least 60 seconds to drain the microprocessor inside the remote Release number 1 replace the batteries and if n...

Страница 56: ... switch on VCR Also check to make sure TV VCR switch on VCR is in correct position Sound okay picture poor Check antenna connections Try adjusting sharpness function to improve weak signals CARE AND CLEAN ING CAUTION Turn OFF your monitor before cleaning You can clean the monitor as required using a soft lint free cloth Be sure to occasionally dust the ventilation slots in the cabinet to help assu...

Страница 57: ...rrange for home service Show the Authorized Service Center Representative your sales receipt or other evidence of purchase date or first rental What your warranty does not cover Customer instruction Your Owner s Manual clearly describes how to install adjust and operate your monitor Any additional information should be obtained from your dealer Installation and related adjustments Signal reception...

Страница 58: ...ponents farther apart or need additional cables Antenna Cables VH81 3 ft VH82 6 ft VH89 6 ft Screw on Cable attaches to the round antenna connectors called 75 ohm F type on the back of your VCR or TM The ends screw onto the connectors for a secure connection Push on Cable attaches to the round antenna connectors called 75 ohm F type on the back of your VCR or TM Ends push on for a quick connection...

Страница 59: ...ral VCR Dubbing Cable 6 ft _tereo VCR Dubbing Cable 6 ft _ Video Cable 6 f0 _ Video Cable 12 ft Z way Signal Splitter mplified Antenna _emote Control CRK76TCL2 udio Video Adapter _urge Protector VH82 VH89 VH83 VH84 VH976 VH913 VH47 ANT200 240895 228449 SCTV160 6 95 5 95 5 95 9 95 7 95 8 95 3 95 49 95 39 95 4 35 49 95 Prices are subject to change without notice Total Merchandise Sales Tax We are re...

Страница 60: ...iling label of waiting Name Street United States and Canada Orders To place your order by phone have your Visa MasterCard or Discover Card ready and call the toll free number listed below between 8AM and 8PM EST Monday through Friday or between 9AM and 5PM EST Saturday Use this number only to place on order for accessory items listed on this order form 1 800 338 0376 To place your order by mail de...

Страница 61: ...terference by one or more of the following measures Reorient or relocate the receiving antenna that is the antenna for radio or television that is receiving the interference Change the position of the multimedia monitor with respect to the radio or television equipment that is receiving interference Move the multimedia monitor away from equipment receiving interference Plug the multimedia monitor ...

Страница 62: ...1 Speakers 13 VCR 10 Content Themes 41 Contrast 37 D DDC2B 15 DVD Channel 23 E Exiting a menu 34 External Speakers 9 F Fixed images 54 Front panel buttons 31 Front Panel Inputs 17 Front Panel Lockout 47 Input button 29 INPUT1 40 L Labels 25 39 Limited Warranty 55 M Menus 34 Choice Lists 36 Control Panels 35 exiting 34 Numeric entzy 35 Sliders 35 Mono 36 Mute 36 P Parental Controls Channel Block 47...

Страница 63: ...9 UHF VHF Antenna 39 Sleep Timer 40 Stereo 36 49 T Time Current 49 Time setting 19 Tint 37 Tone Controls 36 Troubleshooting 53 U USB Inputs Output 17 V V Chip Age Based Ratings 41 Blocking Movies 46 Content themes 41 V chip 41 VCR remote codes 32 VCR1 Channel 21 39 VCR2 Channel 22 39 VESA DPMS 15 Video Inputs viewing 7 B Video Noise Reduction 37 Viewing Video Inputs 7 8 61 ...

Страница 64: ...10330 North Meridian Street Indianapolis IN 46290 01999 Thomson Consumer Electronics Inc Trademark s Registered Marca s Registrada s Printed in USA TOCOM 15351800 100 RECYCLED PAPER MINIMUM 40 POST CONSIJM R _ _j PRINTED WITHI SOYINK ...

Отзывы: