20
3. Configuring the Wireless Subscriber Gateway
3-1 Setting
Wizard
Step 1:
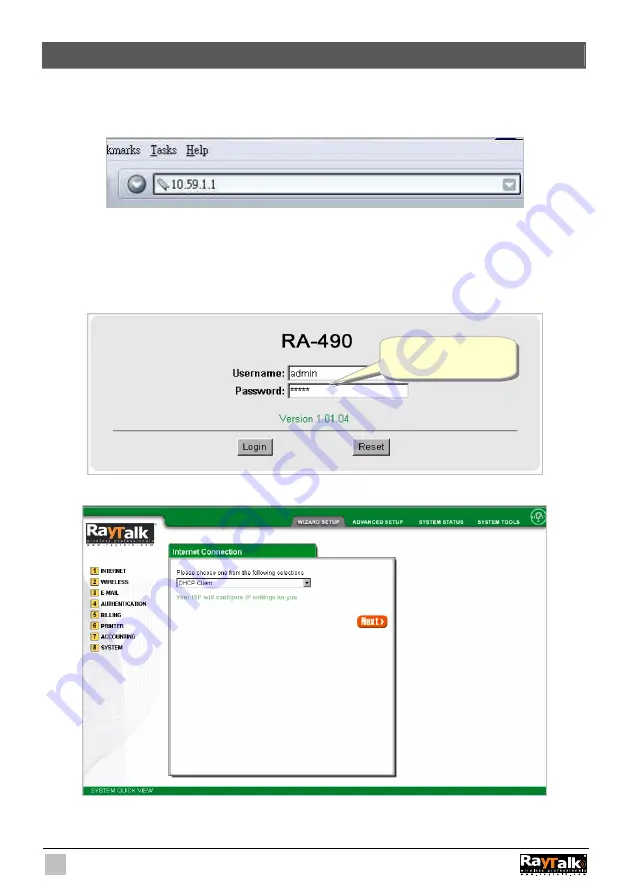
Start your browser, and then enter the factory default IP address
10.59.1.1
in your browser’s
location box. Press
Enter
.
Figure 3-1 RA-490 Web Browser Location Field (Factory Default)
Step 2:
The Wireless Subscriber Gateway configuration tools menu will appear. In the Username and
Password field, type the factory default user name
admin
and password
admin
and click
Login
. If you are first time setting the system, the wizard setup screen will appear. You will be
guided, step-by-step, through a basic setup procedure.
Figure 3-2 Configuration Tools Menu
Figure 3-3 Wizard Setup Screen
Username:
admin
Password:
admin
Содержание RA-490
Страница 1: ......
Страница 2: ...2 RA 490...
Страница 37: ...37 Figure 3 20 Example Account Printout...
Страница 42: ...42 Figure 3 27 Example Post paid Printout...
Страница 45: ...45 3 2 1 System Define the Wireless Subscriber Gateway System configuration Figure 3 30 System Setting Screen...
Страница 59: ...59 3 2 5 RADIUS Authentication Figure 3 45 Authentication Setting Screen...
Страница 71: ...71 Figure 3 58 Account Generator Panel Figure 3 59 Web based Account Generator Printout Time to Finish...
Страница 72: ...72 Figure 3 60 PC connected Printer Printout Time to Finish...
Страница 73: ...73 Figure 3 61 Web based Account Generator Printout Accumulation...
Страница 77: ...77 Below is an example of the account printout Figure 3 67 Account Printout...
Страница 79: ...79 Below is an example of the account printout Figure 3 69 Account Printout...
Страница 88: ...88 3 2 9 Keypad Figure 3 79 Keypad Setting Screen...
Страница 95: ...95 Network Report Printout Figure 3 91 Network Report Printout Press ABCAB...
Страница 102: ...102 Figure 3 102 Logo Setting Screen Figure 3 103 Login Page...
Страница 109: ...109 Figure 3 116 Account Generator Printer Printout Figure 3 117 Account Generator Printer Printout...
Страница 111: ...111 Figure 3 120 Billing Setting Screen...
Страница 113: ...113 Figure 3 122 Service Selection Page Setting Screen iValidate net...
Страница 114: ...114 Figure 3 123 Service Selection Page Setting Screen Secure Pay...
Страница 115: ...115 Figure 3 124 Service Selection Page Authorize net...
Страница 116: ...116 Figure 3 125 Service Selection Page iValidate net...
Страница 117: ...117 Figure 3 126 Service Selection Page SecurePay...
Страница 118: ...118 Successful Page Figure 3 127 Successful Page Setting Screen...
Страница 145: ...145 3 2 22 Wireless Figure 3 154 Wireless Setting Screen...
Страница 151: ...151 Figure 3 158 System Status Screen...
Страница 167: ...167 3 5 2 Glossary of Terms Figure 3 189 Glossaries of Terms...


