background image

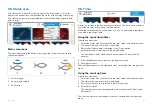
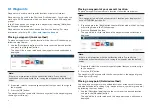
Note:

If there is no interaction with the notification within 5 seconds the
notification will automatically close, saving the waypoint with the default
values.

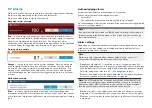
2. Press the

[Down]

button.

The ‘new waypoint options’ menu is displayed.

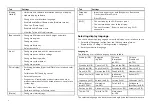
3. You can select the waypoint symbol to view a list of available symbols

and then select the symbol you want to use.

4. You can select the

[Name:]

field to open the onscreen keyboard and

customize the name of your waypoint.

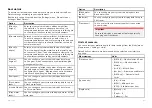
5. You can select the

[Group:]

field to open the list of waypoint groups and

either choose an existing or create a

[New group]

.

6. You can also add notes about the waypoint by selecting the

[Comment:]

field and using the onscreen keyboard.

7. When you have finished customizing the waypoint details, press the

[OK]

button to save the details.

8. You can select

[Goto]

to begin navigation to the new waypoint.

Note:

Selecting

[Delete]

will delete the waypoint.

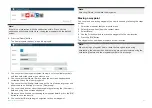
Moving a waypoint

You can move an existing waypoint to a new location by following the steps
below.
1. Select the waypoint that you want to move.
2. Select

[more options]

from the context menu.

3. Select

[Move]

.

4. Use the Directional pad to move the waypoint to the new location.
5. Press the

[OK]

button.

The waypoint has now been moved to its new location.

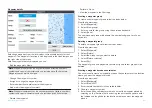
Note:

When moving a waypoint from a route that was generated using
autorouting, the new position and route leg are not recalculated using the
autorouting feature and the waypoint symbol will not change.

Waypoints, Routes and Tracks

53

Содержание LIGHTHOUSE SPORT 3.18

Страница 1: ...2022 Raymarine UK Limited 81388 Rev 10 Document number 12 2022 Date English en US OPERATION INSTRUCTIONS LIGHTHOUSE SPORT 3 18 ELEMENT DISPLAY OPERATING SYSTEM...

Страница 2: ......

Страница 3: ...nt no more than three copies of this manual for your own use You may not make any further copies or distribute or use the manual in any other way including without limitation exploiting the manual com...

Страница 4: ......

Страница 5: ...s 22 Switching on and off at the breaker 22 Switching active app 23 4 2 Getting started 23 Startup wizard 23 First power up Limitation on Use acknowledgement 24 Identifying engines 24 Sonar transducer...

Страница 6: ...o the display 35 Raymarine app 36 Pairing a Quantum radar scanner 38 CHAPTER 5 HOMESCREEN 39 5 1 Homescreen overview 40 Accepting the Limitations on Use 40 Available apps 40 Assigning app pages to Qui...

Страница 7: ...verview 70 Supported electronic navigational charts 70 LightHouse charts 71 7 3 Automatic Identification System AIS support 73 AIS target context menu 74 AIS dangerous targets 74 AIS vectors 74 AIS ta...

Страница 8: ...tory 103 8 7 Fishfinder sensitivity controls 103 8 8 Sonar transducer calibration 104 Depth offset 104 Configuring transducer settings 104 8 9 Fishfinder settings menu 105 CHAPTER 9 DASHBOARD APP 110...

Страница 9: ...controls 129 10 9 Radar settings menu 129 Bearing alignment 132 CHAPTER 11 TROUBLESHOOTING 133 11 1 Troubleshooting 134 11 2 Power up troubleshooting 134 Performing a power on reset 135 Downgrading so...

Страница 10: ...at the route is safe to navigate You MUST review the suggested route carefully and where necessary edit the route before following it If a waypoint within any automatically generated route is added or...

Страница 11: ...w raymarine com manuals Warranty registration To register your Raymarine product ownership please visit www raymarine com and register online It is important that you register your product to receive...

Страница 12: ...CHAPTER 2 DOCUMENT AND PRODUCT INFORMATION CHAPTER CONTENTS 2 1 Product documentation page 13 12...

Страница 13: ...etails operations of the LightHouse Sport operating system which is compatible with the following displays Product part numbers Part number Description E70532 E70644 Element 7 HV HyperVision sonar GPS...

Страница 14: ...aymarine co uk view id 5175 For further information about the Print Shop please visit the Print Shop FAQ pages http www raymarine co uk view id 5751 Note Accepted methods of payment for printed manual...

Страница 15: ...CHAPTER 3 GENERAL INFORMATION CHAPTER CONTENTS 3 1 Document conventions page 16 3 2 Databoxes page 16 3 3 Menu types page 19 General information 15...

Страница 16: ...le refers to using the Directional pad to highlight a toggle switch and press OK to activate the switch when activated the switch background will turn green and the toggle is positioned to the right D...

Страница 17: ...abox selecting Hide or Show from the pop over menu Data items The following data items can be displayed in Databoxes Note Where more than 1 data source is available for a data item based on the specif...

Страница 18: ...essure Trans oil temperature Category Data item Fuel Tank 1 Tank 2 All Tanks Tank 1 and Tank 2 Fuel level All Tanks Engine economy total Fuel flow total Time to empty Distance to empty Fuel used seaso...

Страница 19: ...d angle Maximum app wind angle App wind angle Minimum app wind speed Maximum app wind speed App wind speed 3 3 Menu types The different types of menu available in LightHouse Sport are shown below App...

Страница 20: ...apps and from menu pages Pop over options provide access to further menu options and settings Pressing the Back button will close pop over menus Controls and settings Common menu controls and options...

Страница 21: ...tting started page 23 4 3 Shortcuts page 26 4 4 Memory card compatibility page 27 4 5 Software updates page 29 4 6 User data import and export page 31 4 7 EV 1 heading sensor page 32 4 8 Multiple data...

Страница 22: ...Fishfinder apps 7 Minus Zoom Range out Press to increase the area displayed onscreen in the Chart app Press to decrease the zoom level in the Fishfinder app when in Zoom mode Press to revert to scrol...

Страница 23: ...utton to close the menu 4 2 Getting started Startup wizard The first time the display is powered up or after a Factory reset the startup wizard is displayed The startup wizard guides you through the c...

Страница 24: ...your user data For instructions on importing your user data refer to p 26 Importing user data First power up Limitation on Use acknowledgement After you have completed the Startup wizard the Limitati...

Страница 25: ...for the first time it is important that you correctly configure your transducer Transducer configuration settings are available from the Fishfinder app 1 Select Transducer from the Fishfinder app s Se...

Страница 26: ...ins your user data files into the memory card reader on your display 2 Select Import from card from the Import export menu Homescreen Settings Import export Import from card 3 Navigate to your User da...

Страница 27: ...ct the desired color theme Note Changing the Color theme inverts the Black and White colors used for text and in Homescreen and menu backgrounds The dark theme is recommended in lower light conditions...

Страница 28: ...ity branded memory cards Removing MicroSD card from its adaptor MicroSD memory and cartography chart cards are usually supplied inserted into an SD card adaptor The card will need to be removed from t...

Страница 29: ...ith an active Internet connection In order to perform a software update any connected radar scanner must be switched to standby In addition to updating your display s software your display can also be...

Страница 30: ...to reinstall the current software version unless you are experiencing problems with the product select No otherwise select Yes and the current version of software will be reinstalled 10 When all rele...

Страница 31: ...ort menu can be accessed from the homescreen settings menu Homescreen Settings Import export Saving user data You can backup your user data waypoints routes and tracks to a MicroSD card 1 Insert a mem...

Страница 32: ...e EVO COMPASS section of the This display menu If dashes are displayed then the calibration has not been successful If the Maximum deviation is 45 or greater it is recommended that either the EV 1 is...

Страница 33: ...MDS can be used for the following data types Depth Speed through water Heading GPS GPS Datum Wind Time Date If you do not want to use the automatically selected data source you can manually select you...

Страница 34: ...ay can access the internet via a Wi Fi access point When connected to a Wi Fi access point that has internet access software updates can be downloaded and installed directly on the display 1 Open the...

Страница 35: ...e available networks 2 Enter your MFD s Wi Fi passphrase and select Connect Make sure the password you enter is case sensitive 3 When your Android device is connected to your MFD s Wi Fi it will displ...

Страница 36: ...of interest POI high resolution satellite aerial overlays and regular chart updates After the free subscription ends the premium features can be continued for an annual fee LightHouse charts can be p...

Страница 37: ...Note Once a storage location memory card or internal memory has been chosen for your charts you cannot change it Charts cannot subsequently be saved to a different card Charts cannot be downloaded to...

Страница 38: ...m radar scanner s SSID and passcode 1 Select Pair with Quantum from the This display tab Homescreen Settings This display Quantum Radar Pair with Quantum 2 Enter the SSID and passcode for your Quantum...

Страница 39: ...S 5 1 Homescreen overview page 40 5 2 Customizing app pages page 43 5 3 Creating a new app page page 43 5 4 Global positioning page 44 5 5 Status area page 45 5 6 Timer page 45 5 7 Alarms page 46 5 8...

Страница 40: ...You can identify which Homescreen page is being shown using the indicator bar located above the Routes Tracks icon 5 Waypoints Select to view the Waypoints list 6 Routes Tracks Select to view the Rout...

Страница 41: ...r detailed information about the Dashboard app refer to p 110 Dashboard app Radar The Radar app is a situational awareness aid that displays a graphical representation of your surroundings in relation...

Страница 42: ...iew and an instantaneous real time A scope view of the water beneath the transducer Radial The radial app page is a fullscreen page that provides an instantaneous real time radial view of the water be...

Страница 43: ...een keyboard Assign as Quicklaunch 1 2 3 select to assign the app page to a Quicklaunch button 5 3 Creating a new app page The homescreen consists of 3 homescreen pages the first page is populated wit...

Страница 44: ...toggle switch can be used to show or hide a signal strength bar for each satellite GPS GNSS settings Settings for your GPS GNSS receiver can be accessed by selecting the top left corner of the homesc...

Страница 45: ...rom the homescreen 1 Select the status area located in the top right corner of the homescreen 2 The status area pop over menu is displayed 3 Ensure that Count down is selected in the Timer option 4 Se...

Страница 46: ...ect OK The notification is dismissed and the audible tone is stopped An acknowledged alarm remains active until the conditions that triggered the alarm are no longer present Note If an alarm notificat...

Страница 47: ...ths of 0 8 m 2 62 ft the alarm is triggered Important Accurate bottom tracking can be unreliable in depths shallower than 0 8 m 2 62 ft When operating at or below this depth be cautious of misleading...

Страница 48: ...data Waypoints Routes and Tracks from MicroSD card Eject SD card Wi Fi Connect display to a Wi Fi access point Connect mobile devices to the display Connect Quantum Radar to display using Wi Fi connec...

Страница 49: ...ed the number of engines select Identify engines and follow the onscreen instructions to configure your engines May require an extra hardware interface to enable engine data to be displayed Fuel tanks...

Страница 50: ...my units Distance per Volume Volume per Distance Liters per 100 km Pressure units Bar PSI Kilopascals KPa Date format MM DD YYYY DD MM YYYY MM DD YY DD MM YY Time format 12hr 24hr Time zone UTC offset...

Страница 51: ...CHAPTER 6 WAYPOINTS ROUTES AND TRACKS CHAPTER CONTENTS 6 1 Waypoints page 52 6 2 Routes page 57 6 3 Tracks page 61 6 4 User data import and export page 63 Waypoints Routes and Tracks 51...

Страница 52: ...e chosen symbol in the waypoint group shown against Group Placing a waypoint at your vessel s location To place a waypoint at your vessel s locations follow the steps below Note For a waypoint to be p...

Страница 53: ...omment field and using the onscreen keyboard 7 When you have finished customizing the waypoint details press the OK button to save the details 8 You can select Goto to begin navigation to the new wayp...

Страница 54: ...ypoint group Note Waypoint group names can be any combination of letters numbers symbols and special characters and can include up to 16 characters Waypoint group names must be unique Create a new way...

Страница 55: ...below From the homescreen 1 Select Waypoints 2 Select New group 3 Enter a name for the group using the onscreen keyboard 4 Select Save The new waypoint group will become the new default group for all...

Страница 56: ...pad to pan the chart area to the desired location 6 Press the Back button 7 Select Find waypoints in this area Showing and hiding waypoint groups When the waypoint menu is accessed from the Chart app...

Страница 57: ...mported and exported from the display For more information refer to p 63 User data import and export Creating a Route Follow the steps below to build a new route Routes can be created in the Chart app...

Страница 58: ...ed route is generated by comparing data available on your cartography against the minimum safe distances specified in the Boat details menu Homescreen Settings Boat details Waypoints will not be place...

Страница 59: ...nt symbols it is critical that these legs are checked to ensure that there is sufficient tide to avoid the hazard Width Height clearances Navionics Autorouting and Dock to dock does not use the user d...

Страница 60: ...to the route by selecting Add waypoint change route options such as route name route color route hide or delete the route by selecting the relevant option from the Route options pop over menu Note Rou...

Страница 61: ...ect Start track Your vessel s voyage will now be recorded 4 When your voyage is complete select Stop track from the boat details pop over menu You can also start a new track recording at anytime from...

Страница 62: ...e the pop over menu to edit the track name Note Track names can be any combination of letters numbers symbols and special characters and can include up to 16 characters Track names must be unique chan...

Страница 63: ...lt 300 ft 600 ft 0 20 nm 0 50 nm 1 00 nm Menu item and description Options 30 mins 6 4 User data import and export User data i e Waypoint Routes and Tracks can be imported and exported from your displ...

Страница 64: ...marine My Data directory of your memory card in gpx format Importing user data You can import user data i e GPX format Waypoints Routes and Tracks to your display 1 Insert the MicroSD card that contai...

Страница 65: ...tography overview page 70 7 3 Automatic Identification System AIS support page 73 7 4 Navigation page 77 7 5 Find nearest page 79 7 6 RealBathy page 80 7 7 Reeds almanac page 81 7 8 Tides mode page 82...

Страница 66: ...configure which data is shown in each databox or the databoxes can be hidden 6 Destination line During a go to a dashed line connects your vessel to the destination point 7 Track You can record the pa...

Страница 67: ...ovides Latitude longitude range and bearing details for the selected location or object The context menu provides quick access to relevant menu options Select more options to display further options N...

Страница 68: ...r vessel icon Chart motion Chart motion controls how the chart and boat are drawn in relation to each other The following options are available Relative motion In relative motion the vessel icon remai...

Страница 69: ...o represent your vessel show hide Heading vector show hide COG vector change vectors to display infinite length vectors or reference period length vectors show hide Tide graphics show hide Wind graphi...

Страница 70: ...ce that the line represents across the screen You can remove and insert chart cards at any time The chart screen is automatically redrawn when the system detects that a compatible chart card has been...

Страница 71: ...es After the free subscription ends the premium features can be continued for an annual fee LightHouse charts can be purchased from Raymarine dealers as either a pre loaded chart card or a blank chart...

Страница 72: ...ope Region part number R70794 NEU Mediterranean Region part number R70794 MED France part number R70794 FRA Australia New Zealand part number R70794 AUS R70794 ANZ Note New regions are added all the t...

Страница 73: ...k receive email notification to get an email when the package is ready to be downloaded If the download does not start automatically once the package has been prepared click Download 16 Locate the dow...

Страница 74: ...considered to be dangerous if they will pass within a specified safe distance from your vessel within a specified time interval The dangerous target alarm can be enabled and disabled from the alarms...

Страница 75: ...the AIS target details page is displayed AIS Settings Settings related to AIS can be accessed from the Target Settings menu Menu AIS Targets Target Settings AIS Enables and disables display of AIS ta...

Страница 76: ...sel Wing In Ground vessel Cargo vessel Passenger vessel Other Land based station ATON SAR Search and Rescue Virtual ATON SART Search and Rescue Transponder AIS target symbol status Lost No border cros...

Страница 77: ...ller for acknowledgement Navigating to a waypoint or point of interest You can perform a Goto to a Waypoint or to a specific location 1 Select the waypoint or point of interest and select Goto from th...

Страница 78: ...rent position to your destination rather than continuing to follow the original planned route 1 Select Restart XTE from the Navigation menu Menu Navigation Restart XTE Following a Route Follow the ste...

Страница 79: ...menu Menu Routes Tracks 7 5 Find nearest The Find nearest feature allows you to select a location and search for nearby objects or points of interest Note The level of detail available on charts is d...

Страница 80: ...Navionics and C Map Boat Ramps LightHouse Charts Food Drink LightHouse Charts Toilets LightHouse Charts Beach Swim Recreation LightHouse Charts Search for port LightHouse Charts Legacy LightHouse Cha...

Страница 81: ...de station data to correct height When Tidal is selected a tidal station search is performed and a list of available stations is displayed Select the closest tide station to your location Lake level U...

Страница 82: ...ent predictions for a 24 hour period Note Set and drift vectors require a paddle wheel transducer Animations are only available on supported cartography Refer to your cartography provider for more inf...

Страница 83: ...s through the animation Note Pressing and releasing the Left or Right buttons will skip the animation in 15 minute intervals Pressing and holding the Left or Right buttons will skip the animation cont...

Страница 84: ...ayed in subscript Decimals are not shown for values of 10 or greater 4 Blue arrow indicates tide height is decreasing Tide graph Tide graphs are available with compatible cartography by selecting more...

Страница 85: ...rder indicates current status Red increasing current speed Blue decreasing current speed Current speed is shown inside the arrow Current speed is displayed in user selected speed units with decimals d...

Страница 86: ...hart app LightHouse Charts Navionics C MAP Layers tab Menu item and description Options Chart detail Allows you to select the level of detail displayed onscreen for vector based cartography This setti...

Страница 87: ...erlay opacity Allows opacity percentage of the aerial overlay to be set This setting is always available and not dependent on the cartography in use 0 to 100 Range rings Enables and disables the displ...

Страница 88: ...e up Boat position Adjust the boat position to allow more or less look ahead space in front of your boat This setting is always available and not dependent on the cartography in use Center Partial off...

Страница 89: ...is setting is available when using LightHouse and legacy LightHouse charts Dark to light Light to dark Menu item and description Options Record depth data Enables depth and position data to be recorde...

Страница 90: ...d in databox 1 2 Determines the data item displayed in databox 2 3 Determines the data item displayed in databox 3 4 Determines the data item displayed in databox 4 Reset all Selecting will reset all...

Страница 91: ...tory SonarChart Live contours are not being recorded but historical recordings are displayed onscreen 4 Select the Visibility setting field and adjust to your preferred value 5 Enable Tide correction...

Страница 92: ...channel range page 96 8 3 Fishfinder app overview page 97 8 4 Fishfinder app controls page 100 8 5 Fish detection page 102 8 6 Sonar scroll back page 102 8 7 Fishfinder sensitivity controls page 103...

Страница 93: ...se targets This enables the sonar to display multiple targets instead of large combined targets that you would see when using traditional non CHIRP sonar Benefits of CHIRP include improvements to targ...

Страница 94: ...wnVision beam is a water column directly beneath and to the sides of the vessel DownVision beam DownVision is effective at lower vessel speeds In deeper waters the CHIRP bandwidth is automatically opt...

Страница 95: ...ine of image data to the top of your display Each new line shows sonar returns from both the port and starboard sides of your vessel As new lines are added with each successive ping older data gradual...

Страница 96: ...top to bottom as your vessel moves 10 Bottom Solid mass indicating the bottom using the default color palette the bottom is colored copper It may be possible to identify the transition of bottom mate...

Страница 97: ...um sonar depth alarm is triggered when your vessel reaches or is in water shallower than this depth Below are examples of the Sonar app when it is tracking a false bottom in shallow waters 1 Examples...

Страница 98: ...lease contact an authorized Raymarine dealer for advice 2 Ensure you have installed and connected your transducer in accordance with its supplied documentation When opened the Fishfinder app will scro...

Страница 99: ...ant displays DownVision SideVision and RealVision 3D channels are available in both 350 kHz Standard and 1 2 MHz Hyper frequencies With either DownVision SideVision or RealVision 3D channel displayed...

Страница 100: ...s real time view of the water beneath the transducer This allows you to see what is currently passing under your transducer e g bottom structure or target etc rather than the historical display provid...

Страница 101: ...aypoint at your vessels s current location Pressing the Menu button will open the app menu Pressing the OK button pauses scrolling and switches to pause playback mode Pause Playback mode In pause play...

Страница 102: ...t to the target that the fish detection algorithm considers to be fish The fish detection feature can be adjusted manually as follows Detection sensitivity The detection sensitivity setting determines...

Страница 103: ...is displayed when using sonar scroll back The sensitivity controls can be accessed from the Fishfinder app menu Menu Adjust sensitivity The following sensitivity controls are available to help you op...

Страница 104: ...stem for the first time it is important that you correctly configure your transducer Transducer configuration settings are available from the Fishfinder app 1 Select Transducer from the Fishfinder app...

Страница 105: ...en Burnt Yellow default Inv Burnt Yellow Cool Blue Inv Cool Blue Menu item and description Options Ruby Red Background Changes the color used for the app background Black default Blue White Gray Targe...

Страница 106: ...raph The temperature graph overlay must be enabled before manual temperature range can be enabled On Off default Maximum temp Specifies the fixed maximum water temperature limit for the temperature gr...

Страница 107: ...the temperature line On Off default Menu item and description Options Manual temp range When enabled you can specify a manual minimum and maximum limit for water surface temperature The temperature gr...

Страница 108: ...offset between the actual measured water temperature and the current temperature displayed by your transducer Offset temperature value Sounder tab Menu item and description Options Ping enable Enable...

Страница 109: ...shallow limit cannot be greater than the deep limit 0 ft to 1000 ft 3 3 ft default or equivalent units Ignore fish deeper than Targets returns found in water deeper than the specified depth will not...

Страница 110: ...ER CONTENTS 9 1 Dashboard app overview page 111 9 2 Navigation and sailing dials page 112 9 3 Rolling road page 112 9 4 Customizing existing data pages page 113 9 5 Data items page 113 9 6 Dashboard a...

Страница 111: ...start up wizard selections with a number of customizable data pages Switching data page When the Dashboard app is the active app you can cycle through the available data pages 1 Use the Left and Right...

Страница 112: ...gle The indicator is available on the sailing dial when wind data is available and the dial is set to TWS Apparent wind angle indicator Visual identification of the apparent wind angle The indicator i...

Страница 113: ...se deviation that occurs and maintain your course to the target destination 9 4 Customizing existing data pages The data items displayed on each page can be changed 1 Select Customize page from the Da...

Страница 114: ...ture Oil pressure Alternator Coolant pressure Coolant temperature Engine load Engine trip Fuel flow Fuel flow inst Category Data item Fuel flow avg Fuel pressure Gear Trans oil pressure Trans oil temp...

Страница 115: ...wind direction Minimum true wind angle Maximum true wind angle Category Data item True wind angle Maximum true wind speed Minimum true wind speed True wind speed Minimum app wind angle Maximum app wi...

Страница 116: ...elected the number of engines select Identify engines and follow the onscreen instructions to configure your engines May require an extra hardware interface to enable engine data to be displayed Fuel...

Страница 117: ...st of available datums Measurement Units Variation Auto Manual Manual variation 30 W to 30 E Advanced settings menu Menu item and description Options Maximum RPM The maximum RPM Revolutions Per Minute...

Страница 118: ...119 10 2 Opening the Radar app page 119 10 3 Radar app overview page 121 10 4 Radar modes page 122 10 5 Automatic Identification System AIS support page 122 10 6 Range and bearing page 126 10 7 Guard...

Страница 119: ...radar scanner to a power supply following the instructions supplied with the radar scanner Ensure you know your Quantum radar scanner s SSID and passcode 1 Select Pair with Quantum from the This disp...

Страница 120: ...e Radar not found message is displayed then power cycle your system and perform the pairing procedure again If the radar scanner still cannot be found refer to your Radar s installation documentation...

Страница 121: ...d to report geographical positions Latitude and Longitude of the cursor position Radar target tracking and Doppler features are not available in LightHouse Sport The Radar app allows you to configure...

Страница 122: ...des The Radar app provides preset modes that can be used to quickly achieve the best picture depending on your current situation Only Radar modes supported by your Radar scanner are shown To change ra...

Страница 123: ...TCPA if available COG and SOG data The following menu options are available View AIS data displays more detailed AIS data on a fullscreen page Vector enables and disables display of the AIS target ve...

Страница 124: ...h of the vector indicates the predicted position of the target after the time interval specified in Vectors period has passed Adjusting the Vectors period option will adjust the length of the vector A...

Страница 125: ...her vessels Hide static targets Targets travelling under 2 knots will be hidden unless the target is dangerous or becomes dangerous AIS vectors Enables and disables display of vectors on AIS targets V...

Страница 126: ...HM Ships Heading Marker 3 Bearing indicator ring White 4 Range rings with range indicator Green 5 Vessel position 6 Current displayed bearing and range ring separation distance Range identifies the di...

Страница 127: ...y s bearing reference can be specified from the Units menu Homescreen Units Bearing When set to Relative bearings are taken from the Ships Heading Marker SHM Creating a centered VRM EBL To create a VR...

Страница 128: ...nfigured as a sector or as a circle around your vessel If required the sensitivity of the guard zone can be adjusted using the Sensitivity field Sensitivity determines the size at which objects will t...

Страница 129: ...ntify real objects The higher the rain control is set the more echoes will be suppressed S Sea clutter Radar echoes from waves can clutter the radar screen The sea control suppresses these echoes for...

Страница 130: ...r vessel move in true perspective to each other and to landmass As your vessel s position reaches the edge of the screen the image is redrawn to reveal the area ahead Boat position Boat position deter...

Страница 131: ...rget returns On Off Bearing alignment Enables you to align the radar image correctly in relation to your vessel s bow 179 5 Port to 180 Starboard Description Option Sea clutter curve manual mode When...

Страница 132: ...nstallation Checking alignment Align the bow with a stationary object between 0 25 nm and 2 nm away Reduce the gain sensitivity control to make the target as small as possible on the screen Note the p...

Страница 133: ...TING CHAPTER CONTENTS 11 1 Troubleshooting page 134 11 2 Power up troubleshooting page 134 11 3 GPS GNSS troubleshooting page 136 11 4 Sonar troubleshooting page 137 11 5 Wi Fi troubleshooting page 13...

Страница 134: ...to the Technical Specification section of your product s installation instructions for fuse ratings 2 If fuse keeps blowing check for cable damage broken connector pins or incorrect wiring Poor damag...

Страница 135: ...the Home button 5 Use the Down button to highlight Wipe data factory reset 6 Press the OK button 7 Use the Down button to highlight Yes 8 Press the OK button The display will now be reset to factory d...

Страница 136: ...to see if a fix is obtained in better conditions or another geographic location No Fix status icon is displayed or display keeps losing position fix Display in poor location For example Below decks Cl...

Страница 137: ...startup wizard Damaged display connector Check that the transducer connector pins on the back of the display are not bent or broken missing If damage is detected replace the display or send it to an a...

Страница 138: ...nsducer cable runs too close to engine and other high power cables the transducer signal may be interrupted causing loss of transducer connection and or electrical noise to appear onscreen These issue...

Страница 139: ...Display s Wi Fi can only connect to 2 4 GHz networks Cannot connect to network Possible cause Possible solutions Trying to connect to the wrong Wi Fi network Ensure you are trying to connect to the co...

Страница 140: ...nect at all Move display closer to router Interference being caused by other Wi Fi enabled or older Bluetooth enabled devices Bluetooth and Wi Fi both operate in the 2 4 GHz frequency range some older...

Страница 141: ...CHAPTER 12 TECHNICAL SUPPORT CHAPTER CONTENTS 12 1 Raymarine product support and servicing page 142 12 2 Learning resources page 144 Technical support 141...

Страница 142: ...rine website for Manuals and Documents http www raymarine com manuals Technical support forum https raymarine custhelp com app home Software updates http www raymarine com software Worldwide support U...

Страница 143: ...m the Homescreen 2 Select the This display tab 3 Select About this product from the DIAGNOSTICS section 4 If the Save data button is highlighted press the Left button 5 Use the Up button and Down butt...

Страница 144: ...displayed The pop over menu will identify whether there are any logs that can be saved 3 Select Save system logs 12 2 Learning resources Raymarine has produced a range of learning resources to help y...

Страница 145: ...ilot controller can be used to control your autopilot system SeaTalkng autopilot controllers Product details Product details 1 p70s E70328 2 p70Rs E70329 3 p70 E22166 4 p70R E22167 5 ST70 E22105 6 ST7...

Страница 146: ...detailed status Receive 127507 Charger status Receive 127508 Battery status Receive 127509 Inverter status Receive 128259 Speed Receive Transmit 128267 Water Depth Receive Transmit 129025 Position rap...

Страница 147: ...ns Document 81388 9 Software version LHS 3 17 25 Date 09 2022 Updated software version to 3 17 25 Updated new features list Updated LightHouse chart details to include new regions Document 81388 8 Sof...

Страница 148: ...for different fishfinder channels and views to homescreen chapter Added descriptions of different fishfinder channel modes to fishfinder chapter Document Changes Moved list of compatible autopilot co...

Страница 149: ...a items to include wind and speed data Added details for wind and navigation dials in Dashboard app Updated list of supported PGNs Updated Chart app chapter to include Tides mode Updated Fishfinder ap...

Страница 150: ......

Страница 151: ...to GPS 32 App pages Customize 43 Delete 43 New 43 Quicklaunch 43 Rename 43 Applications 40 Apps 40 Chart 41 Dashboard 41 Fishfinder 41 Radar 41 Automatic Identification System See AIS Autopilot comma...

Страница 152: ...contours 88 Show soundings 88 Simple mode 68 Tide animation 82 Tide bar 84 Tide graph 84 Tide station 83 Tides 68 87 Tides mode 82 True motion 68 View Motion 88 Chart app AIS context menu 74 Context m...

Страница 153: ...89 90 Depth Data items 17 114 Depth calibration 25 104 Depth offset 25 104 Depth units 49 116 Destination line 66 Destination waypoint 66 Diagnostics 144 Directional pad 22 Display Buttons 22 Controls...

Страница 154: ...ision modes 99 Sonar display menu 105 107 Sounder menu 108 Sounder reset 108 Surface filter 103 Temperature graph 106 107 Transducer 108 Transducer alignment 108 Transducer menu 108 Transducer offset...

Страница 155: ...0 Limitations on Use LoU 40 Live well tank selection 49 116 M Manual variation 50 117 Memory cards Compatibility 27 Menu Button 22 Closing 22 Opening 22 Menus Settings 16 Types 19 MicroSD Adaptor 28 i...

Страница 156: ...ntation 130 Powering off 121 Rain suppression 129 Range and Bearing 126 Range ring labels 130 Range rings 130 Reset advanced settings 131 scanner 129 Sea clutter 129 131 Sensitivity controls 129 Stand...

Страница 157: ...2 Settings menu 47 Shortcuts Menu 26 Shortcuts menu Opening 22 SideVision Left 99 Left right 99 Right 99 Software 135 Software updates 29 30 Software version 13 Sonar History 102 Ping 26 Sonar logs 90...

Страница 158: ...ducer offset 89 Transducer selection 24 49 116 Troubleshooting 134 GNSS GPS 136 Wi Fi 139 U Units 49 116 units of measurement 48 Upgrading software 29 User data Restore Back up 31 63 User interface La...

Страница 159: ...nt names 87 Waypoint sharing 56 Wi Fi 48 Wi Fi channel 35 Wi Fi credentials 34 Wi Fi name 34 Wi Fi passphrase 34 Wi Fi settings 34 Wind 69 Data items 19 115 Wind speed units 50 117 X XTE Restart 78 Z...

Страница 160: ......

Страница 161: ......

Страница 162: ...rine House Cartwright Drive Fareham Hampshire PO15 5RJ United Kingdom Tel 44 0 1329 246 700 www raymarine co uk Raymarine US 9 Townsend West Nashua NH 03063 United States of America Tel 1 603 324 7900...

Отзывы: