background image

R/C Rayline „R808“ UFO 


12


l'arrière vous utilisez cette garniture 

NL Vooruit / Achteruit Trim


Als het model, geen signaal naar voren vliegen of naar 
achteren als u deze versiering te gebruiken 

ES Avance / Retroceso Ajuste


Si el modelo, no hay señal de correr hacia delante o hacia 
atrás que utilice este ajuste 

PL Przodu / do tyłu Obudowa


Jeśli model, żaden sygnał nie latać do przodu lub do tyłu to 
wykorzystać wykończenia 

IT Avanti / Indietro Trim


Se il modello, nessun segnale di volare in avanti o indietro si 
usa questo assetto 


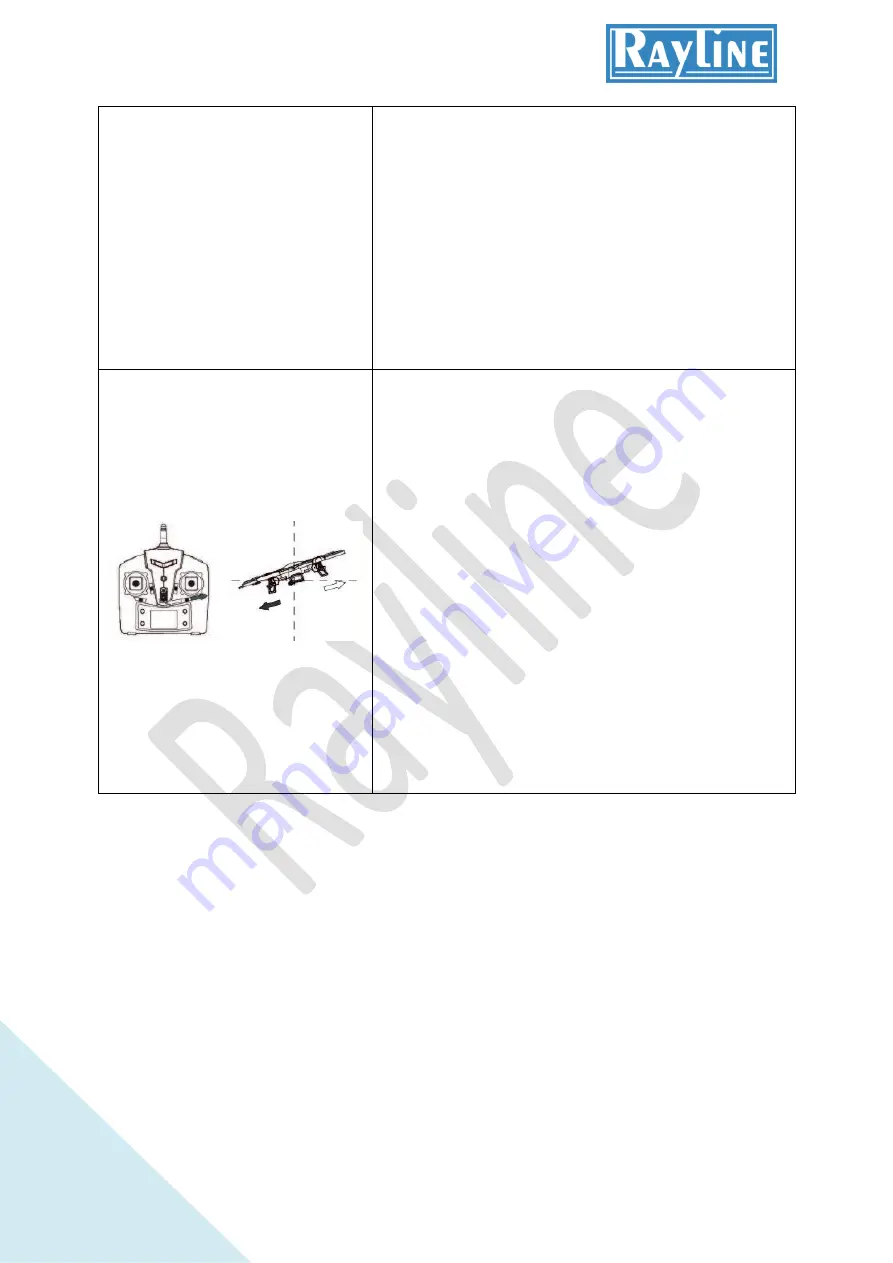
DE Links / rechts Trimmung 

Nutzen Sie diese Trimmung falls das Modell ohne Signal 
nach rechts oder links fliegt 

GB Left / right trim


Use this trim if the model with no signal to the right or left 
flying 

FR Gauche / droite garniture


Utiliser cette garniture si le modèle avec aucun signal vers la 
droite ou vers la gauche de vol 

NL links / rechts trimmen


Gebruik deze bekleding als het model met geen signaal naar 
rechts of links te vliegen 

ES Izquierda / derecha del ajuste


Utilice este ajuste si el modelo sin señal a la derecha oa la 
izquierda volar 

PL Lewo / prawo wykończenia


Użyj tego wykończenia czy model bez sygnału w prawo lub 
w lewo latania 

IT Sinistra / destra assetto


Utilizzare questo assetto, se il modello in assenza di segnale 
per il volante a destra oa sinistra 

 
DE 

Normal- und Hochgeschwindigkeitsmodus 


Das Modell verfügt über zwei Geschwindigkeitsmodi. Durch Drücken der Taste „high/low 
Speed“ können Sie zwischen diesen Modi umschalten. Der aktuelle Modus wird im Display 
angezeigt.


GB 

Normal and high-speed mode


The model has two speed modes. By pressing the "high / low speed" you can switch between 
these modes. The current mode is displayed.


FR 

Mode normal et haute vitesse


Le modèle dispose de deux modes de vitesse. En appuyant sur la "haute vitesse / basse», 
vous pouvez basculer entre ces modes. Le mode actuel est affiché.


NL 

Normale en high-speed mode


Het model heeft twee snelheden modi. Door op de "high / low speed" kunt u wisselen tussen 
deze modi. De huidige modus wordt weergegeven. 

ES 

Modo normal y de alta velocidad


El modelo tiene dos modos de velocidad. Al pulsar la "velocidad alta / baja" se puede 
cambiar entre estos modos. Se muestra el modo actual. 

Содержание R808 UFO

Страница 1: ...ement à l original NL Gebruiksaanwijzing Lees deze instructies aandachtig en zorgvuldig bewaar ze in staat zijn om omhoog te kijken in de toekomst De afbeeldingen in deze handleiding zijn alleen ter referentie en niet noodzakelijkerwijs overeenkomen met de oorspronkelijke ES Usuario Lea atentamente estas instrucciones y guárdelas cuidadosamente para ser capaz de buscar en el futuro Las ilustracion...

Страница 2: ...R C Rayline R808 UFO 2 ...

Страница 3: ...sponsibility for the damage caused by improper use Keep small parts away from young children Keep batteries away from excessive heat or open flame Keep a safe distance of 1 2 meters to themselves or others to protect against injury Never disassemble or modify this product it may cause malfunction and accidents Fly the model only in your field of vision Only batteries of the same or equivalent type...

Страница 4: ... un uso inadecuado Mantenga las piezas pequeñas fuera del alcance de los niños pequeños Mantenga las pilas lejos del calor excesivo o fuego Mantenga una distancia de seguridad de 1 a 2 metros a sí mismos oa otros para proteger contra las lesiones Nunca desarme ni modifique este producto puede causar un mal funcionamiento y accidentes Vuela el único modelo en su campo de visión Sólo se pueden utili...

Страница 5: ...end der Fernbedienung Wenn Sie das Modell ausschalten möchten schalten Sie zuerst das Modell aus und anschließend die Fernbedienung GB Flight preparation Look for an open space of approximately 8 mx 8 mx 5 m Make sure that the batteries of the remote control and the model of the battery is charged Make sure that the throttle lever to the lowest position before turning on the model Make sure that t...

Страница 6: ... il modello quindi il telecomando DE Installation der Fernbedienung Öffnen Sie das Batteriefach auf der Rückseite der Fernbedienung und legen Sie 4x 1 5V AA Batterien in die Fernbedienung ein Achten Sie hierbei auf die korrekte Polarität Die Batterien sind nicht im Lieferumfang enthalten GB Installing the remote control Open the battery compartment on the back of the remote control and insert 4x 1...

Страница 7: ...connecter la batterie avec l adaptateur secteur fourni et le brancher sur une prise 230V Le voyant d état vous indique lorsque le processus de charge est terminé Il s allume en rouge pendant la charge et vert lorsque la charge est terminée ATTENTION Utilisez uniquement l adaptateur secteur fourni pour charger NL Opladen Verwijder de batterij uit het model Sluit vervolgens de batterij met de meegel...

Страница 8: ... Jetzt ist die Fernbedienung mit dem Modell verbunden GB Commissioning Connect the battery to the connector of the model Then switch on the remote control Place the model on an open plain Now press the left lever throttle the remote control all the way down and then to the top Now the remote control is connected with the model FR Mise en service Connecter la batterie au connecteur du modèle Allume...

Страница 9: ...ighlighted The front of the model has white blades and the back has black blades see figure FR Informations complémentaires Pour déterminer qui est l avant ou à l arrière des pales du rotor du modèle sont mis en évidence La face avant du modèle a pales blanches et le dos a lames noires voir figure NL Aanvullende informatie Om te bepalen wat de voorkant of achterkant van de rotorbladen van het mode...

Страница 10: ... derecha PL Lewa prawa Naciśnij prawą dźwignię w lewo lub w prawo IT Sinistra destra Premere la leva destra verso sinistra o destra DE Aufwärts abwärts Drücken Sie den linken Hebel nach unten oder oben GB Up down Press the left lever up or down FR Haut bas Appuyez sur le levier gauche vers le haut ou vers le bas NL Omhoog omlaag Druk op de linker hendel omhoog of omlaag ES Arriba abajo Presione la...

Страница 11: ...a derecha hacia arriba o hacia abajo PL Do przodu do tyłu Naciśnij prawą dźwignię w górę lub w dół IT Avanti indietro Spingere la leva destra verso l alto o verso il basso DE Drehungstrimmung Falls das Modell sich dreht nutzen Sie diese Trimmung GB rotation trim If the model turns you use this trim FR Garniture de rotation Si le modèle tourne vous pouvez utiliser cette garniture NL rotatie bekledi...

Страница 12: ...te Utilice este ajuste si el modelo sin señal a la derecha oa la izquierda volar PL Lewo prawo wykończenia Użyj tego wykończenia czy model bez sygnału w prawo lub w lewo latania IT Sinistra destra assetto Utilizzare questo assetto se il modello in assenza di segnale per il volante a destra oa sinistra DE Normal und Hochgeschwindigkeitsmodus Das Modell verfügt über zwei Geschwindigkeitsmodi Durch D...

Страница 13: ...nt de la télécommande Vous pouvez exécuter la boucle dans des directions différentes S il vous plaît commande par le bouton Renverser en combinaison avec la direction NL Looping Om de looping functie te activeren drukt u op de knop aan de bovenkant links van de afstandsbediening De afstandsbediening piept als de modus is ingeschakeld Om een lus te voeren druk op de Overturn Knof op de afstandsbedi...

Страница 14: ...ion 3 est relié à l arrière gauche Connexion 4 est relié à l arrière droit NL De printplaat installeren Om een goede werking te garanderen dient u de juiste bedrading van de raad van bestuur Verbinding 1 is verbonden met de rechter voorkant Verbinding 2 is verbonden met de linker Verbinding 3 is verbonden met het linker achterwiel Verbinding 4 is aangesloten rechts achter ES Instalación de la plac...

Страница 15: ...er Kamera leuchtet auf sobald Sie den Photo Knopf betätigen Die rote Statusleuchte leuchtet dauerhaft sobald Sie den Video Knopf betätigen Drücken Sie den Video Knopf erneut um die Videoaufnahme zu beenden Um sich die Fotos und Videos zu betrachten entfernen Sie die Speicherkarte und lesen Sie diese an Ihrem PC aus DE Ersatzteile In der unteren Tabelle finden Sie die jeweiligen Ersatzteile für das...

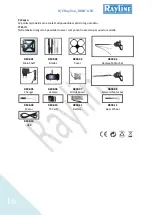
Страница 16: ...lla tabella di seguito è possibile trovare i componenti necessari per questo modello R808 01 Main Shelf R808 02 Blades R808 03 Cover R808 04 Reserve Motor Set R808 05 Charger R808 06 Camera R808 07 Circuit board R808 08 Forward Motor Set R808 09 Motor R808 10 TF Card R808 11 Battery R808 12 Gear Wheel R808 13 USB ...

Отзывы: