EN
Page 64 of 77
INSTRUCTION, USE AND
MAINTENANCE MANUAL
15.3.3 Gauges calibration
Press the button
(
Fig. 74 ref. 3
) to display the
following screen page on the monitor:
1
2
KEY
1 – Distance-diameter caliper calibration
2 – Calibration of wheel external data gauge/auto-
matic external data gauge
Distance-diameter caliper calibration
Press the button
to display the following screen
page on the monitor:
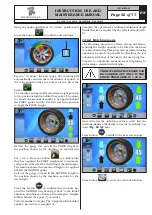
Place the gauge (
Fig. 75 ref. 1
) on the chuck flange
(
Fig. 75 ref. 2
).
Fig. 75
2
1
The following screen will appear on the monitor to
indicate the measured values:
2
1
Fig.
_
76
- The value next to the symbol "scale" (
Fig.
_
76 ref. 1)
(236 mm for threaded chuck or 256 mm for pneu-
matic chuck) must be equal to the value positioned
above the gauge (
Fig.
_
76 ref. 2
) ± 1 mm.
IF THE MEASUREMENT GAUGE
IS NOT EXACTLY POSITIONED
ALONG THE UPPER EDGE OF THE
FLANGE AND CONSEQUENTLY IF
THE DISTANCE MEASUREMENT
IS NOT 236 MM ± 1 MM (FOR
THREADED CHUCK) OR 256 MM ±
1 MM (FOR PNEUMATIC CHUCK),
WHEN THE MEASUREMENT IS
CONFIRMED, THE PROGRAM
WILL NOT PASS ON TO THE NEXT
STAGE. TRY REPOSITIONING THE
GAUGE FERRULE NEXT TO THE
UPPER EDGE OF THE FLANGE
AND, IF THE MEASUREMENT
CONTINUES NOT TO BE BETWEEN
236 MM ± 1 MM (FOR THREADED
CHUCK) OR 256 MM ± 1 MM (FOR
PNEUMATIC CHUCK) AND THE
PROGRAM DOES NOT PASS ON TO
THE NEXT CALIBRATION STAGE,
CONTACT THE AFTER-SALES
SERVICE.
- Press push button
.
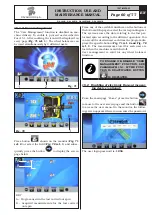
The following screen will appear on the monitor:
RAVAGLIOLI S.p.A.
1297-M005-03
G4.140R - G4.140WS - G4.140WSLB - GP4.140WS


