Instructions for Use MPR1 DATALOGGER
Manufacturer:
RAUMEDIC AG, Hermann-Staudinger-Strasse 2, 95233 Helmbrechts, Germany
Page 51 of 98
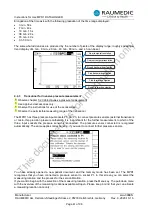
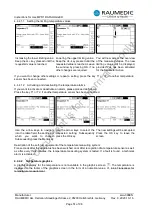
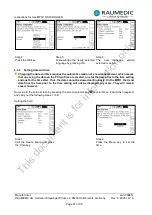
4.4.4.1.1 Setting the limiting temperature values
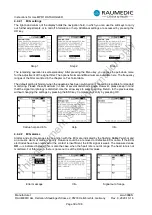
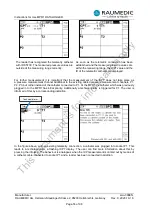
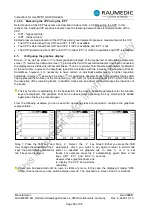
Increasing the lower limiting value:
Keep the LL+ key pressed until the
requested value is reached.
Lowering the upper limiting value:
Keep the UL- key pressed until the
requested value is reached. Leave
the window by pressing OK, if no
other changes are required.
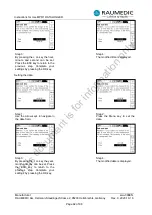
You will now access the overview
of the measured values. The new
limiting values will be displayed,
provided Yes has been activated
for the parameter Active.
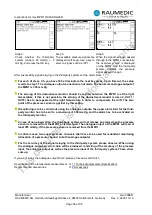
If you want to change other settings or repeat a setting, press the key T1 or T2, if another temperature
sensor has been connected.
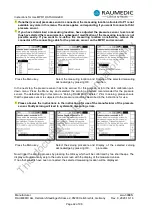
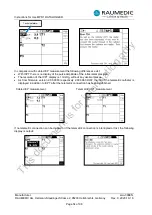
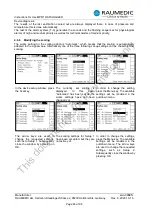
4.4.4.1.2 Activating and deactivating the temperature alarms
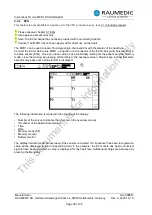
If you want to activate or deactivate an alarm, please proceed as follows:
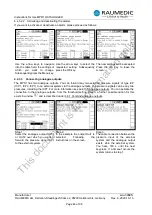
Press the key T1 or T2, if another temperature sensor has been connected.
Use the arrow keys to navigate
into the table field, the settings of
which you want to change.
Subsequently press the Menu key.
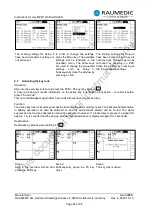
Use the arrow keys to select the
requested setting. Subsequently
press the OK key.
The new settings will be accepted.
Press the OK key to leave the
screen.
Description of the self-test equipment of the temperature measuring system:
Five seconds after the apparatus has been switched on or after recognition of a temperature sensor as well
as after every thirty minutes, the temperature measuring system is tested. If a fault is found, a technical
alarm is activated.
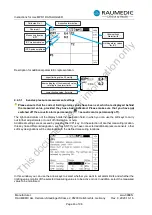
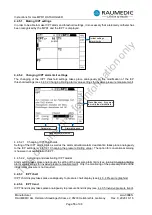
4.4.4.2 Temperature graphics
A graphical display for the temperature is not available in the graphics screen . The temperature is
displayed in the footer of the graphics screen in the form of a numerical value, cf. 4.4.4 Transducer for
document
is
for
information
only

