


Appendix G: Old PX3 Character LCD Display
724
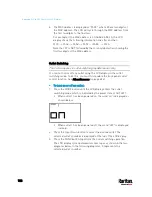
2.
On a multi-inlet model, press the Up or Down button until the
desired inlet's number is displayed at the top.
3.
If your PX3 is a 3-phase model, the selected inlet line is indicated
below the reading. Press the Up or Down button until the desired
inlet line's number (L1, L2, L3, L1-L2, L2-L3 or L3-L1) is shown.
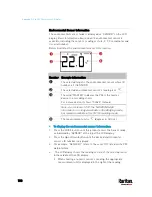
4.
Press the FUNC button to switch between voltage, active power and
current readings of the selected target.
A is displayed for the current reading. A means Amp.
V is displayed for the voltage reading. V means Volt.
W is displayed for the power reading. W means Watt.
If the word "ALARM" appears below the reading, it means the
currently displayed reading already reaches or crosses the upper or
lower thresholds.
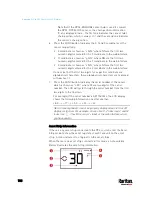
To display the unbalanced load and active power of a 3-phase
inlet:
1.
Switch to the current reading of any inlet line.
2.
Press the Up or Down button until "W" or "%" is displayed to the
right of the LCD display. Make sure NONE of the inlet's line number
is displayed at the bottom of the display.
Unbalanced load - % is displayed for the unbalanced current
value.
Active power - W is displayed for the power reading. W means
Watt.
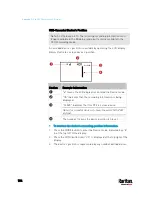
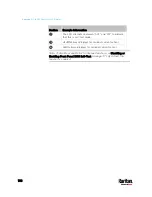
Overcurrent Protector Information
The Overcurrent Protector mode is displayed as either "CB" or "FUSE"
on the LCD display, which varies according to the type of overcurrent
protector implemented on your PX3. CB refers to the circuit breaker and
FUSE refers to the fuse.
Below illustrates an overcurrent protector's information.
Содержание PX3-3000 series
Страница 5: ......
Страница 18: ...Contents xviii Index 841...
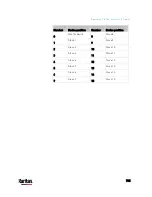
Страница 66: ...Chapter 3 Initial Installation and Configuration 42 Number Device role Master device Slave 1 Slave 2 Slave 3...
Страница 93: ...Chapter 4 Connecting External Equipment Optional 69...
Страница 787: ...Appendix J RADIUS Configuration Illustration 763 Note If your PX3 uses PAP then select PAP...
Страница 788: ...Appendix J RADIUS Configuration Illustration 764 10 Select Standard to the left of the dialog and then click Add...
Страница 789: ...Appendix J RADIUS Configuration Illustration 765 11 Select Filter Id from the list of attributes and click Add...
Страница 792: ...Appendix J RADIUS Configuration Illustration 768 14 The new attribute is added Click OK...
Страница 793: ...Appendix J RADIUS Configuration Illustration 769 15 Click Next to continue...
Страница 823: ...Appendix K Additional PX3 Information 799...
Страница 853: ...Appendix L Integration 829 3 Click OK...


