Chapter 6: Using the Web Interface
163
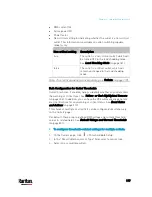
If you are configuring an individual outlet on
Individual Outlet Pages
(on
page 183), there is one more outlet state option.
Additional
option
Function
PDU defined
(xxx)
Follows the global outlet state setting, which is set
on
PDU
(on page 157).
The value xxx in parentheses is the
currently-selected global option -
on, off, or last
known.
Initialization Delay Use Cases
Apply the initialization delay in either of the following scenarios.
When power may not initially be stable after being restored
When UPS batteries may be charging
Tip: When there are a large number of outlets, set the value to a
smaller number to avoid a long wait before all outlets are available.
Inrush Current and Inrush Guard Delay
Inrush current:
When electrical devices are turned on, they can initially draw a very large
current known as inrush current. Inrush current typically lasts for 20-40
milliseconds.
Inrush guard delay:
The inrush guard delay feature helps prevent a circuit breaker trip due to
the combined inrush current of many devices turned on at the same
time.
For example, if the inrush guard delay is set to 100 milliseconds and two
or more outlets are turned on at the same time, the PDU will
sequentially turn the outlets on with a 100 millisecond delay occurring
between each one.
Содержание PX3-3000 series
Страница 5: ......
Страница 18: ...Contents xviii Index 841...
Страница 66: ...Chapter 3 Initial Installation and Configuration 42 Number Device role Master device Slave 1 Slave 2 Slave 3...
Страница 93: ...Chapter 4 Connecting External Equipment Optional 69...
Страница 787: ...Appendix J RADIUS Configuration Illustration 763 Note If your PX3 uses PAP then select PAP...
Страница 788: ...Appendix J RADIUS Configuration Illustration 764 10 Select Standard to the left of the dialog and then click Add...
Страница 789: ...Appendix J RADIUS Configuration Illustration 765 11 Select Filter Id from the list of attributes and click Add...
Страница 792: ...Appendix J RADIUS Configuration Illustration 768 14 The new attribute is added Click OK...
Страница 793: ...Appendix J RADIUS Configuration Illustration 769 15 Click Next to continue...
Страница 823: ...Appendix K Additional PX3 Information 799...
Страница 853: ...Appendix L Integration 829 3 Click OK...


