


Chapter 5: Introduction to PDU Components
126
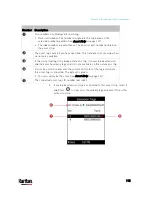
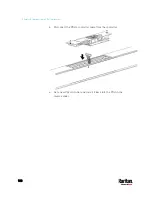
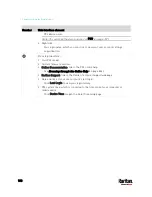
3.
Push the cover of the fuse holder to expose the fuse.
4.
Take the fuse out of the holder.
5.
Insert a new fuse into the holder. There is no orientation limit for
fuse insertion.
6.
Close the fuse holder and the hinged cover in a reverse order.
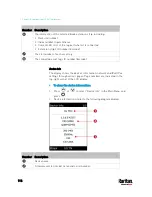
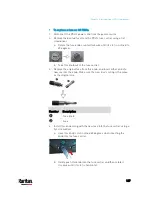
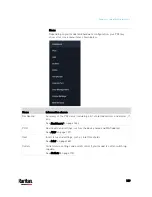
Fuse Replacement on 1U Models
On the 1U model, a fuse is installed in a fuse knob, which fits into the
PDU's fuse carrier.
Number
Description
Fuse carrier
Fuse knob where a fuse is installed
Содержание PX3-3000 series
Страница 5: ......
Страница 18: ...Contents xviii Index 841...
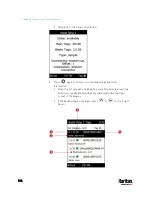
Страница 66: ...Chapter 3 Initial Installation and Configuration 42 Number Device role Master device Slave 1 Slave 2 Slave 3...
Страница 93: ...Chapter 4 Connecting External Equipment Optional 69...
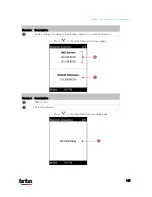
Страница 787: ...Appendix J RADIUS Configuration Illustration 763 Note If your PX3 uses PAP then select PAP...
Страница 788: ...Appendix J RADIUS Configuration Illustration 764 10 Select Standard to the left of the dialog and then click Add...
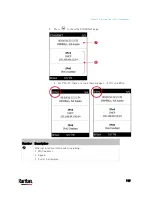
Страница 789: ...Appendix J RADIUS Configuration Illustration 765 11 Select Filter Id from the list of attributes and click Add...
Страница 792: ...Appendix J RADIUS Configuration Illustration 768 14 The new attribute is added Click OK...
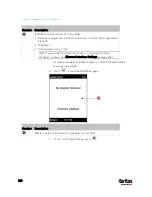
Страница 793: ...Appendix J RADIUS Configuration Illustration 769 15 Click Next to continue...
Страница 823: ...Appendix K Additional PX3 Information 799...
Страница 853: ...Appendix L Integration 829 3 Click OK...


