


Chapter 5: Introduction to PDU Components
91
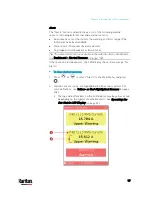
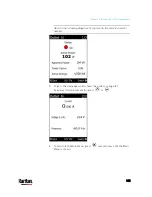
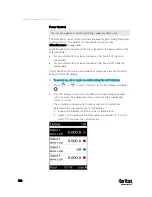
Dot-Matrix LCD Display
The following diagram shows the dot-matrix LCD display panel on
different Zero U models.
PX3 models:
PX3-iX7 models:
You can use the LCD display to view the PX3 information and even switch
an outlet. It consists of:
A dot-matrix LCD display
Four control buttons
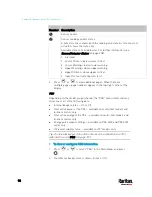
Note 1: All dot-matrix LCD display diagrams illustrated in the User Guide
are for Zero U models. Your dot-matrix LCD may look slightly different if
it is a 1U/2U model.
Zero U models automatically adjust the orientation of the content shown
on the dot-matrix LCD display after detecting the direction in which the
PDU is installed. 1U and 2U models do NOT adjust the content's
orientation.
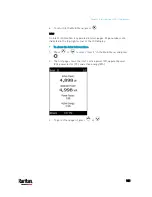
Note 2: For information on the character LCD display of the PX3 'phase I'
model, see
Old PX3 Character LCD Display
(on page 719).
Содержание PX3-3000 series
Страница 5: ......
Страница 18: ...Contents xviii Index 841...
Страница 66: ...Chapter 3 Initial Installation and Configuration 42 Number Device role Master device Slave 1 Slave 2 Slave 3...
Страница 93: ...Chapter 4 Connecting External Equipment Optional 69...
Страница 787: ...Appendix J RADIUS Configuration Illustration 763 Note If your PX3 uses PAP then select PAP...
Страница 788: ...Appendix J RADIUS Configuration Illustration 764 10 Select Standard to the left of the dialog and then click Add...
Страница 789: ...Appendix J RADIUS Configuration Illustration 765 11 Select Filter Id from the list of attributes and click Add...
Страница 792: ...Appendix J RADIUS Configuration Illustration 768 14 The new attribute is added Click OK...
Страница 793: ...Appendix J RADIUS Configuration Illustration 769 15 Click Next to continue...
Страница 823: ...Appendix K Additional PX3 Information 799...
Страница 853: ...Appendix L Integration 829 3 Click OK...


