background image

OW1.7-VS-CL-1280/ USER MANUAL REV1.4 
March 2019 

8


Carefully thread the C-

mount lens onto the camera’s lens ring, rotating the lens in a cloc

kwise 

direction until it is securely fastened.  Use the lens controls to adjust focus.  We suggest that 
the camera be mounted on a tri-pod or an optical bench. 


Connect the 12V power supply to the camera. 

The Owl 1280 camera is compatible with all types of Camera Link frame grabber.  However, our cameras 
are extensively tested using 

Epix Inc equipment’s 

XCAP, for this reason we recommend XCAP software. 


4.  

EPIX XCAP 

For  minimum  computer  system  requirements,  please  contact  Epix  for  the  latest  information.  It  is  a 
minimum requirement to use a PIXCI E8 frame grabber. Bit packing must also be switched off in order 
for the camera to image. 

4.1  

Download and Install XCAP 

Using  the  following  link

http://www.epixinc.com/support/files.php

,  please  select  the  appropriate 

version of XCAP for your computer.  Please ensure you are downloading from the section labelled.  

Pre-

release  version  with  support  for  the  latest  cameras  and  latest  PIXCI®  imaging  boards.

    Open  the 

downloaded file when complete and follow the onscreen instructions.  Be sure to accept the board 
driver installation.  

4.2 

Operating your camera using XCAP 

1. Open XCAP from within your operating system enabling administrative privileges.   

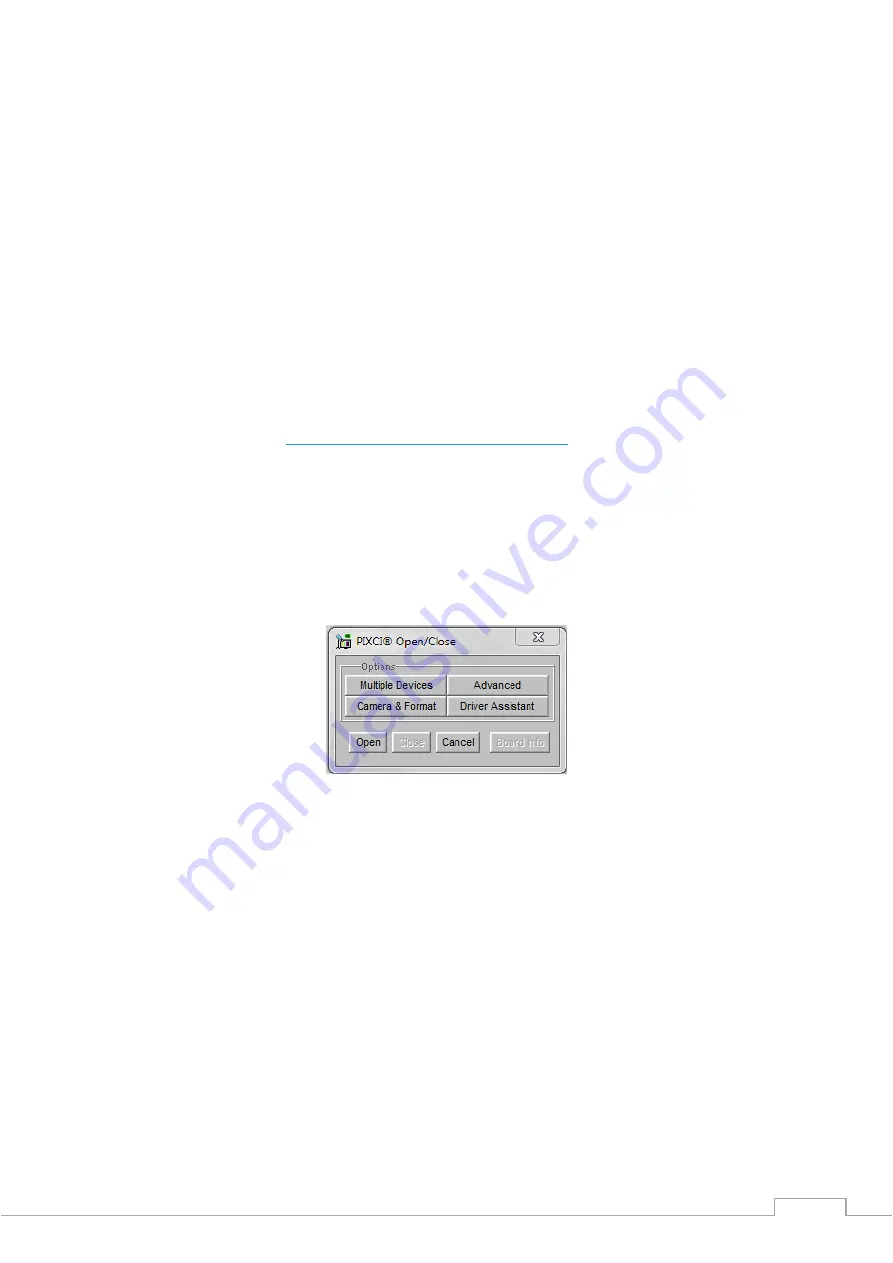
2. Select PIXCI dropdown menu and select PIXCI Open Close, Figure 1 should appear. 


Figure 1: Open / Close 

3. Select Close, and then Click on the Camera & Format button. 

4. Using the dropdown menu scroll down and select Raptor Photonics OWL 1280 from the list (Figure 
2).  Selecting OK when done. 

Содержание OW1.7-VS-CL-1280

Страница 1: ...OWL 1280 Model OW1 7 VS CL 1280 USER MANUAL...

Страница 2: ...OW1 7 VS CL 1280 USER MANUAL REV1 4 March 2019 2 CONTENT CONTENT 2 1 INTRODUCTION 3 2 SPECIFICATION 4 3 GETTING STARTED 6 4 EPIX XCAP 8...

Страница 3: ...s window between the camera sensor and the microscope or lens Should any other issues occur please contact your local agent To clean the sensor window gently wipe the face of the sensor window with a...

Страница 4: ...rons typical Quantum Efficiency 80 1 55 m Full Well Capacity LG 450ke HG 10ke Pixel Operability 99 Digital Output Format 12 bit Camera Link Medium Configuration Dark Current e p s 19 000 15 C Exposure...

Страница 5: ...OW1 7 VS CL 1280 USER MANUAL REV1 4 March 2019 5 2 2 Mechanical Outline 3D drawings STEP are available upon request...

Страница 6: ...Microscope The OWL 640 has a standard C Mount that should easily screw onto any microscope port 3 3 Mounting to a tripod or optical table The camera has a 20 BSW Whitworth threaded hole to mount to a...

Страница 7: ...to a USB port of your PC the red light on the dongle should light up Use the Camera Link cables to connect the camera to the computer Where the cable closest to the trigger and power connectors going...

Страница 8: ...packing must also be switched off in order for the camera to image 4 1 Download and Install XCAP Using the following link http www epixinc com support files php please select the appropriate version...

Страница 9: ...windows should open a viewing window Left and a control window Right Figure 3 XCAP Camera Control Screen 6 The camera controls are pre configured in EPIX 7 The control window on the right should refle...

Страница 10: ...ready to acquire an image 10 Check the Serial Connect box to establish serial communication to the camera This should contain a tick as circled in Figure 5 11 Check the live button as circled in Figur...

Страница 11: ...ugh the tabs in the control window of the EPIX software 4 4 Exposure Click on the Gain Tab There is an option for Auto Level Control ALC When Auto Level Control is unchecked you can manually adjust th...

Страница 12: ...OW1 7 VS CL 1280 USER MANUAL REV1 4 March 2019 12 Figure 7 Gain Tab 4 5 Trigger Use this tab to select the Readout Mode and a Fixed Frame Rate value Figure 8 Trigger Tab...

Страница 13: ...ure time and digital gain within the given frame rate to optimise the image quality Figure 9 Auto Tab 4 7 Auto ROI Use this tab to set the Region of Interest ROI used for the Auto Level Control ROI ga...

Страница 14: ...r when we move the ROI box to the carpet Figure 12 where the sun is shining the camera adjusts the exposure but the box becomes too dark to see any detail This is an extreme example used with our Owl...

Страница 15: ...5 Figure 13 Controlling the NUC Status Figure 14 NUC Off Figure 15 NUC On 4 9 TEC Thermoelectric Cooling TEC Use this tab to set and read back the sensor temperature The optimum temperature should be...

Страница 16: ...invert and Active Image Enhancement Output video can be digitally inverted such that dark areas in the image will appear bright by checking the video invert box Figure 17 Camera Information Output vid...

Страница 17: ...tically adjusted in the XCAP software This needs manually Configured to give the best display of the RAW image data from the camera 1 Go to the Modify Contrast Modification menu Figure 19 2 Select Str...

Страница 18: ...OW1 7 VS CL 1280 USER MANUAL REV1 4 March 2019 18 Figure 20 Stretch Contrast...

Страница 19: ...W1 7 VS CL 1280 USER MANUAL REV1 4 March 2019 19 CORPORATE HEADQUARTERS Raptor Photonics LTD Willowbank Business Park Larne Co Antrim BT40 2SF Northern Ireland PH 44 2828 270141 www raptorphotonics co...

Отзывы: