Operating Instructions D50+ | P50+ | SHERAprint 50
53
│
96
Rapid Shape GmbH
│
DOCR000438
Enabling the
„
Show detailed printing
screen
“
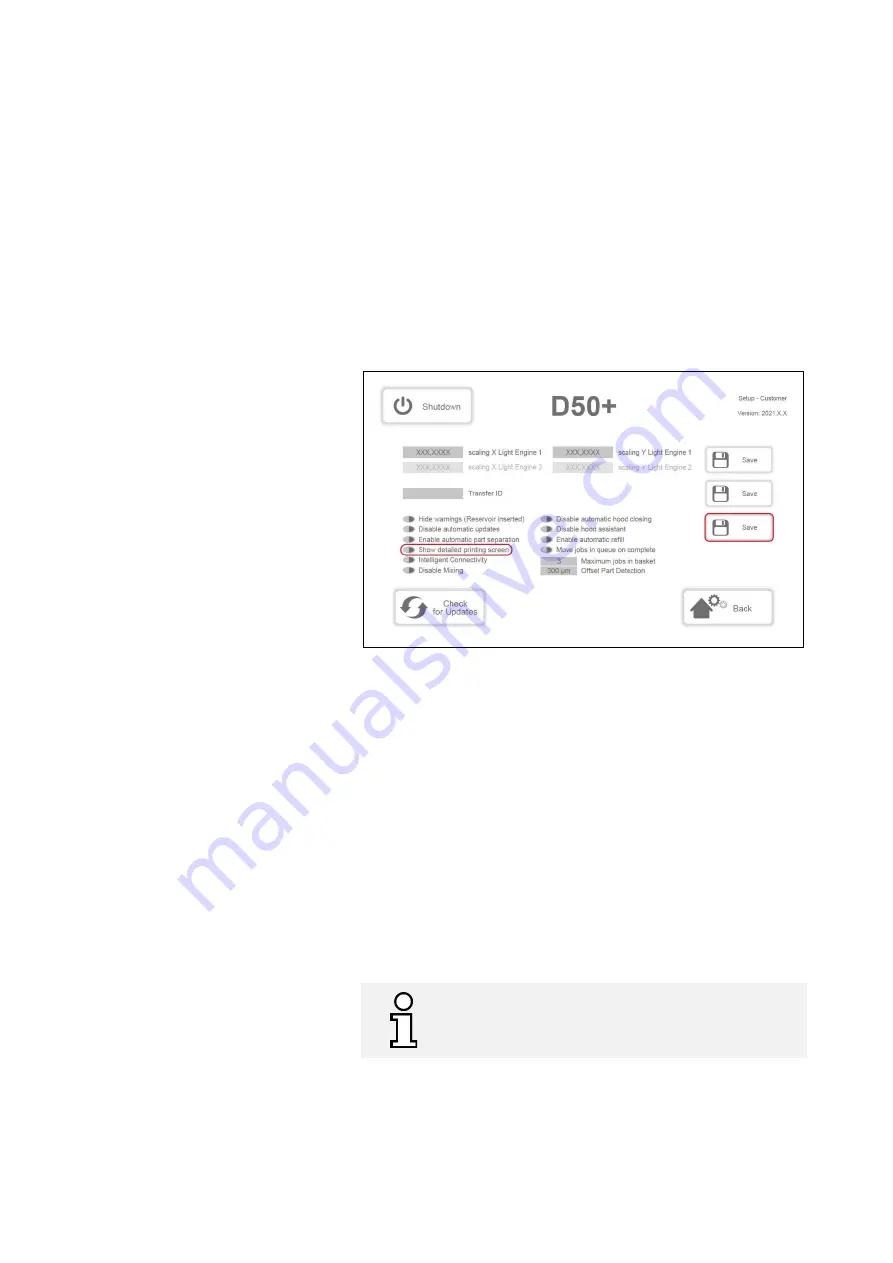
Proceed as follows if you want the detailed print view with force charts
to be displayed as standard during printing:
1.
Access the
«
Customer
»
menu: Main Menu >
«
Setup
»
>
«
Service
»
>
«
Switch Level
»
>
«
Customer
»
. (see fig. below)
2.
Locate the button
«
Show detailed printing screen
»
on the left-
hand side of the display.
The button lights up red when the
function is disabled.
3.
Press the button next to the description to enable the function.
The button lights up green when the function is enabled.
4.
Press the
«
Save
»
button on the right-hand side of the display to
save the setting.
5.
Return to the main menu.
Figure 22: Customer menu
, „Show detailed printing screen“
7.8.3
Pausing Jobs & Ending Them Prematurely
You can pause or prematurely end an active printing process (for
example, in the case of a failed or incorrect job).
Pausing a Job
Proceed as follows to pause a job:
1.
Progress summary: Press the
«
Pause
»
button. The current layer is
still cured in full, then the printing process is stopped.
2.
Press the
«
Continue
»
button to resume the paused printing
process.
Ending a Job
Proceed as follows to end your print job:
1.
Progress summary: Press the
«
Cancel
»
button. The printing
process is cancelled immediately and you return to the main
menu.
We do not recommend pausing the print job or not for
too long as the interrupted layer may not adhere
properly due to too much exposure to oxygen.


