


24
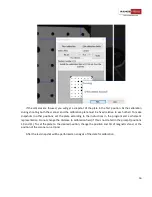
Scanning with markers
This scanning method is more convenient than scanning without markers. In addition to construction of
the object surface, in this mode the scanner finds marks and calculates their coordinates. If each of the
following scans has enough related marks from previous ones, new fragment automatically will be placed in
the desired position. In this way, all the pieces will automatically form a three-dimensional object model,
making it easier for further processing of the scan data.
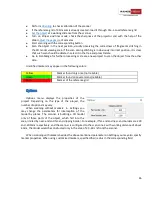
Found markers form a
reference grid.
You can create a reference grid in advance,
and then scan the object. Thus each scan will be connected to the reference grid, and
not to the previous scan, without the need for overlap between them. Thus, you can
stick fewer markers to an object. Switching between creating a reference grid and
scanning is done in the control panel.
Reference grid can be used repeatedly, if you're using auxiliary object for your scanning process (surface
with markers). Reference grid can be uploaded in different formats: bаsegrid, оbс, txt from third-party
sources, for example, from photogrammetric system, that allows you to scan large objects without
significant loss in accuracy. If you want to create the reference grid press the
File
→
Save reference grid.
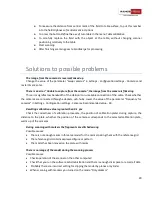
When sticking markers to an object it is desirable to choose flat areas. In this case, on obtained model
you can cut the section with the mark, and cover the blank space without significant losses in a result.
For scanning it is convenient to use additional dark rotating platform with in advance placed markers.
Using a dark surface, which is "invisible" for the scanner, simplifies removing extra areas when processing
the model.
Содержание Smart
Страница 1: ...RangeVision Smart ScanCenter 2016 1 ...