INSTALLATION GUIDE
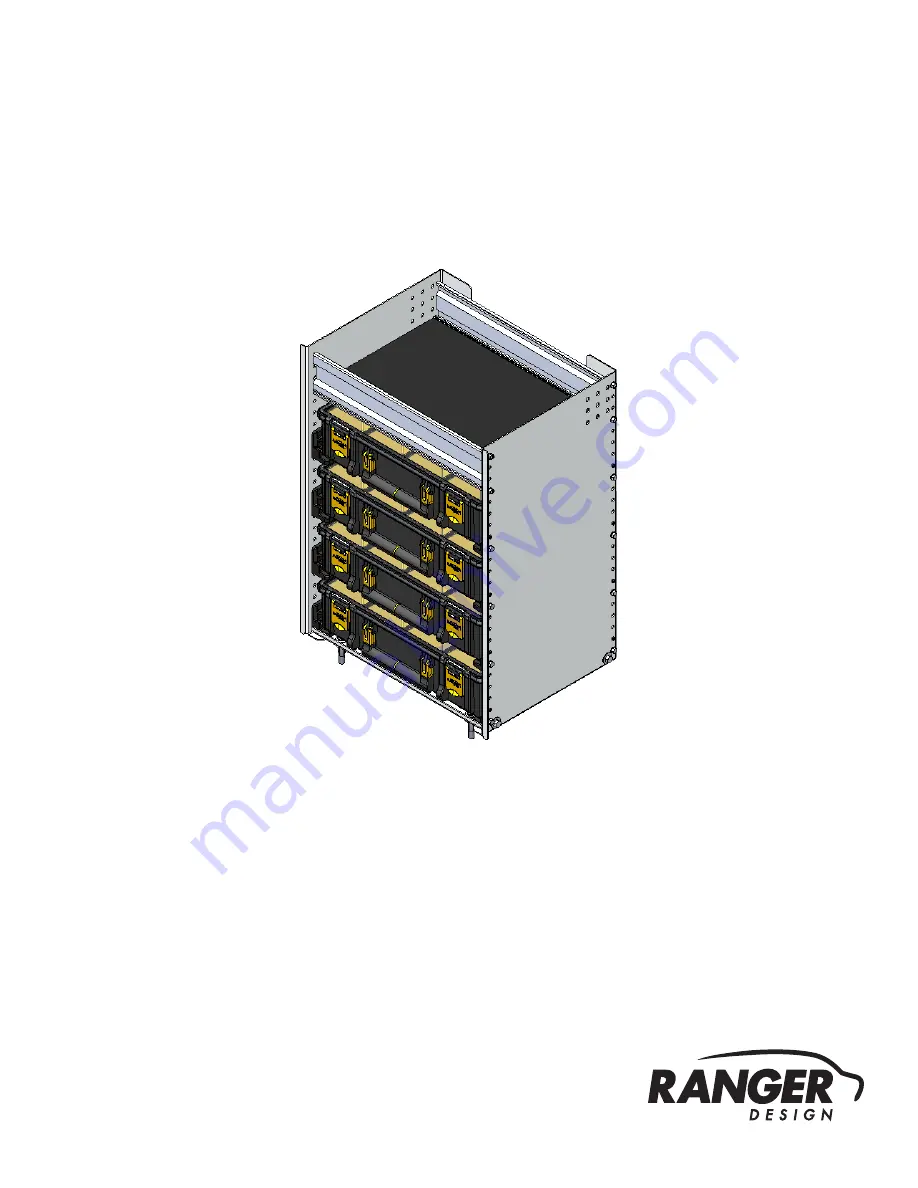
C2-PA18-4 Partskeeper Cabinet
Страница 1: ...INSTALLATION GUIDE C2 PA18 4 Partskeeper Cabinet...
Страница 2: ...hase 2 Installation 8 9 10 11 13 q 2 1 Mark Holes For Plus Nuts q 2 2 Attach Plus Nut q 2 3 Attach Partskeeper Cabinet To the Floor q Cordless Impact q Cordless Drill q Tape Measure q Marker q 1 2 Soc...
Страница 3: ...2 Verify all parts are present Item No Description Qty 50 712 Floor Bracket 2 50 760 Partskeeper Rail 2 50 7007 End Panel Left 1 50 7008 End Panel Right 1 62 U5079 Plastic Partskeeper Case 4 60 11 87...
Страница 4: ...ly 1 1 3 Fastener kits 90 204 Hex Bolt 5 16 3 4 98 116 Flat Washer 5 16 94 116 Serrated Nut 5 16 4 4 8 8 92 102 Screw 14 1 4 4 90 012 Screw 1 4 10 3 4 Hex Bolt 5 16 18 3 4 GR 5 ZINC 90 204 92 102 Scre...
Страница 5: ...ly 4 4 Spacer 0 375 ID 1 0 OD 0 25 LONG NYLON 98 157 Plusnut 94 132 4 4 98 116 Flat Washer 5 16 O D 7 8 ZINC 4 4 98 122 Lock Washer 5 16 ZINC 4 4 Hex Bolt 5 16 18 1 3 4 GR 5 ZINC 90 011 4 4 94 132 5 1...
Страница 6: ...ion Guide REV A1 Page 6 1 2 1 Attach both panels to the shelf trays PHASE 1 ASSEMBLY 1 2 SHELF ASSEMBLY IMPORTANT Assemble the partskeeper on a protected clean surface to avoid scratching TOOLS q Cord...
Страница 7: ...2 bottom brackets to the end panels 1 2 4 Attach 1 partskeeper rail on the bottom of each end panel TOOLS q Cordless Impact q 1 2 Socket HARDWARE USED 4 94 5022 90 204 Hex Bolt 5 16 3 4 98 116 Flat W...
Страница 8: ...2 1 1 Lift the assembled partskeeper into the van then mark the holes on the bottom brackets to the vehicle PHASE 2 INSTALLATION 2 1 MARK HOLES FOR PLUS NUTS TOOLS q Marker MARK Mark the 2 holes of ea...
Страница 9: ...nk Wiring Harness and Hose NOTE Use 1 2 drill bit with drill collar to stop drill at 1 2 depth 2 2 1 Lift the assembled partskeeper cabinet on the side Drill all the marks using 1 2 drill bit w drill...
Страница 10: ...HARDWARE USED Flat washer 5 16 Flat washer 5 16 BS 7 8 OD TOOLS q Cordless Impact q 1 2 Socket q 9 16 Wrench STEP 1 Assemble the 6491 plusnut tool with the hardware needed plus nut and the 9 16 wrench...
Страница 11: ...the holes to the plusnuts then install the bottom shelf to the plus nuts PHASE 2 INSTALLATION 2 3 ATTACH PARTSKEEPER CABINET UNIT TO THE FLOOR without ranger floor TOOLS q Cordless Impact q 1 2 Socke...
Страница 12: ...he floor using 1 hole saw then drill holes into the van floor for plus nut Attach plus nut in the van floor then lift the partskeeper cabinet back in place and attach the floor braket to the plus nut...
Страница 13: ...Guide REV A1 Page 13 You have successfully installed your C2 PA18 4 Thank you for doing business with us For any feedback or suggestions you may have please contact cs rangerdesign com IMPORTANT After...