background image

.

.

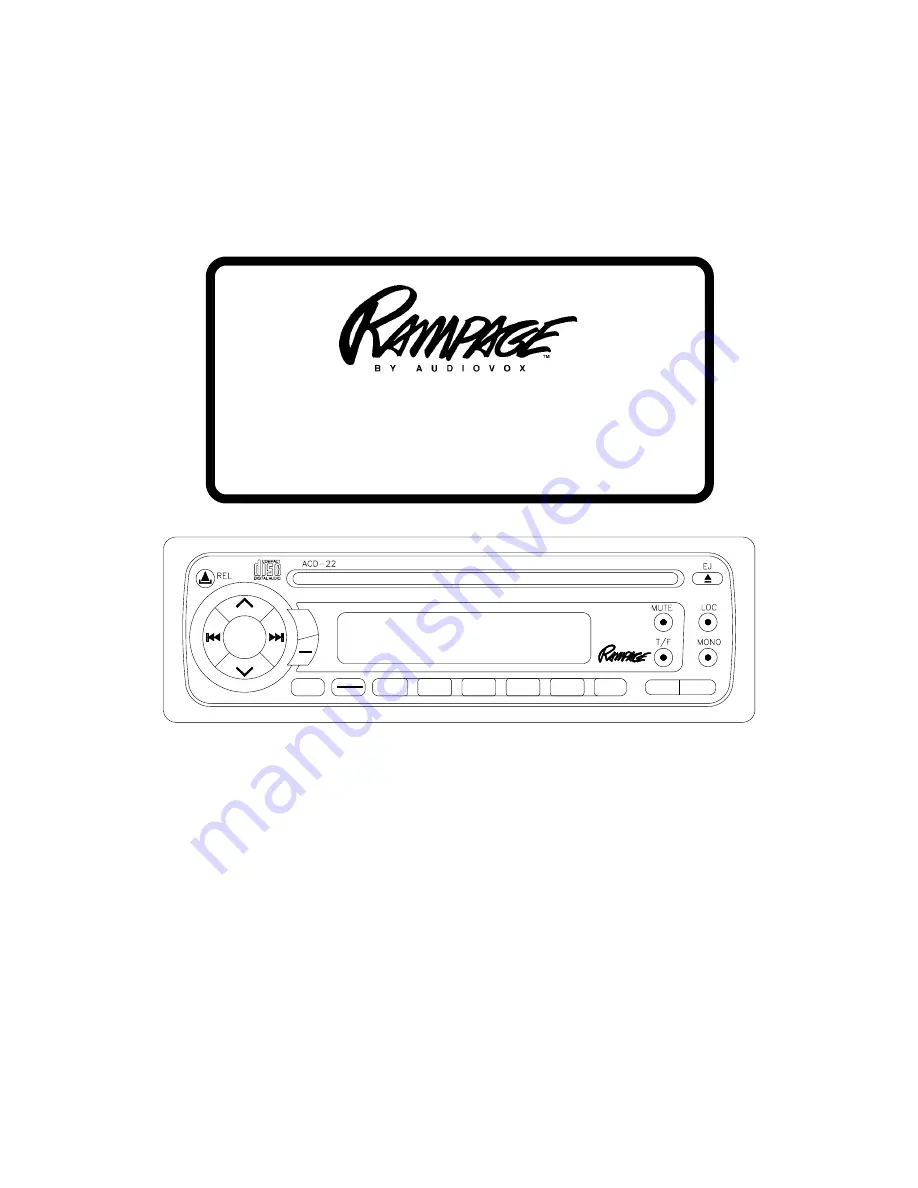
ACD-22

ACD-22

ACD-22

ACD-22

ACD-22

 AM/FM/MPX RADIO

 WITH DETACHABLE FRONT PANEL,

COMPACT DISC PLAYER

 AND QUARTZ CLOCK

LOUD

BAND

1

PAU

2

SCN

3

RPT

4

5

6

MODE

PWR

SEL

VOL

VOL

CONTROL

SHF

EQ

AS

PS

CD-R/RW PLAYBACK

LEVEL METER

OWNER'S  MANUAL

MANUEL  DE  L'UTILISATEUR

MANUAL  DE  OPERACION

Содержание 1285300F

Страница 1: ... FM MPX RADIO WITH DETACHABLE FRONT PANEL COMPACT DISC PLAYER AND QUARTZ CLOCK LOUD BAND 1PAU 2 SCN 3RPT 4 5 6 MODE PWR SEL VOL VOL CONTROL SHF EQ AS PS CD R RW PLAYBACK LEVEL METER OWNER S MANUAL MANUEL DE L UTILISATEUR MANUAL DE OPERACION ...

Страница 2: ...chieved turn off the ignition switch and proceed with final mounting of the chassis 5 Carefully slide the radio into the mounting sleeve making sure it is right side up until it is fully seated and the spring clips lock it into place 6 Attach one end of the perforated support strap supplied to the screw stud on the rear of the chassis using the hex nut provided Fasten the other end of the perforat...

Страница 3: ... AC H A B L E FRONT PANEL EXISTING DASH OPENING FILE EDGES TO FIT IF NECESSARY DO NOT OVERFILE NOTE IF DASH IS SOLID USE REAR SIDE WITHOUT THE LIP OF MOUNTING SLEEVE AS A TEMPLATE CUT OPENING UNIVERSALINSTALLATIONUSINGMOUNTINGSLEEVE UNIVERSALINSTALLATIONUSINGMOUNTINGSLEEVE UNIVERSALINSTALLATIONUSINGMOUNTINGSLEEVE UNIVERSALINSTALLATIONUSINGMOUNTINGSLEEVE UNIVERSALINSTALLATIONUSINGMOUNTINGSLEEVE NUT...

Страница 4: ...ATE AN AUTOMATIC ANTENNA OR AN EXTERNAL AMPLIFIER SEE ANTENNAORAMPLIFIERMANUAL ANTENNA LEAD ON REAR OF RADIO 9 PIN PLUG SEE PAGE 4 FOR SPEAKER WIRING POSITIVE TERMINAL 12 VOLT BATTERY METAL PART OF DASH DRILL HOLE IF NECESSARY SCREW BLACK RED EXISTING ANTENNA CABLE BLUE ANTENNA AUTOMATIC ANTENNA FUSEBLOCK IMPORTANT YELLOW WIRE MUST BE CONNECTED ASSHOWNORRADIOWILLNOT OPERATEPROPERLY 4 PIN PLUGS YEL...

Страница 5: ...SPEAKER RIGHT REAR SPEAKER G R E E N GRAY w BLACK STRIPE 9 PIN PLUGS GREEN w BLACK STRIPE WARNING l THE AMPLIFIERS IN THIS RADIO ARE ONLY DESIGNED FOR USE WITH 4 SPEAKERS l NEVER COMBINE BRIDGE OUTPUTS FOR USE WITH 2 SPEAKERS l NEVER GROUND NEGATIVE SPEAKER LEADS TO CHASSIS GROUND l FAILURE TO WIRE EXACTLY AS SHOWN BELOW MAY CAUSE ELECTRICAL VIOLET w BLACK RADIO 8 30am 7 00pm Eastern 9 00am 5 00pm...

Страница 6: ... panel Pressing the button additional times will select bass adjustment BAS on display panel treble adjustment TRB balance BAL fader FAD and volume VOL again The display will return to the normal indication 5 seconds after the last adjustment or when an other function is activated 4 BASSCONTROL To adjust the bass level first select the Bass mode by pressing the Select button 3 until the BAS indica...

Страница 7: ... be shown on the display panel from FAD 10R full rear to FAD 10F full front When the volume level between the front and rear speakers is equal FAD F R will be shown on the display panel The display will automatically return to the normal indication 5 sec onds after the last adjustment or when an other function is activated 8 LOUDNESSCONTOUR LOUD When listening to music at low volume lev els this f...

Страница 8: ... set using theUp Down seek tuning functions bm 3 Press the pre set button to be set and con tinue to hold the button in A confirming tone will be heard and the pre set number will ap pear on the display panel The station is now set into the memory of that pre set button and can be re called at any time by momentarily pressing that button 4 Repeat the above procedure for the remaining 5 pre sets on...

Страница 9: ...r the play back mode for the CD player Each press of the button will select a different mode as indi cated on the display panel During CD player operation this button may be used to change to radio without eject ing the disc the CDP indication will remain on the display panel to show that a disc is still loaded in the unit Press the button again to return to integral CD player mode cl TRACK SELECT...

Страница 10: ...sh 10 10 10 10 10 OPER OPER OPER OPER OPER A A A A A T T T T T ING INSTRUC ING INSTRUC ING INSTRUC ING INSTRUC ING INSTRUCT T T T T IONS IONS IONS IONS IONS when the panel is removed The flashing light serves as a visual warning to the would be thief that the unit has been disabled by removal of the front panel cu RESET BUTTON A RESET button is located on the front of the chassis above the theft d...

Страница 11: ...PER OPER OPER OPER A A A A A T T T T T ING INSTRUC ING INSTRUC ING INSTRUC ING INSTRUC ING INSTRUCT T T T T IONS IONS IONS IONS IONS Engage right side first ATTACHING THE FRONT PANEL DETACHING THE FRONT PANEL Release button ...

Страница 12: ...ejecting properly Try pressing the Eject button again Check the condition of the disc in use or try another disc ER 4 Indicates an error in the laser reading the disc Eject the disc make sure it is clean undamaged and loaded correctly label side up Re load the disc and check for proper operation or try another disc ER 5 Indicates excessive temperature conditions CD play will resume when the temper...

Страница 13: ... 10 KHz step FM 87 5 107 9 MHz 200 KHz step Sensitivity AM 20 uv FM 1 5 uv FM Stereo Separation 30 dB CD Frequency Response 20 20 000 Hz 1 dB CD Signal Noise Ratio 70 dB CD Channel Separation 60 dB CD Distortion 0 2 13 13 13 13 13 SPECIFICA SPECIFICA SPECIFICA SPECIFICA SPECIFICAT T T T T IONS IONS IONS IONS IONS CD RANDCD RWPLAYBACKCAPABILITY This model can play most CD R and CD RW media that con...

Страница 14: ... the Warranty on this product l When not using the disc player always remove the compact disc Do not leave an ejected disc sitting in the disc slot as this can expose it to sunlight and other causes of damage l Do not attempt to open the unit chassis There are no user serviceable parts or adjustments inside l When the vehicle warms up during cold weather or under damp conditions moisture may conde...

Страница 15: ... S LIABILITY UNDER THIS WARRANTY IS LIMITED TO THE REPAIR OR REPLACEMENT PROVIDED ABOVE AND IN NO EVENT SHALL THE COMPANY S LIABILITY EXCEED THE PURCHASE PRICE PAID BY PURCHASER FOR THE PRODUCT This Warranty is in lieu of all other express warranties or liabilities ANY IMPLIED WARRANTIES INCLUDING ANY IMPLIED WARRANTY OF MERCHANTABILITY SHALL BE LIMITED TO THE DURATION OF THIS WRITTEN WARRANTY ANY...

Страница 16: ...tement et que les pinces à ressort s enclenchent 6 Fixer l une des extrémités de l étrier perforé fourni au crampon à vis situé à l arrière de la radio à l aide de l écrou hexagonal fourni Fixer l autre extrémité de l étrier à une partie fixe du tableau de bord soit endessus soit en dessous de la radio à l aide de la vis et de l écrou hexagonal fournis Courber l étrier pour rectifier la position s...

Страница 17: ...EMARQUE SILETABLEAUDEBORDESTPLEIN UTILISERLA GAINE DE MONTAGE COMME GABARIT ET DECOUPER L OUVERTURE INSTALLATION UNIVERSELLE ECROU ENLEVER LE CADRE DE PLASTIQUE DU DEVANT DU CHÂSSIS EN LE DÉTACHANT DÉLICATEMENT INSTALLATION TYPIQUE INSTALLATION ISO INSTALLATION ISO INSTALLATION ISO INSTALLATION ISO INSTALLATION ISO 20 MAXIMUM PANNEAU AVANT ATTENTION POUR QUE LE LECTEUR DE CD FONTIONNE CORRECTEMENT...

Страница 18: ...CHE EXISTANTE DANS LE TABLEAU DE BORD PERCER SI NÉCESSAIRE ANTENNE A COMMANDE ELECTRIQUE ANTENNE POSTE DE RADIO NOIR VIS LE FIL D ANTENNE FICHE À 4 BROCHES COFRET À FUSIBLES BORNE POSITIVE DE LA BATTERIE 12 VOLT FUSIBLE RADIO OU ACCESSORY IMPORTANT BRANCHER LE FIL JAUNE VERS LA SOURCE 12 VOLTS CONSTANTE BLEU IMPORTANT DU FIL BLEU PEUT ETRE UTILISE POUR ACTIVER A DISTANCE UNE ANTENNE A COMMANDE ELE...

Страница 19: ... HAUT PARLEURS l NE METTEZ JAMAIS A LA MASSE DES CABLES DES HAUT PARLEURS NEGATIFS l TOUT MAUVAIS CABLAGE PEUT ENDOMMAGER L AUTORADIO ATTENTION 8 30am 7 00pm Côte Est 9 00am 5 00pm Côte Est Lundi au Vendredi Samedi POSTE DE RADIO HAUT PARLEUR AVANT GAUCHE HAUT PARLEUR AVANT DROIT HAUT PARLEUR ARRIÈRE GAUCHE HAUT PARLEUR ARRIÈRE DROIT BLANC VERT GRIS RAYE NOIR VIOLET VERT RAYE NOIR BLANC RAYE NOIR ...

Страница 20: ...r avant arrière à régler à l aide de la touche de réglage du niveau 2 Une pression unique sur le sélecteur permet d accéder au réglage du volume de l appareil VOL s inscrit sur l afficheur Les pressions suivantes permettent de sélectionner le réglage des basses BAS s affiche le réglage des aigus TRB de la balance BAL ou de l équilibreur avant arrière FAD puis de nouveau du vol ume VOL L affichage ...

Страница 21: ...L affichage revient automatiquement à l indication normale 5 secondes après le dernier réglage ou lorsqu une autre fonction est activée 7 RÉGLAGE DE L ÉQUILIBREUR AVANT ARRIÈRE Pour réaliser l équilibrage entre les haut parleurs avant et arrière commencez par sélectionner le mode Équilibreur avant arrière en appuyant sur le sélecteur 3 jusqu à ce que l indication FAD s affiche Dans un délai de 5 s...

Страница 22: ...AYAGE PS Appuyez brièvement sur cette touche pour balayer les 6 stations présélectionnées de la bande FM utilisée ainsi que des deux autres bandes FM L appareil s arrête 10 secondes sur chaque station présélectionnée avant de passer à la suivante la fréquence clignote sur l afficheur durant le balayage des présélections Appuyez de nouveau brièvement sur la touche pour interrompre la fonction de sy...

Страница 23: ...onner le réglage local LOCAL s affiche pendant 5 secondes et LOC reste affiché au centre de l afficheur et seules les stations dont le signal est puissant sta tions locales sont reçues Une nouvelle pression sur la touche permet de sélectionner le réglage distant Dx s affiche pendant 5 secondes et l autoradio s arrête sur un plus grand nombre de signaux dont ceux émis par les stations moins puissan...

Страница 24: ... affichera ainsi que le numéro de la plage Lorsque vous avez trouvé une plage intéressante appuyez de nouveau sur la touche de balayage des intro ductions des plages pour désactiver la fonction et la lecture de la plage sélectionnée se poursuivra Le mode Balayage des introduc tions des plages est également désactivé par les fonctions de répétition 24 et de lecture aléatoire 25 cp SÉLECTEUR DE RÉPÉ...

Страница 25: ...r de CD appuyer sur le bouton de réinitialisation permet de remettre le système à zéro et de revenir à un fonctionnement normal dl BOUTON DE VERROUILLAGE DE LA FAÇADE Ce bouton permet de déverrouiller le mécanisme retenant la façade au châssis Pour détacher la façade appuyez sur le bou ton de façon à libérer la partie gauche Saisissez ensuite la partie dégagée et retirez la du châssis Pour remettr...

Страница 26: ...chera 2 Appuyez brièvement sur le sélecteur d heure fréquence T F de façon à afficher l heure Pressez ensuite le sélecteur T F et maintenez le enfoncé jusqu à ce que l affichage de l heure se mette à clignoter 3 Tandis que l affichage clignote appuyez sur la touche de syntonisation vers le haut pour régler les heures et l indication A ou P et sur la touche de syntonisation vers le bas pour régler ...

Страница 27: ...cu et faire un nouvel essai ER 7 Indique une erreur du lecteur laser Éjecter le disque s assurer qu il est propre en bonne condition et qu il est correctement chargé l étiquette tournée vers le haut ER 8 Indique une erreur du lecteur laser Éjecter le disque s assurer qu il est propre en bonne condition et qu il est correctement chargé l étiquette tournée vers le haut Si les mesures préconisées s a...

Страница 28: ... ouvrir le boîtier du lecteur Il ne contient aucune commande d ajustement ni aucune pièce dont on doit faire l entretien l Lorsque le véhicule se réchauffe alors qu il fait très froid où qu il y a beaucoup d humidité il peut se former de la condensation sur l objectif du lecteur Si cela se produit le lecteur ne fonctionnera pas tant que l humidité ne se sera pas évaporée l Cet appareil est doté d ...

Страница 29: ... LIMITEE A LA REPARATION OU AU REMPLACEMENT TEL LE QU IL ELLE EST STIPULE E CI DESSUS ET EN AUCUN CAS LA RESPONSABILITE DE LA SOCIETE NE POURRA EXCEDER LE PRIX D ACHAT PAYE PAR L ACHETEUR DU PRODUIT CetteGarantieremplacetouteautregarantieexpresseouresponsabilité TOUTEGARANTIE TACITE COMPRENANT TOUTE GARANTIE DE QUALITE LOYALE ET MARCHANDE EST LIMITEE A LA DUREE DE CETTE GARANTIE ECRITE TOUTE ACTIO...

Страница 30: ...ue el funcionamiento sea correcto apague el interruptor de encendido y prosiga con el montaje final del chasis 5 Deslice con cuidado la radio hacia el soporte de montaje asegurándose de que el lado correcto esté hacia arriba y una vez que esté totalmente asentada pueda enganchar los sujetadores de resorte para trabarla 6 Fije un extremo de la correa de soporte perforada provista al tornillo que es...

Страница 31: ...ODUCTOR DE DISCOS CD EL CHASÍS DEBE SER MONTADO DENTRO DE 20 DEL HORIZONTAL ASEGÚRESE QUE LA UNIDAD ESTÉ MONTADA DENTRO DE ESTA LIMITACIÓN INSTALACION UNIVERSAL INSTALACION UNIVERSAL INSTALACION UNIVERSAL INSTALACION UNIVERSAL INSTALACION UNIVERSAL CORREA PERFORADA TORNILLO TUERCA FIJE ESTE EXTREMO AL TORNILLO DE LA PARTE TRASERA DEL CHASIS ABERTURAQUEEXISTEENELTABLERO LOMELOSBORDES PARAADAPTARLAS...

Страница 32: ...EL TABLERO TALADRE UN AGUJERO SIES NECESSARIO TORNILLO RADIO O ACCESORIO FUSIBLE FUSIBLES DEL VEHICULO VEAPAGINA32PARAALAMBRACION DELOSALTAVOZ ENCHUFE DE 4 CLAVIJAS IMPORTANTE ESTE ALAMBRE TIENE QUE SER CONECTADO COMO ILUSTRADO O EL RADIO NO OPERARA PROPIAMENTE ZOCALO PARA LA ANTENA DE LA PARTE TRASERA DE LA RADIO EL CABLE DE LA ANTENA ANTENA ANTENA AUTOMATICA AZUL IMPORTANTE EL ALAMBRE AZUL PUEDE...

Страница 33: ...TE LAS SALIDAS PARA USO CON 2 ALTOVOZ l NUNCA CONECTE A TIERRA LOS CONDUCTORES NEGATIVOS DE LOS ALTOVOZ A LA CONEXIÓN A TIERRA DEL CHASIS l EL ALAMBRADO INCORRECTO PODRÁ OCASIONAR DAÑOS AL RADIO LAS SALIDAS RCA DE BAJO NIVEL SE CONECTAN A AMPLIFICADOR ES EXTERNO S OPCIONAL ES ROJO CANAL DERECHO TRASERO BLANCO CANAL IZQUIERDO TRASERO ALTAVOZ DELANTERO IZQUIERDO ALTAVOZ TRASERO IZQUIERDO BLANCO CON ...

Страница 34: ...e regula con el botón de nivel 2 Al oprimir el botón una vez se prepara la unidad para regular el volumen aparece VOL en el visor Al oprimir el botón más veces se prepara la unidadpararegularlossonidosbajos Aparece BAS en el visor los sonidos agudos TRB en la pantalla equilibrio acústico BAL o atenuación acústica FAD y volumen nuevamente VOL El visor volverá a la indicación normal 5 segundos despu...

Страница 35: ...a derecha Cuando el nivel de volumen entre los parlantes izquierdo y derecho sea igual en el visor aparecelaindicaciónBALL R Elvisorvuelve automáticamente a la indicación normal 5 segundos después de la última regulación o cuando se active otra función 7REGULACIÓN DEL ATENUADOR DE VOLUMENADELANTEOATRÁS Para regular el equilibrio acústico de los parlantes delantero y trasero primero seleccione el m...

Страница 36: ...a frecuencia deseada o cerca de ella cuando se suelte el botón Si no se realiza otra sintonización después de 5 segundos por un instante aparecerá AUTO en el visor y la sintonización volverá al modo anterior bn SINTONIZACIÓNDELALMACENAMIENTO AUTOMÁTICO AS SINTONIZACIÓN DE ESTACIONESPREDETERMINADAS PS Pulse este botón brevemente para recorrer las 6 estaciones de las memorias predeterminadas de la b...

Страница 37: ...lección del modo de realce por ecualización bqSELECCIÓN MONOAURAL O ESTEREO PARA FM MONO Durante el funcionamiento de la radio en FM se usa este botón para seleccionar la recepción estereofónica o monoaural de la señal de transmisión En situaciones normales de recepción tiene que dejarse la radio en el modo de recepción estereofónica que se indica en el visor con el ícono al sintonizar una señal F...

Страница 38: ...e selecciona el 38 38 38 38 38 número siguiente de pista tal como aparece indicado en el visor De igual manera cada vez que se aprieta el botón de selección de pista hacia atrás se selecciona el número siguiente de pista en orden descendente que se indicará en el visor cm BOTONES DE AVANCE Y RETROCESO RÁPIDOS Con estas funciones puede realizarse una búsqueda audible de alta velocidad a través de l...

Страница 39: ...z intermitente actúa como advertencia visual para el posible ladrón de que la unidad está inhabilitada por la extracción de su frente cuBOTÓN DE REINICIO Este botón se encuentra en el frente del bastidor arriba del diodo antirrobos el frente debe abrirse para tener acceso al botón El circuito de reinicio protege los circuitos del microprocesador y sólo debe activarse en las siguientes circunstanci...

Страница 40: ...n esta unidad Botón de desenganche CONEXIÓNDELPANELDELANTERO Enganche el lado derecho primero PR PR PR PR PROGR OGR OGR OGR OGRA A A A AMACIÓN DEL RELOJ MACIÓN DEL RELOJ MACIÓN DEL RELOJ MACIÓN DEL RELOJ MACIÓN DEL RELOJ 1 Coloque la llave de encendido del vehículo y la radio en la posición ON en el visor se verán la frecuencia de la radio o el número de pista del disco 2 Oprima el botón de la hor...

Страница 41: ...e el disco Eyecte el disco fíjese si está limpio sin daño alguno y colocado correctamente con la etiqueta hacia arriba Vuelva a colocar el disco y fíjese si funciona bien o pruebe algún otro disco ER 8 Indica un error en el láser que lee el disco Eyecte el disco fíjese si está limpio sin daño alguno y colocado correctamente con la etiqueta hacia arriba Vuelva a colocar el disco y fíjese si funcion...

Страница 42: ...dar expuesto a la luz directa del sol y otras causas de daños l No intente abrir el chasis de la unidad No hay piezas que puedan arreglarse ni tampoco se pueden hacer ajustes internos l Cuando el vehículo se calienta en climas fríos o en condiciones de mucha humedad la humedad puede condensarse en la lente del reproductor de discos Si esto ocurriera el reproductor no operará en la forma adecuada h...

Страница 43: ...ación de las etiquetascorrespondientesalnúmerodeserieycódigodebarrasdelafábrica LARESPONSABILIDAD QUE LA COMPAÑIA ASUME EN VIRTUD DE LA PRESENTE GARANTIA SE LIMITA A LA REPARACION O LA SUSTITUCION QUE SE MENCIONAN ANTES Y BAJO NINGUNA CIRCUNSTANCIA LA RESPONSABILIDAD DE LA COMPAÑIA HABRA DE EXCEDER EL PRECIO DE COMPRA QUE EL COMPRADOR PAGO POR EL PRODUCTO Esta Garantía reemplaza a toda otra garant...

Страница 44: ...128 5300F 2003AudiovoxElectronicsCorporation Hauppauge N Y 11788 PrintedinChina ...

Отзывы: