RAMBO ROOSTER R750R-ST-B Скачать руководство пользователя страница 1


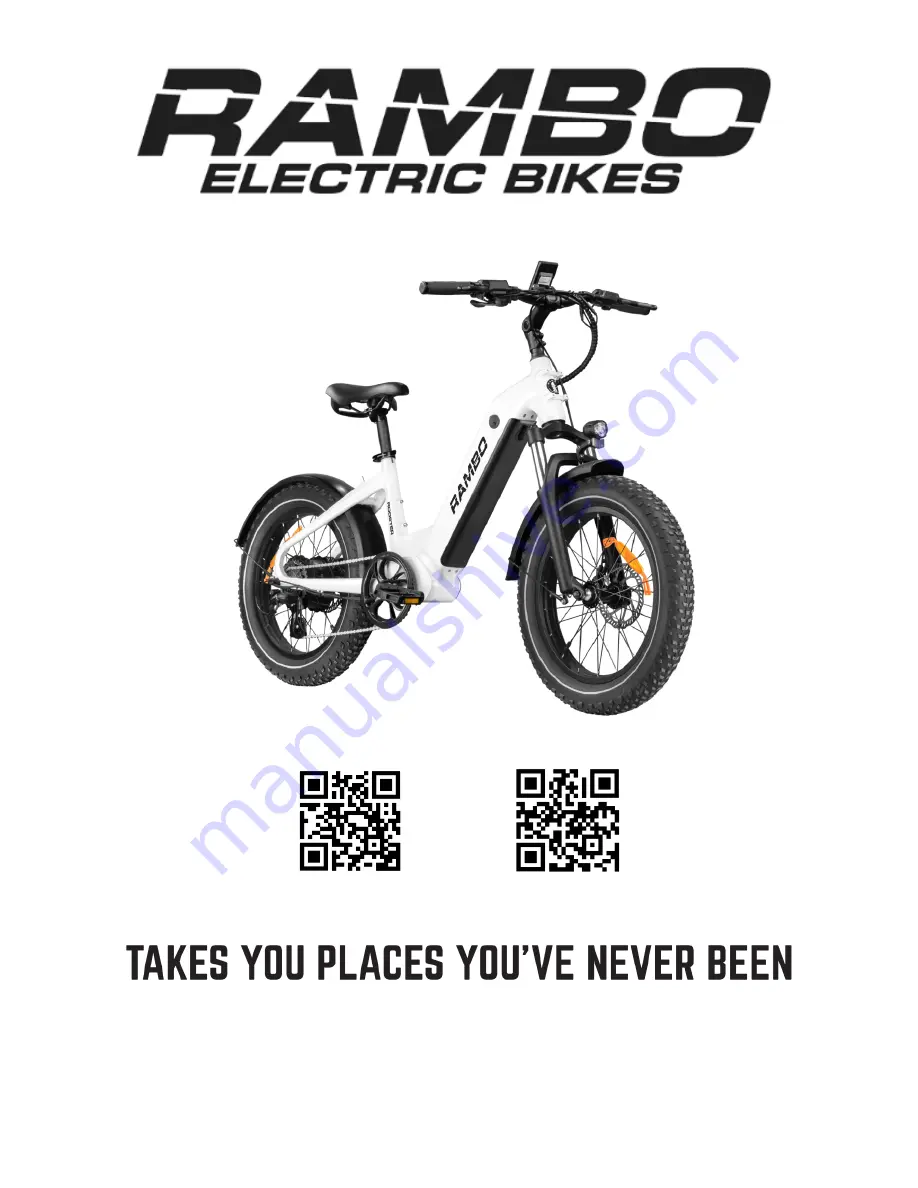
ROOSTER : R750R-ST-B  /  ROOSTER : R750R-ST-BL  /   ROOSTER : R750R-ST-W 


Assembly 


Operation 


Scan the QR code for a video of step-by-step assembly and operation 


Rambo Bikes 

22844 230

th

 Ave 

Centerville, IA  52544 

First Edition, March 2023, Published by Rambo Bikes, Centerville Iowa. All rights reserved. 

Содержание ROOSTER R750R-ST-B

Страница 1: ...ROOSTER R750R ST W Assembly Operation Scan the QR code for a video of step by step assembly and operation Rambo Bikes 22844 230th Ave Centerville IA 52544 First Edition March 2023 Published by Rambo B...

Страница 2: ...NTENANCE AND CARE 21 22 TROUBLESHOOTING GUIDE 23 STANDARD LIMITED WARRANTY 24 Contact Information Email cs rambobikes com Phone 952 283 0777 Website rambobikes com Serial Number This is a good time to...

Страница 3: ...TH RIDING A BIKE CAUTION IS REQUIRED CAUTION OBSERVE CONDITIONS AND MAINTAIN SAFE RIDING PRACTICES WARNING PRODUCT UNDER POWER AND MOVING PARTS WARNING BEWARE OF ELECTRICAL FIRE OR SHOCK ALWAYS WEAR A...

Страница 4: ...RIDING You must ensure that you understand the safe operation of this bike and follow all traffic bike laws and regulations in the area in which the bike is being operated These may include rules rega...

Страница 5: ...e any cracks or visible damage All lighting should be inspected to be sure they have fresh batteries and work properly Check Frame Fork and Components If you notice that the frame or fork has any visi...

Страница 6: ...risk of serious injury or death Pay attention and avoid distractions while riding Always maintain both hands on the handlebars Avoid bike stunts and or aggressive riding When carrying gear make sure i...

Страница 7: ...u can ride your bike may have specific regulations Always respect private property and never trespass Respect the rights of others you may be sharing the trail with i e hikers cyclists equestrians Sta...

Страница 8: ...ize yourself with which hand brake stops each wheel You can complete this task by spinning the front wheel and squeezing each brake lever one at a time to determine which one stops the wheel from spin...

Страница 9: ...9 IDENTIFYING BIKE PARTS...

Страница 10: ...ny time even from a complete stop it can be used to take off and assist you up to max speed Please note the power of the thumb throttle is set to match the power of the pedal assist level you are on 1...

Страница 11: ...s BE SURE NOT TO CUT ANY ELECTICAL WIRES OR BRAKE CABLES Once the packaging material is removed from the bike remove the Allen bolts from the handlebar clamp using a 4mm Allen wrench At this time be s...

Страница 12: ...eat and the handlebars Loosen the axle nuts from the axle then put the wheel into the fork making sure the washers are on the outside of the fork on both sides As shown below You can also remove the a...

Страница 13: ...13 The picture below shows the correct way to install the washer and axle nut to the front fork Then use a 15mm wrench to tighten the axle nuts firmly As shown below...

Страница 14: ...is reverse threaded It is recommended to add general purpose grease to the threads before installing the pedals Right and Left is determined when sitting on the bike After the pedals are installed fli...

Страница 15: ...t height is set properly the rider should be able to put both feet on the ground while fully seated The seat post has a minimum insertion point be sure not to extend the seat beyond this line When usi...

Страница 16: ...level is on 0 there is no power from the motor for both pedaling and for using the thumb throttle Once the assist level is set above 0 the motor will have power and pedal assist and the thumb throttl...

Страница 17: ...les is using throttle only on PAS levels 3 5 with mostly flat ground Range Estimate up to 35 miles is using pedal assist on level 3 4 with mostly flat ground Range Estimate up to 45 miles is using ped...

Страница 18: ...rame and the battery is sitting flush with the frame The first click is the safety latch and the second click is the lock system for the battery Charging Do not charge the battery at temperatures belo...

Страница 19: ...harging the charger will display red and once fully charged the charger will turn green Charging will take approximately 4hrs depending on the battery level Storage Always store the battery in a dry p...

Страница 20: ...and watching for any side to side or up and down wobble If any movement is noted do not ride this bike until the rim is repaired Check the tire inflation Make sure to check tire pressures using a tire...

Страница 21: ...through the grip Seat Position The saddle should be adjusted for proper fit and is an important factor in riding safely Place your pedals in the 6 o clock and 12 o clock position Your bottom leg shou...

Страница 22: ...ear or damage Check the frame fork handlebars and stem for cracks and damage Lubricate handlebar stem and seat post Check each pedal to make sure they are not loose and lubricated Make sure there is n...

Страница 23: ...11 Temperature sensor inside controller fault 11H 12 Current sensor fault 12H 13 Temperature sensor inside battery fault 13H 14 Temperature sensor inside the motor fault 14H 21 Speed sensor fault 21H...

Страница 24: ...ties expressed or implied You may have certain legal rights that extend beyond this warranty in certain states Terms and Conditions of this Limited Warranty This limited warranty does not cover instal...

Страница 25: ...25 Catalog ____ Webpage ____Friend ____Magazine Other Please Explain ____________________________________________________________________ WWW RAMBOBIKES COM...

Отзывы: