


8
2.2 Mission Planner Introduction
Once installation is complete, open Mission Planner by clicking on its system icon.
Finish Mission Planner and drive installation, there will several hints when you open the MP at the
first time. The first hint clicks Yes and the others click NO.
There are six Menu Button in main menu.
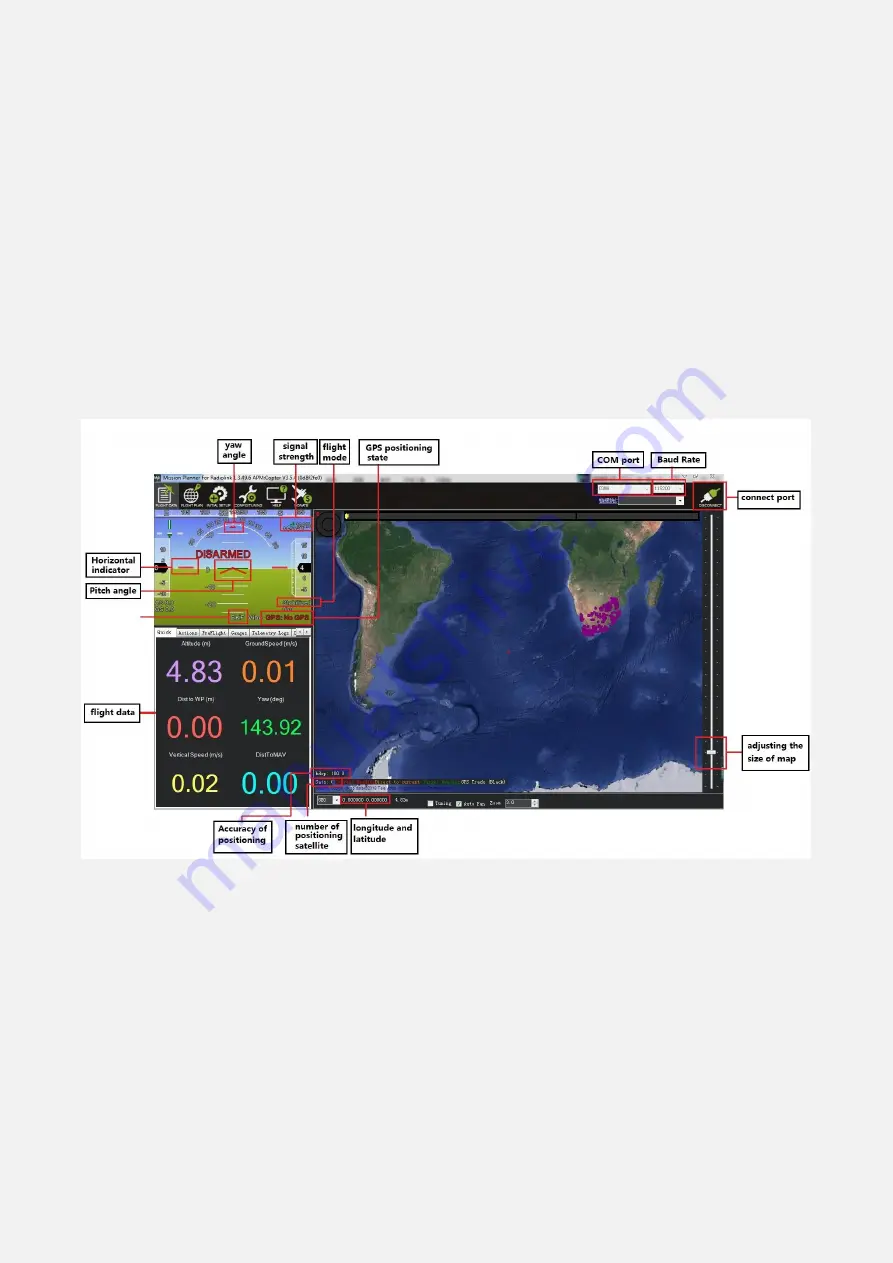
FLIGHTDATA:
flight attitude and data will show in real time on MP
FLIGHTPLAN:
planning the flight mission
INTIAL SETUP:
for firmware installation and update, Mandatory Hardware and Optional Hardware
setup
CONFIG/TUNING:
including detailed PID setup and parameters change
SIMULATION:
make MINI PIX work as a simulator after upgrade a special simulation firmware
HELP:
you can get help when you have questions about MP
3. Initial Setup
First, you have to upgrade the firmware you need when you the first time ready to use MINI PIX.
Radiolink Mini Pix is default with quadcopter firmware, you have to install the right firmware if you
use the other frame drone.
3.1 Download and Install Firmware
Please connect your Mini Pix and computer via USB cable. Open the Mission Planner and select the
right COM port drop-down on the upper-right corner of the screen (near the Connect button). Make
sure the Baud rate is 115200 as shown.
Содержание Mini Pix
Страница 4: ...4 1 2 Connectors ...
Страница 5: ...5 Parameters ...
Страница 14: ...14 4 Place vehicle DOWN and press any key to save setting ...
Страница 21: ...21 For safety you should disconnect the battery and or remove propellers before preforming radio calibration ...
Страница 46: ...46 Hexacopter Octocopter Y6 ...


