background image

13

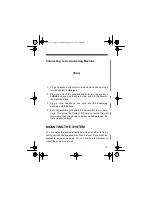
CONNECTING THE SYSTEM

The System 931 connects to any modular phone jack and your
phone. You can also connect it to an answering machine.

Cautions:

• Never install telephone wiring during a lightning storm.

• Never touch uninsulated telephone wires or terminal,

unless the telephone line has been disconnected at the
network interface.

• Use caution when installing or modifying telephone

lines.

Connecting to a Single-Line Phone

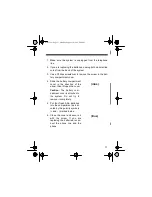
1. Disconnect the telephone line cord from the phone and

plug it into the system’s 

LINE 

jack.

2. Plug one end of the supplied line cord into the system’s

PHONE 

jack.

3. Plug the other end of the cord into the phone’s jack.

(illus)

43-931.fm  Page 13  Monday, August 16, 1999  2:49 PM

Содержание 43-931

Страница 1: ...Cat No 43 931 OWNER S MANUAL Please read before using this equipment System 931 79 Memory Caller ID with Dial Back 43 931 fm Page 1 Monday August 16 1999 2 49 PM...

Страница 2: ...open the product s case This symbol is intended to inform you that important oper ating and maintenance instructions are included in the lit erature accompanying this product RISK OF ELECTRIC SHOCK D...

Страница 3: ...number Caller ID records and includes these features Easy Installation the system easily connects to your tele phone line so you can quickly begin using it Call Summary displays the number of new cal...

Страница 4: ...see caller informa tion and the current time and date Contrast Control lets you adjust the display contrast for the best readability Time and Date Display displays the current time and date as provid...

Страница 5: ...to comply with all appli cable ETL and FCC standards We recommend you record the system s serial number here The number is on the system s bottom panel Serial Number _________________________ 43 931...

Страница 6: ...of the following options are generally available Caller s number only Caller s name only Caller s name and number Your system displays the caller s name only if that option is available in your area T...

Страница 7: ...impair ringer operation If ringer operation is impaired remove a device from the line Your system complies with Part 68 of FCC Rules You must upon request provide the FCC registration number and the R...

Страница 8: ...hese limits provide reasonable protection against radio and TV interference in a residential area However your equipment might cause TV or radio interference even when it is operating properly To elim...

Страница 9: ...9 CONTENTS Pls add the contents 43 931 fm Page 9 Monday August 16 1999 2 49 PM...

Страница 10: ...t types of batter ies standard alkaline or rechargeable or rechargeable batteries of different capacities Follow these steps to install batteries Notes When you replace the batteries do not press any...

Страница 11: ...compartment cover in the direction of the arrow then lift open the cover Caution The battery com partment cover is attached to the system Do not try to remove it completely 5 Put four fresh AAA batter...

Страница 12: ...place the batteries Cautions Always remove old or weak batteries Batteries can leak chemicals that can damage your system Dispose of dead batteries promptly and properly Do not bury or burn them 43 93...

Страница 13: ...terminal unless the telephone line has been disconnected at the network interface Use caution when installing or modifying telephone lines Connecting to a Single Line Phone 1 Disconnect the telephone...

Страница 14: ...931s to a two line phone 1 Disconnect the telephone line cord from the modular phone jack on the wall and plug it into L1 L2 on the tri plex adapter 2 Plug the triplex adapter into the modular phone...

Страница 15: ...answering machine and the phone 4 Set your answering machine to answer after two or more rings This gives the System 931 time to record the call information that the phone company sends between the f...

Страница 16: ...em from the bracket press up from the bot tom of the system until it snaps off the bracket Mounting on a Wall To mount the system on the wall you need two screws not supplied with heads larger than th...

Страница 17: ...e system see Attaching the Mounting Bracket on Page x 5 Route the phone line cords through the slots on the back of the bracket 6 Line up the keyhole slots on the bracket with the screws in the wall t...

Страница 18: ...h but you can change it to display in French or Spanish Follow these steps to change the language 1 Hold down REVIEW and CALL BACK buttons for about 3 seconds until the current language ENGLISH ESPANO...

Страница 19: ...l LOCAL AREA CODE appears 2 To change the first digit press REVIEW until the desired digit appears then press DELETE button to con firm 3 Repeat Step 2 for setting the second and third digit 4 Leave t...

Страница 20: ...time Your system saves up to 79 call records then replaces the oldest call record with each new one During an incoming call the red new call indicator flashes the display lights and NEW and TOTAL num...

Страница 21: ...press REVIEW to view the calls again REDIALING FROM CALL RECORD MEMORY To redial a telephone number stored in the Caller ID call record memory press either REVIEW button to view the desired call reco...

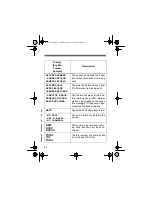
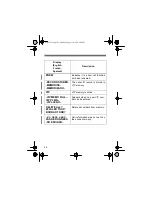
Страница 22: ...the incoming call is long distance UNKNOWN NAME NOM INCONNU NOM DESCONOCIDO The incoming call is from an area that does not send Caller ID name information UNKNOWN NUMBER NUMERO INCONNU NUM DESCONOCID...

Страница 23: ...rted be fore reaching the system Normal static on the telephone can cause this message If it happens often contact your phone company BATT Appears when battery level is low NO CALL PAS D APPEL NO LLAM...

Страница 24: ...memory is active VIP MEMO FULL VIP PLEIN VIP LLENO Appears when no new VIP num ber can be entered DELETE ALL EFFALER TOUT BORRAR TODD Delete all numbers from memory NO DATA SENT PAS DE DONNEES NO ENV...

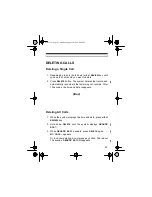
Страница 25: ...he remaining call records After 10 seconds the time and date reappears Deleting All Calls 1 While the system displays the time and date press either REVIEW key 2 Hold down DELETE until the system disp...

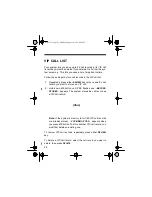
Страница 26: ...nt to store as a VIP call 2 Hold down VIP button until VIP flashes and RECORD STORED appears The system stores the call record as a VIP call record Note If the system s memory is full 20 VIP call reco...

Страница 27: ...om the VIP call list hold down DELETE un til DELETE ALL appears Press DELETE to confirm Or to cancel deletion do not press any button After about 10 seconds DELETE ALL disappears 43 931 fm Page 27 Mon...

Страница 28: ...trast as described in Adjusting the Display Con trast on Page x Check if you have ordered caller ID service from your local tele phone company No dial tone on the phone attached to the caller ID unit...

Страница 29: ...action The system has no alarm action Problem Solution You have an incoming call but do not receive any Caller ID informa tion You answered the call before the System 931 received the call in formatio...

Страница 30: ...tore the system only in normal tempera ture environments Temperature extremes can shorten the life of electronic devices and distort or melt plastic parts Keep the system away from dust and dirt which...

Страница 31: ...sk you to disconnect your system until you have resolved the problem LIGHTNING Your system has built in protection circuits to reduce the risk of damage from surges in phone line or power line current...

Страница 32: ...RadioShack A Division of Tandy Corporation Fort Worth Texas 76102 12A8 Printed in China Pls add one year warranty 43 931 fm Page 32 Monday August 16 1999 2 49 PM...

Отзывы: