Troubleshooting
QL-300 User Guide
284
Besides, when “Please see HELP for details” is shown in the message, pressing the
HELP
button in the control panel will show the solution procedure, and you can easily solve the
process according to the guidance.
See “Operating the Help Screen” on page 255.
Messages about Replacing Wear Items
When the scheduled replacement of wear items approaches, or when the replacement
becomes necessary, messages, such as “ABC Near End of Life” and “Install New ABC / ABC
Life”, will appear, and the
ATTENTION
lamp will start blinking.
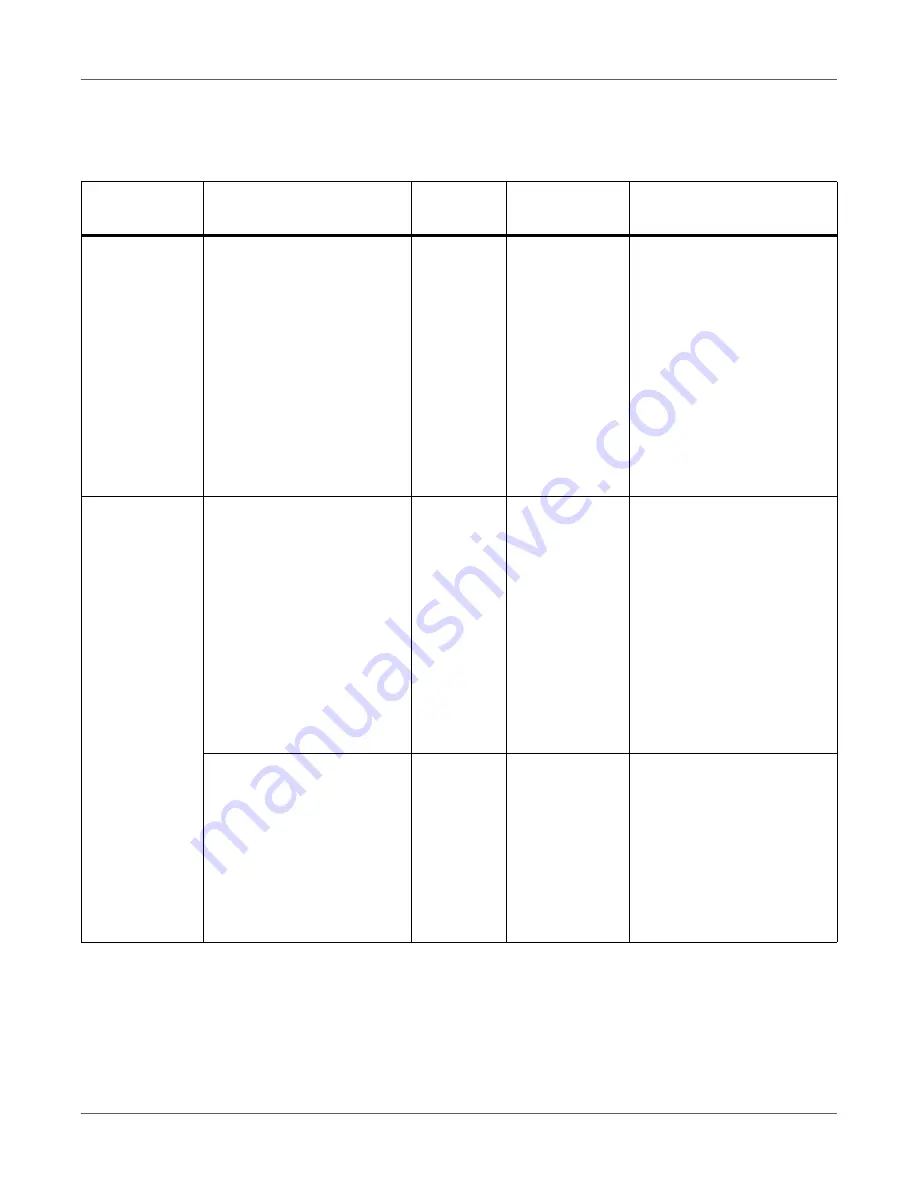
Category
Message displayed on the
display screen
Error code
ATTENTION
lamp
Causes and Troubleshoot-
ing
Change paper
Change paper in Unwinder
Press UNLOAD or OK But-
ton
Please see HELP for details
461
Blinking
The paper settings for the
unwinder are different from
the print driver specifica-
tions.
To cancel printing, press the
CANCEL
button. If multiple
errors occur, you may not be
able to cancel printing.
Press the
HELP
button, and
solve according to the guid-
ance shown on the Help
screen.
Empty
Install paper in Unwinder
Please see HELP for details
491
Blinking
Paper has run out.
Load paper that is the size
displayed.
To cancel printing, press the
CANCEL
button. If multiple
errors occur, you may not be
able to cancel printing.
Press the
HELP
button, and
solve according to the guid-
ance shown on the Help
screen.
Open Unwinder Cover
Roll Paper End
Please see HELP for details
7311
Blinking
Paper has run out.
Open the unwinder cover,
and remove the cut paper
end.
Press the
HELP
button, and
solve according to the guid-
ance shown on the Help
screen.
Содержание QL-300
Страница 1: ......
Страница 20: ...Installation QL 300 User Guide 20 2 Remove the top layer of packing materials...
Страница 21: ...Installation QL 300 User Guide 21 3 Remove the handles 4 pieces and then remove the top of the packing box...
Страница 23: ...Installation QL 300 User Guide 23 5 Cut and remove the bands that secure the printer 6 Remove the plastic bag...
Страница 28: ...Installation QL 300 User Guide 28 3 Remove the unwinder...
Страница 29: ...Installation QL 300 User Guide 29 4 Remove the plastic bag from the unwinder and then remove the accessories...
Страница 30: ...Installation QL 300 User Guide 30 5 Peel off the tape from two locations...
Страница 41: ...Installation QL 300 User Guide 41 Unwinder Black mark Gap sensor...
Страница 110: ...Printing QL 300 User Guide 110 4 Turn the two belt locking keys counterclockwise to release the lock...
Страница 113: ...Printing QL 300 User Guide 113 Caution Do not touch the belt surface or damage the belt...
Страница 262: ...Troubleshooting QL 300 User Guide 262 9 Turn the two belt locking keys counterclockwise to release the lock...
Страница 273: ...Troubleshooting QL 300 User Guide 273 24 Push down the fuser unit handle and firmly push it inside...
Страница 274: ...Troubleshooting QL 300 User Guide 274 25 Lift up the fuser and exit unit locking lever...
Страница 277: ...Troubleshooting QL 300 User Guide 277 29 Raise the blue lever and install the cutter unit...
Страница 329: ...Replacing Wear Items QL 300 User Guide 329 5 Turn the two belt locking keys counterclockwise to release the lock...
Страница 339: ...Replacing Wear Items QL 300 User Guide 339 4 Turn the two belt locking keys counterclockwise to release the lock...
Страница 342: ...Replacing Wear Items QL 300 User Guide 342 Caution Do not touch the belt surface or damage the belt...
Страница 343: ...Replacing Wear Items QL 300 User Guide 343 7 Remove the waste toner box from the back of the belt unit...
Страница 353: ...Replacing Wear Items QL 300 User Guide 353 8 Push down the fuser unit handle and firmly push it inside...
Страница 359: ...Cleaning QL 300 User Guide 359 2 Press down the flange locking lever 3 Remove the flange...
Страница 370: ...Cleaning QL 300 User Guide 370 5 Turn the two belt locking keys counterclockwise to release the lock...
Страница 378: ...Cleaning QL 300 User Guide 378 16 While supporting the fuser and exit unit with one hand lift up the fuser unit handle...
Страница 382: ...Cleaning QL 300 User Guide 382 23 Push down the fuser unit handle and firmly push it inside...
Страница 383: ...Cleaning QL 300 User Guide 383 24 Lift up the fuser and exit unit locking lever...
Страница 384: ...Cleaning QL 300 User Guide 384 25 Align the positions of the paper guide s edge 1 and the guide notch on the printer...
Страница 395: ...Cleaning QL 300 User Guide 395 5 Raise the cutter unit lock levers at both ends of the cutter unit...
Страница 401: ...Cleaning QL 300 User Guide 401 Cleaning the lower roller Cleaning the upper roller 12 Assemble the cleaned cutter unit...
Страница 432: ...Web Utility QL 300 User Guide 432 27 Click OK 28 Click OK to exit Customize IPsec Settings 29 Click OK...
Страница 456: ...Safety QL 300 User Guide 456...


