background image

Chapter 2

Getting Started 


12   

Qui  User’s Manual–November 2013  

GFK-2847 


A 24VDC power supply. For requirements, see the Input power specification on page 
8.  

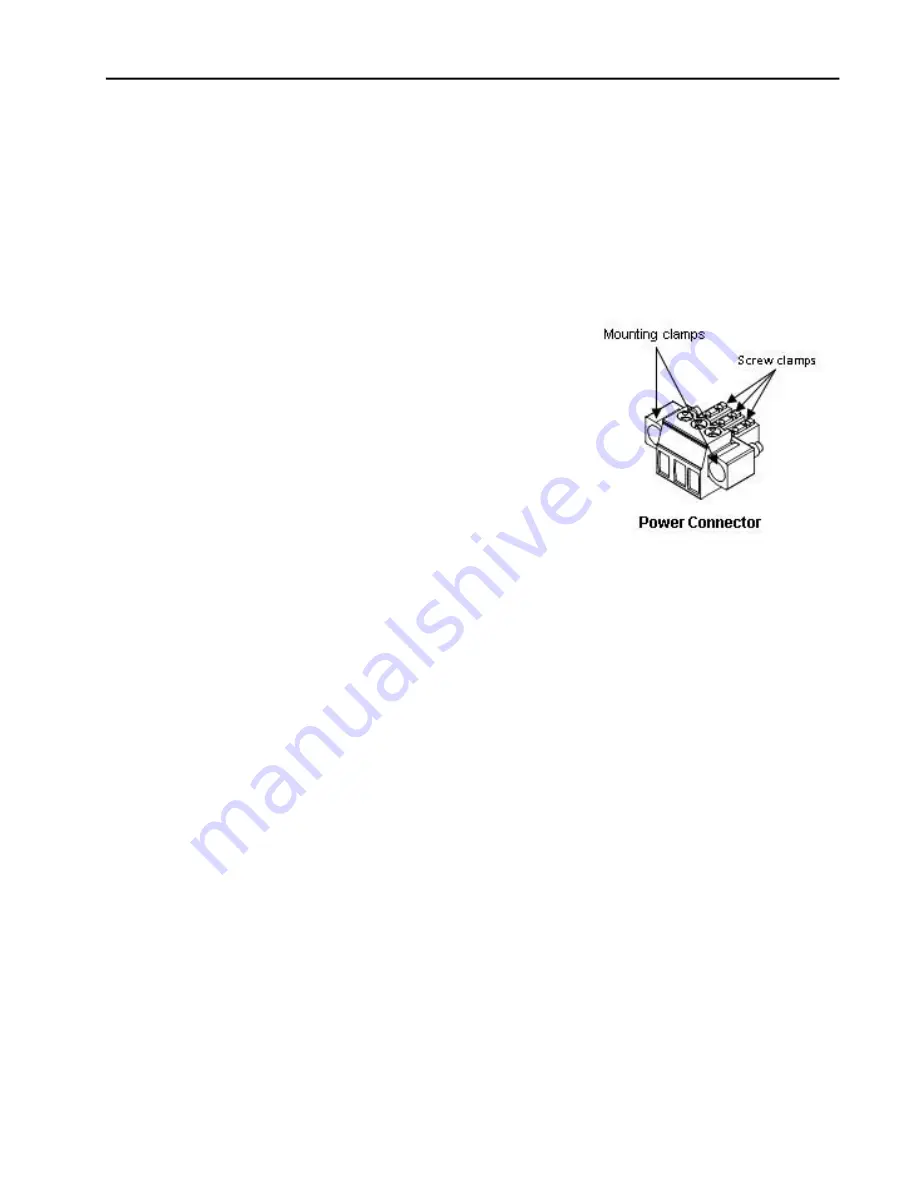
A power terminal block is supplied.   


Power cord

 with 

30 

– 14 AWG (0.05 – 2.00 mm

2

) wires  


USB-compatible keyboard (optional)  


USB-compatible mouse (optional)  

2.3.1 

Connecting Input Power  

1.  Make sure that the power cable is not energized 

and that the Qui unit is not on.  

2.  Loosen the screw clamps on the mating power 

connector  

3.  Strip the insulation from the power cables.  


4.  Secure the power cable to the mating connector 

while noting polarity and tighten the screw clamps. 
The torque for the attaching screws is 0.31 Nm.  

5.  Apply DC power to the unit.


During normal power up and operation, the 

QuickPanel Status LED display is:   


Solid amber

 while the Qui unit is starting up  


Solid green

 during normal operation  

6.  Once power is applied, the Qui begins initializing. The first thing to appear on the 

display is the splash screen.  

To skip running any programs included in the StartUp folder, tap 

Don’t run StartUp 

programs

.  

7.  The Microsoft Windows Embedded Compact 7 operating system starts automatically. 

During powerup, you should see the normal operating system starting displays.  

To activate the operating system online, you will need to first configure the Ethernet 

settings for operation on your network, as described in “Initial Configuration.”  

You can find the operating system product key on the Microsoft Certificate of Authenticity 

label, which is on the back of the Qui.  

Содержание IC754CBF15CTD

Страница 1: ...15CTD for the GE QuickPanel has 15 inch TFT QuickPanel Ctrl Fully Loaded 24VDC Blank Label http www qualitrol com shop p 16492 ic754cbf15ctd aspx For further information please contact Qualitrol Techn...

Страница 2: ...Shutdown 13 Chapter 3 QuickPanel Software 15 3 1 Operating System 15 3 2 Backup Utility 15 3 3 Storage Manager 15 3 4 Copy Project to SD Card 16 3 5 Updating a Machine Edition Project 16 3 6 FTP Serve...

Страница 3: ...1 2 Configuring the Backlight 32 5 1 3 Calibrating the Touch Screen 33 5 2 Keyboard 34 5 2 1 External Keyboard optional 34 5 2 2 Soft Input Panel 34 5 3 Mouse 34 5 4 Memory 35 5 4 1 DRAM Memory 35 5 4...

Страница 4: ...lication programs The retentive memory consists of 512KB of battery backed SRAM for data storage protecting your valuable data during a power failure 1 1 Specifications 1 1 1 General Specifications Pr...

Страница 5: ......

Страница 6: ...l specifications listed below Cooling Natural convection Ambient Operating temperature 0 C to 50 C Ambient Storage temperature 20 C to 60 C Ambient Humidity operating and storage 85 RH non condensing...

Страница 7: ...he primary touch screen interface the QuickPanel supports a variety of communication ports The following diagrams show the physical layout of the QuickPanel including locations of status LEDs communic...

Страница 8: ...n LED State QuickPanel State Amber steady Operating system starting Green steady Normal operating state Green blinking Backlight off Red blinking Backlight fail Off Power not applied to the QuickPanel...

Страница 9: ...uring shipment However we will fully cooperate with you should such action be necessary After unpacking the unit record all serial numbers Serial numbers are required if you need to contact Customer C...

Страница 10: ...Chapter 2 Getting Started 10 QuickPanel User s Manual November 2013 GFK 2847 Serial Port Connector one Power Connector one...

Страница 11: ...power supply using the supplied quick connect plug Depending on your application you may also want to connect and configure optional input devices communications ports and expansion adapters Figure 3...

Страница 12: ...1 Nm 5 Apply DC power to the unit During normal power up and operation the QuickPanel Status LED display is Solid amber while the QuickPanel unit is starting up Solid green during normal operation 6 O...

Страница 13: ...Panel double tap Network and Dial up Connections to configure network settings 5 To save the settings run Backup 2 4 Runtime Setup To download an application to a QuickPanel unit you must set up a dat...

Страница 14: ...wn the QuickPanel 1 Quit any programs that are running and wait for all file operations to complete 2 If you have not changed operating system settings for example brightness or touch screen sensitivi...

Страница 15: ...ows Registry or Desktop to Flash memory This utility is required because the QuickPanel is not battery powered Specifically Backup does the following Stores the Windows Embedded Compact 7 registry inc...

Страница 16: ...plication currently stored on the QuickPanel with a revision stored on a flash device such as a SD card 1 Insert the flash device containing an upgraded version of the Machine Edition project into the...

Страница 17: ...user is logged into the FTP root directory This is available from the QuickPanel as and is the root of the flash device 3 6 2 FTP with Removable Flash Devices All removable flash devices appear to rem...

Страница 18: ...18 QuickPanel User s Manual November 2013 GFK 2847 Note If the server status is changed the QuickPanel must be re booted before changes take effect...

Страница 19: ...the green curing film off the protective sheet 4 2 Choosing a Mounting Location When mounting the QuickPanel make sure that the mounting area allows room to insert and remove the SD card cables and m...

Страница 20: ...always use a fresh gasket Replacement gaskets can be ordered using the part number listed in Appendix B The unit will not fit through the cutout with any cables connected or with the power supply plu...

Страница 21: ...ote The torque range for the mounting clamp screws is 0 3 Nm 4 4 Mounting on a VESA Arm The QuickPanel can be installed on a commercially available Video Electronics Standards Association VESA MIS D 7...

Страница 22: ...Chapter 4 Installation 22 QuickPanel User s Manual November 2013 GFK 2847...

Страница 23: ...g outward 2 Connect the harness connector of the battery to the header noting keyed orientation 3 Pull Make sure that positive red is down and negative black is up 4 Wrap harness connector around to m...

Страница 24: ...or dispose of in fire Use of batteries not specified for use with the QuickPanel product may present a risk of fire or explosion Lithium Battery Warning Do not recharge disassemble heat or incinerate...

Страница 25: ...t port You can connect an Ethernet network cable unshielded twisted pair UTP CAT 5 to the unit via the RJ 45 connector on the bottom of the enclosure LED indicators on the port indicate channel status...

Страница 26: ...applicable Note To save the settings run the Backup utility 4 6 3 Serial Port 4 6 3 1 Serial Port Details Interface RS 232 Connectors Euro Terminal Tyco Electronics 284539 5 or Equivalent Pin Number S...

Страница 27: ...ve device Interface USB2 0 Number of Ports One Connector Type B Mini connector Pin Number Signal Name Pin out 1 VCC 5 1 2 D 3 D 4 NC 5 GND 4 6 5Audio LINE OUT Details Interface LINE OUT stereo Connect...

Страница 28: ...Card Slot The QuickPanel is equipped with one standard SD Card port SD SDHC memory cards are supported The SD card slot is spring loaded for easy insertion and removal 4 6 7 1 Storage Details Connecto...

Страница 29: ...ion can be set using the operating system Control Panel 5 1 1 Adjusting the Display Brightness 1 In the Control Panel double tap Display and choose the Brightness tab The Brightness dialog box appears...

Страница 30: ...Chapter 5 Detailed Operation 5 2 Keyboard The QuickPanel can be configured to use either or both a hardware keyboard and a software emulation keyboard as operator data input devices Typically an exte...

Страница 31: ...ctions an object store for temporary file storage and the main memory for running programs Typically compressed programs stored in flash memory are expanded and moved to DRAM for execution Temporary s...

Страница 32: ...e and Program memory The amount of memory allocated to and used by each area is shown in the dialog box The blue bar indicates the current amount of unallocated SDRAM and determines the boundaries wit...

Страница 33: ...EMC for Industrial Declaration of Conformity found at Control Equipment http www ge ip com for a complete list of approved products Note The agency approvals listed above and on the Declaration of Con...

Страница 34: ...3 A NMB 3 A Appendix B Orderable Part Numbers Appendix B Orderable Part Numbers IC755CSW07CDA QuickPanel 7 Color TFT Widescreen with Multi touch Projected Capacitive Screen 24 VDC Powered IC755ACC07GA...

Страница 35: ......

Страница 36: ...6 mounting location 21 panel mounting 22 protective sheet 21 VESA arm 24 Keyboard Soft Input Panel 34 Machine Edition updating a project 19 Memory 35 changing allocation 35 DRAM 35 Mouse 34 Network de...

Страница 37: ...Platforms Additional Resources Information Centers For more information please visit the GE Headquarters Intelligent Platforms web site 1 800 433 2682 or 1 434 978 5100 www ge ip com Global regional p...

Страница 38: ...2013 GE Intelligent Platforms Inc All Rights Reserved Trademark of GE Intelligent Platforms Inc All other brands or names are property of their respective holders GFK 2847...

Отзывы: