*
Release or
Press/Hold
Displays
variance
(0.6
o
)
*
Press/Hold
Press once
Displays
maximum
*
Press/Hold
Press once more
Displays
minimum
Thermocouple burnout
Check sensor/wiring
Non-volatile memory error
De-power briefly
Replace unit if it persists
(Press together to
clear alarm condition)
Alarm condition: Temp exceeded maximum
operating temp (62 C).
Heater shutdown
until manually reset. Typically indicates
relay or temperature control failure.
Replace relay or temp control if persists.
PRESS
To clean interior and exterior surfaces, use a damp cloth with or without an all-purpose cleaner. The acrylic door
should only be cleaned using a lint-free cloth, with or without water. Paper towels can mar the surface of the
acrylic door. Use of any commercial cleansers on the acrylic door will cause crazing and cracking of the surface of
the acrylic over time. Periodically, check the accuracy of the control's temperature display against a known
accurate or calibrated device. This should be done with an empty chamber after the set temperature becomes
steady (typically after 45 to 60 minutes). Calibrate the control in the control's functions menu, level 3 (see page 3).
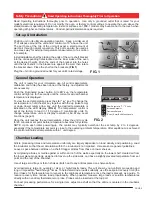
This feature monitors the stability of the control during for any given length process. It will record and display: 1.
The total variation or spread between high and low, 2. The absolute or maximum high and 3. The absolute or
minimum low.
To start the tracking feature navigate to "CheK" prompt in menu level 3. Hold star key then up arrow key to select
ON. Return to temp display or control will auto-return in 60 seconds. The control will track the temperature
variation until "CheK" is turned off. Recorded readings are retained until next "CheK" ON.
You can view readings at any time during or after tracking feature has been turned off. But de-powering the unit
will reset "CheK" to OFF and "rEAd" to zero. To view readings navigate to "rEAd" prompt in menu level 3. Then:
TIP: To avoid erroneous tracking data from run-up temperatures or door openings, start the Tracking feature after
articles have been placed and temperature steadies at set point.
PAGE 4
Control prompts will only display when a fault or alarm condition exists.
Temperature Tracking Feature
Control Self Diagnostics
Maintenance / Control Calibration
Tech Support
Limited Warranty
Quincy Lab, Inc. warrants to the original purchaser that this product will be free from
defects in material and workmanship under normal use throughout the warranty period.
The standard warranty period for this instrument is 18 months from date of shipment.
The instrument warranty is supplemented with a 3-year warranty on the heating
element. Please refer to your invoice or shipping documents to determine the effective
warranty period. This warranty covers parts and labor (labor at factory only), and
shipping costs for replacement parts.
If you have any questions or need technical assistance, please contact Quincy Lab customer support at
Email:
Quincy
Lab,
Inc.
Voice:
800-482-HEAT
(4328)
1925
North
Leamington
Avenue
Fax:
773-622-2282
Chicago,
Illinois
60639
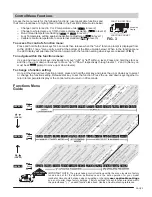
Example for 140E-1 Series


