20
21
CHAPTER 4 MAIN MENU SETUP
Time Tab
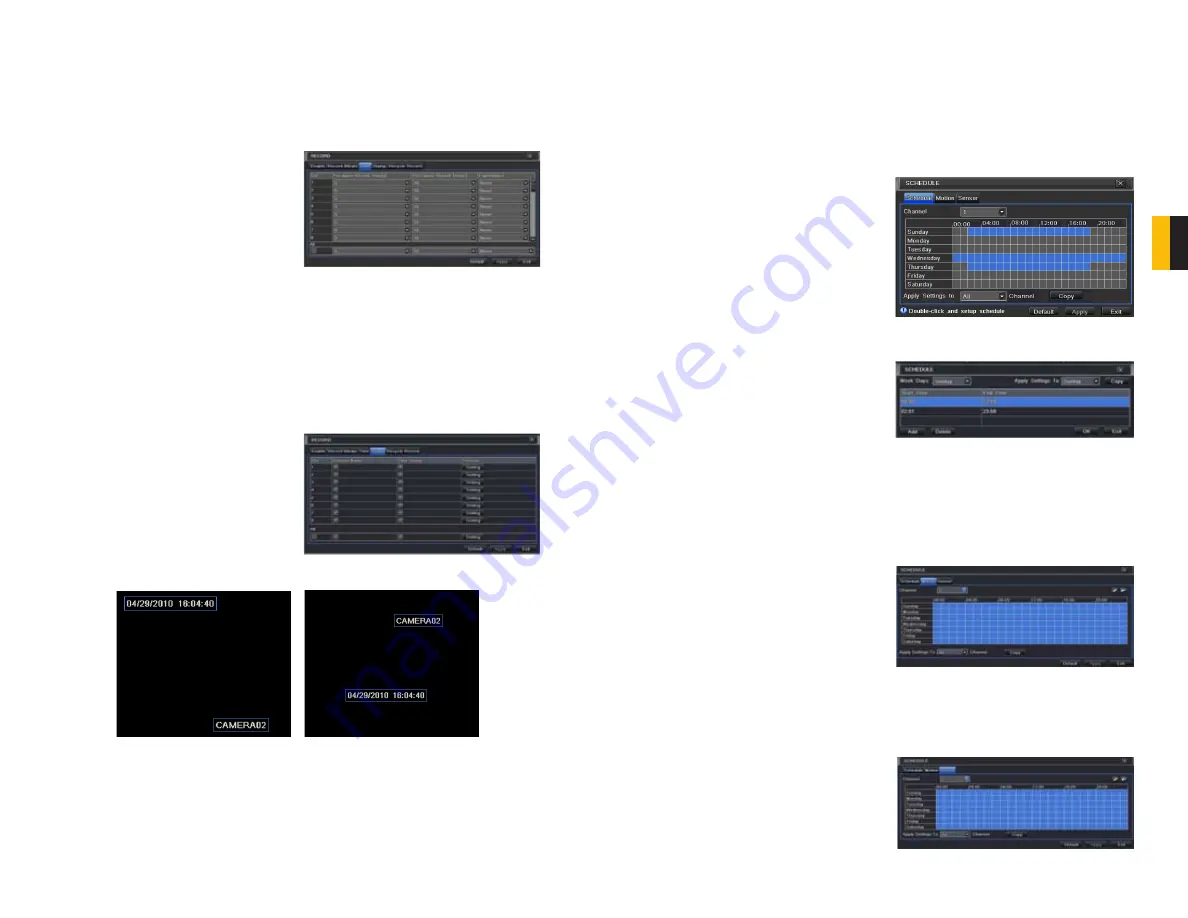
You can set the length of time the DVRs record an event before and after a motion detection
or alarm is triggered as well as how long an individual record is preserved.
PICTURE 4-17
PICTURE 4-18
Pre-alarm record time:
This sets the length
of time showing events prior to a
motion detection or sensor-triggered
event that is included in the record.
Post-alarm record:
Sets the length of time -
from 10 to 60 seconds - that is
added to the record after the event is
finished.
Expire time:
The time - up to 60 days - that
an event is saved on the drive before
it could be overwritten (See
Recycle
Record
below).
You can set up all channels with same values by sellecting
All
and then configuring one
channel.
Stamp Tab
Select which cameras will display their ID and date stamp and where it’ll appear on the screen.
Drag and drop the location of the camera
name and date/time stamp to your desired
location on the screen. This can be done
individually or globally. A “Before” and “After”
example is shown below.
Recycle Record Tab
By selecting the box, you allow the DVR to record over old events when the hard drive is full.
Otherwise, the DVR will stop recording when there is no more space available.
PICTURE 4-19
PICTURE 4-20
PICTURE 4-21
PICTURE 4-22
PICTURE 4-23
4.4 SCHEDULE CONFIGURATION
Configure your camera to record at specific times based on time of day, motion detection or
other sensor input. There are three tabs;
Schedule
,
Motion
and
Sensor
Schedule Tab
The schedule for automatic recording can be set either of two ways.
1. By highlighting individual hours for specific
days by using the pencil tool in the upper
right of the window. The adjacent eraser
tool removes the highlighting in a block.
Double click on either the pencil or eraser
tool to turn them off. Settings can be
copied and applied to any or all of the
channels and to any other day.
2. Blocks of time to be recorded can also
be set up by double clicking on a field
adjacent to a day. Multiple schedules can
be created and saved with start and stop
times down to the minute. These can then
be applied to multiple days and cameras.
Schedules made in one mode can be altered in the other mode.
Motion Tab
Motion detected during the highlighted hours will cause the DVR to start recording. Setup is
similar to that used in
Schedule
above. The default mode is for 24/7.
Sensor Tab
This enables the DVR to record based on input from other sensors connected to the DVR. Like
motion detection, it is default scheduled to be able to record at any time. It is also configured
in the same manner as explained under
Schedule
.


