


10
General
Settings
Format
This item allows you to format the Flash-card (memory card) of the device
(this will delete all files from the memory card).
•
Select option
Format
with
UP (2)/DOWN (5)
buttons.
•
Press briefly the
МENU (3)
button to confirm.
•
With a short press of the
UP (2)/DOWN (5)
buttons select “Yes” to format
the memory card or “No” to return to the submenu.
•
Confirm selection with a short press of the
МENU (3)
button.
- If “Yes” is selected, display will show “Do you want to format memory
card?” and “Yes” and “No” options. Select “Yes” to format the memory
card.
- If “No” is selected, formatting is aborted and you return to the submenu.
Microphone
This item allows you to enable (or disable) the microphone for recording sound during video
recording.
Turning on/off Microphone:
•
Press and hold the
МENU (3)
to enter the main menu.
•
Select the
Microphone
menu item with the
UP (2)/DOWN (5)
buttons.
•
To turn on the microphone, briefly press the
МENU (3)
button.
•
To turn off the microphone, briefly press the
МENU (3)
button.
Rangefinder
Menu item
Rangefinder
allows you to set up built-in rangefinder’s parameters as follows:
•
Enter the main menu with a long press of the
МENU (3)
button.
•
Select the submenu
Rangefinder
with the
UP (2)/DOWN (5)
buttons.
•
Enter the submenu with a short press of the
МENU (3)
button.
•
Select the desired menu item with the
UP (2)/DOWN (5)
buttons.
Reticle Type
•
Select the
Reticle Type
menu item with the
UP (2)/DOWN (5)
buttons.
•
Press briefly the
МENU (3)
button to enter submenu.
•
Select one of the three reticle shapes with the
UP (2)/DOWN (5)
buttons.
•
Confirm selection with a brief press of the
МENU (3)
button.
•
Selected reticle will appear on the display.
•
The reticle will disappear from the display if the rangefinder is not
used longer than 4 seconds.
TPA
Function “TPA” (Target Position Angle) allows you to measure the angle of
target location (angle of elevation). When the function is activated, the angle
is shown continuously in LRF stand-by mode in the top right corner of the
display.
•
Select
TPA
with the
UP (2)/DOWN (5)
buttons.
•
Turn
TPA
on/off with a short press of the
МENU (3)
button.
THD
“THD” (True Horizontal Distance) function allows you to measure true
horizontal distance to a target based on the angle of elevation value.
•
Select
THD
with the
UP (2)/DOWN (5)
buttons.
•
Turn
THD
on/off with a short press of the
МENU (3)
button
•
Hereinafter the message THD will appear above the distance readings.
Remote
Control
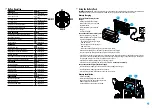
Remote control activation (bought separately)
Before operating the remote control (RC), remember to activate it as follows:
•
Press and hold down the
МENU (3)
button to enter the main menu.
•
Select option
Remote Control
with the
UP (2)/DOWN (5)
buttons.
•
Press briefly the
МENU (3)
button to confirm.
•
Display shows message “Wait” and countdown starts (30 sec), within which hold down for
two seconds any RC button.
•
If activation is successful, the message “Connection complete” appears
.
•
If error occurs the message “Connection failed” appears
. Repeat the procedure.
•
The RC is activated and ready for use.
•
To unlink the
RC
, press the
МENU (3)
button, wait for the countdown to expire without
pressing any
RC
button for 30 sec.
•
All remote controls previously linked to your device are now unlinked.
•
Now you can activate your
RC
again or activate another
RC
.
Defective Pixel
Repair
When operating a thermal imager, defective (dead) pixels (bright or dark dots with constant
brightness) may become visible on the microbolometer.
Defective pixels on the microbolometer may proportionally increase in size when digital zoom
is activated.
Accolade 2 LRF Pro
thermal imaging binoculars allow the user to repair defective pixels on
the detector using a firmware-based method or to abort deletion.
•
Press and hold down the
МENU (3)
button to enter the main
menu.
•
Select the
Defective Pixel Repair
menu item with the
UP
(2)/DOWN (5)
buttons.
•
Press briefly the
МENU (3)
to open the submenu.
•
Select the
Defective Pixel Repair
option by briefly pressing
the
МENU (3)
button.
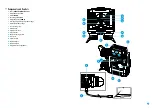
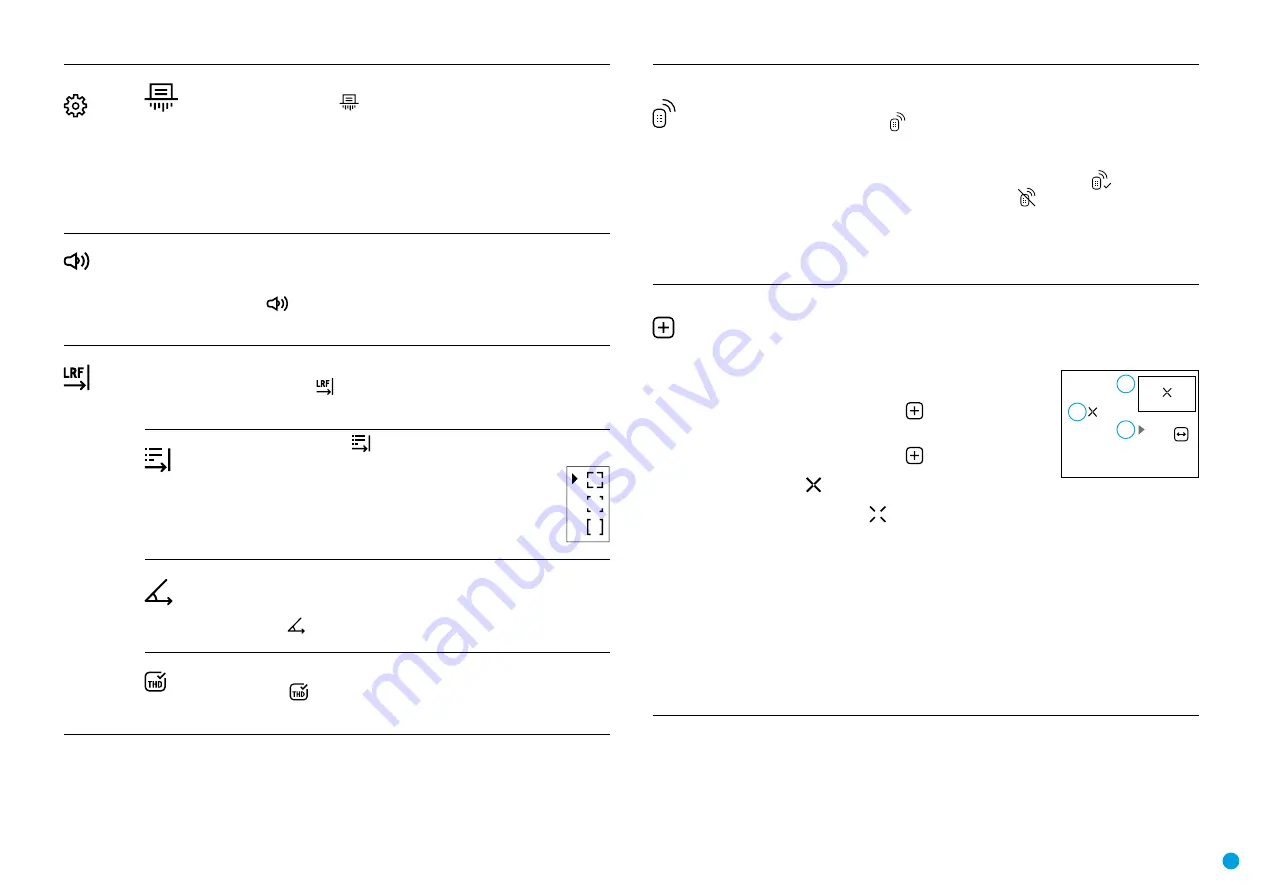
•
A marker
(H)
appears on the left side of the display.
•
On the right side of the display appears “magnifying glass”
(G)
– a magnified image in
a frame with a fixed cross
, designed for easier detection of a defective pixel and to
match the pixel with the marker, horizontal and vertical arrows for X and Y axes
(I)
showing
marker’s movement.
•
With a short press of the
UP (2)/DOWN (5)
buttons move the marker to align it with a
defective pixel.
•
Switch the direction of the marker from horizontal to vertical and vice versa with a short
press of the
МENU (3)
button.
•
Align the defective pixel with the fixed cross in the frame – the pixel should disappear.
•
Delete the defective pixel with a brief press of the REC
(4)
button. A brief message “OK”
appears in the frame in case of success.
•
Then you can delete another defective pixel by moving the marker along the display.
•
Exit
Defective Pixel Repair
with a long press of the
МENU (3)
button.
Attention!
The display of a thermal imager may have 1-2 pixels represented as bright white or
color (blue, red) dots which cannot be deleted and are not a defect.
x=95
y=99
G
H
I
Содержание ACCOLADE 2 LRF XP50 PRO
Страница 1: ...ACCOLADE 2 LRF XP50 PRO USER MANUAL Thermal Imaging Binoculars ...
Страница 15: ...pulsar vision com ...


