background image

C

-6

Psion Teklogix NEO Hand-Held Computer User Manual

Appendix C: Bar Code Settings

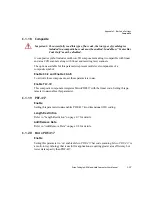
Code 39

Convert To Code 32

Setting this parameter to 

on

 allows the scanner to convert the bar code from 

Code 39

 to 

Code 32

.

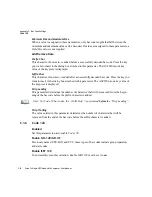
Code 32 Prefix

When this parameter is enabled, the prefix character 

A

 is added to all 

Code 32

 bar codes. 

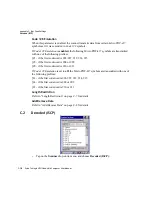
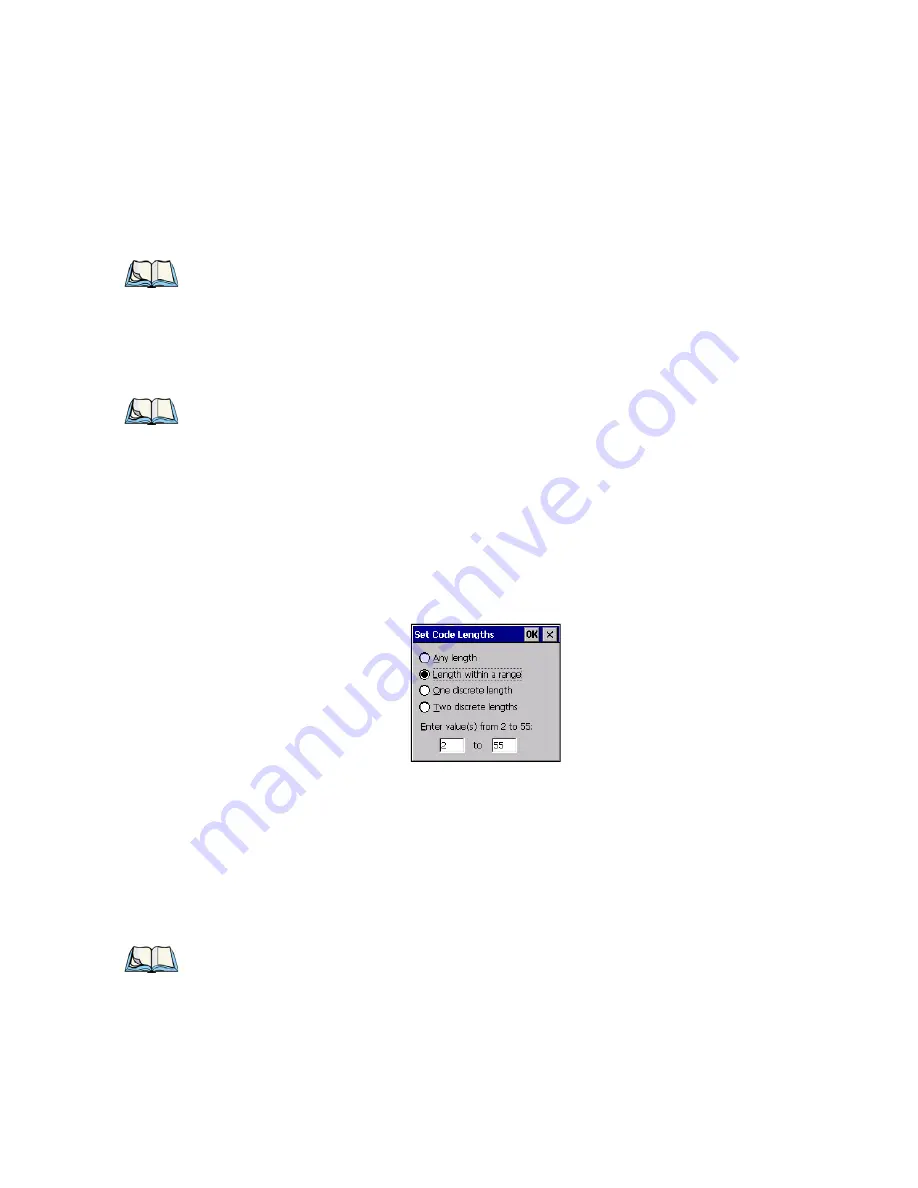
Set Length L1 And Set Length L2

Lengths for 

Code 39

 can be set for 

Any length

Length within a range

One discrete 

length

 or 

Two discrete lengths

. The length of a code refers to the number of characters (i.e., 

human readable characters), including check digit(s). 
Double-tapping on this parameter displays a dialog box labelled 

Set Code Lengths

 where 

you can define the code length that will be decoded by your scanner

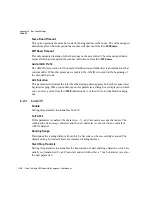
Choosing 

One discrete length

 allows you to decode only those codes containing a selected 

length. Choosing 

Two discrete lengths

 allows you to decode only those codes containing 

two selected lengths. 

Length within a range

 allows you to decode a code type within a 

specified range from 

1

 to 

55

.

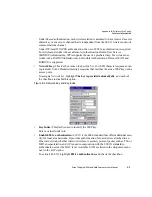
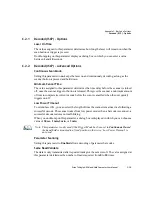
Check Digit Verification

When this parameter is enabled, the integrity of a 

Code 39

 symbol is checked to ensure that 

it complies with specified algorithms.

Note: “Code 39” must be enabled in order for this parameter to function.

Note: “Convert to Code 32” must be enabled in order for this parameter to function.

Note: Only those “Code 39” symbols that include a Mod 43 check digit are decoded when 

this parameter is enabled.

Содержание PX750

Страница 1: ...ISO 9001 Certified Quality Management System NEO Hand Held Computer Model No PX750 May 16 2010 Part No 8100157 B...

Страница 2: ...pt for the sole purpose of promoting the sale of Psion Teklogix manufactured goods and ser vices Furthermore this document is not to be used as a basis for design manufacture or sub contract or in any...

Страница 3: ...end to any product that has been tampered with altered or repaired by any person other than an employee of an authorized Psion Teklogix service organization See Psion Teklogix terms and conditions of...

Страница 4: ......

Страница 5: ...On 11 2 2 2 Switching the Unit Off Suspend 12 2 3 Calibrating the Touchscreen 12 2 4 Wireless Networking 12 2 4 1 Status Tab 13 2 4 2 Wi Fi Config Tab 14 2 4 2 1 Authentication Modes 15 2 4 2 2 EAP 16...

Страница 6: ...s 34 3 4 4 48 Key Alpha Numeric Keyboard Accessing Keys 34 3 4 5 26 Key Keyboard Accessing Alpha Keys 34 3 4 6 The Keyboard Backlight 36 3 5 The Display 36 3 5 1 Adjusting the Display Backlight 36 3 5...

Страница 7: ...4 2 Security Settings 59 4 4 3 Programs 61 4 4 4 Shortcuts 62 4 4 5 Settings 64 4 4 6 Run 65 4 4 7 Shutdown 65 4 5 Using a Dialog Box 66 Chapter 5 Configuration 5 1 Remote Connect 73 5 2 The TekTerm A...

Страница 8: ...er Mapping 100 5 5 7 Certificate Assignment 102 5 6 Bluetooth Setup 102 5 6 1 Paired Tab 103 5 6 2 Device Tab 105 5 6 2 1 Discovering and Removing Devices 105 5 6 2 2 Filtering By Class of Device COD...

Страница 9: ...ngs 133 5 13 1 Imager Demo Applet 134 5 14 Teklogix Scanner Settings 135 5 14 1 Bar Codes Tab 135 5 14 1 1 Scanner Menu 135 5 14 1 2 Restoring Default Settings 136 5 14 2 Options Tab 137 5 14 2 1 Doub...

Страница 10: ...0 6 5 8 Linking NEO to an Ethernet Network 160 6 5 8 1 Network Access 160 6 5 9 Troubleshooting USB Operations 161 6 6 AC Wall Adaptor Model No PX3012 161 6 7 Cigarette Lighter Adaptor Model PX3056 16...

Страница 11: ...one 174 7 3 3 HHP 5000 Imager Performance 174 7 3 3 1 HHP 5000 Decode Zone 175 Appendix A Pinouts A 1 Docking Connector Pinout A 1 A 2 Battery Connector A 2 A 3 Expansion Port Pinout A 2 Appendix B Wi...

Страница 12: ......

Страница 13: ...Psion Teklogix NEO Hand Held Computer User Manual 1 INTRODUCTION 1 1 1 About This Manual 3 1 2 Text Conventions 4 1 3 NEO Hand Held Computer Features 4...

Страница 14: ......

Страница 15: ...ndows CE 5 0 describes the Microsoft Windows CE 5 0 desktop and how to use it This chapter also out lines the basics of moving around a Windows CE 5 0 window selecting and opening icons files folders...

Страница 16: ...s The unique tilted screen design on this hand held computer makes the display content readily visible This means that the operator can scan a bar code and view the results on the display in one movem...

Страница 17: ...Hand Held Computer User Manual 5 Figure 1 1 NEO Hand Held Computer Numeric Alpha Numeric Model Variants Connected NEO Standard Features 2 7 inch Colour Touchscreen Windows CE 5 0 Professional microSD...

Страница 18: ...0 Core microSD Slot 3300 mAh Battery Additional Batch Options Bluetooth Radio Bluetooth Radio and 1D Imager Bluetooth Radio and 1D Laser Scanner Bluetooth Radio and 2D Imager Keyboard Variants 48 Key...

Страница 19: ...Bluetooth radio 10 metre range Application Software Internet Explorer 6 for CE Wordpad ActiveSync Open TekTerm ANSI TESS terminal emulations IBM 3270 IBM 5250 HP 2392 MCC Naurtech Stay Linked PTX Con...

Страница 20: ...at 5 scans transmit and receive per minute Built in gas gauge and performance monitor System backup up to 10 minutes during battery swap 3 day real time clock backup Adjustable battery allocation betw...

Страница 21: ...ouchscreen 12 2 4 Wireless Networking 12 2 4 1 Status Tab 13 2 4 2 Wi Fi Config Tab 14 2 4 2 1 Authentication Modes 15 2 4 2 2 EAP 16 2 4 2 3 Encryption 17 2 4 2 4 Connecting the Wireless Network 18 2...

Страница 22: ......

Страница 23: ...are shut down to preserve power 2 2 Switching NEO On and Off 2 2 1 Installing the Battery and Switching the Unit On Push the release latch at the base of the battery cover to unlatch it Remove the bat...

Страница 24: ...hscreen on page 36 for details 2 4 Wireless Networking NEO contains an integrated 802 11b g radio module The Wi Fi Config application is used to configure NEO for one or more wireless network profiles...

Страница 25: ...g The Wi Fi Config screen is displayed 2 4 1 Status Tab The Status tab displays information about the wireless network to which NEO is configured to connect When there are no network profiles configur...

Страница 26: ...configuring a radio network you can either scan for an existing network or manually create a network If you tap on the Scan button a list of networks detected by the radio is displayed Highlighting o...

Страница 27: ...on Open WEP WPA PSK and 802 1x with EAP Tapping on the Auth Mode menu displays your authentication options Open Authentication Open authentication does not provide security When this option is chosen...

Страница 28: ...Shared Key When PSK is selected either WPA Personal PSK or WPA2 Personal PSK a shared key must be configured on both the access point and the hand held computer One of the follow ing can be chosen fr...

Страница 29: ...ff line dictionary attacks FAST MSCHAPv2 Is a successor to LEAP and does not require strong passwords to protect against off line dictionary attacks Like LEAP EAP FAST does not require the use of serv...

Страница 30: ...pleted the necessary fields tap on OK 2 4 2 4 Connecting the Wireless Network Your configured network is listed in the Configure tab An X next to a network indicates that this is the network to which...

Страница 31: ...server you will need to assign an IP address 2 4 3 1 IP Address To assign an IP address for NEO Tap on the radio icon in the taskbar or Tap on Start Settings Network and Dial up Connections Tap on th...

Страница 32: ...ap the stylus on the radio button next to Specify an IP address to select it Type an IP Subnet Mask and Default Gateway address in the appropriate fields Press ENTER to save your information Note When...

Страница 33: ...he SDIO86861 IP Information tab see Figure 2 1 on page 20 tap on the Configure button Tap on the Name Servers tab The DNS and WINS fields in the Name Servers tab allow you to specify additional WINS a...

Страница 34: ...the left of Use Windows to con figure my wireless settings to add a check mark and activate this option You ll need to reset NEO Choose Start Shutdown Warm Reset A dialog box is displayed letting you...

Страница 35: ...ActiveSync is PC connectivity software that can be used to connect your hand held to PCs running this software ActiveSync works only with the Windows XP SP2 operating system or earlier If the Microsof...

Страница 36: ...esides Registry settings installed programs and any data files are preserved Any open applications are closed and any unsaved data are lost To execute a warm reset Press and hold down the FN BLUE key...

Страница 37: ...g Modifier Keys 32 3 4 2 The Keys 32 3 4 3 Function Keys and Macro Keys 33 3 4 3 1 Function Keys 33 3 4 3 2 The Macro Keys 34 3 4 5 26 Key Keyboard Accessing Alpha Keys 34 3 4 6 The Keyboard Backlight...

Страница 38: ...ld Computer User Manual 3 9 1 Pairing a Bluetooth Headset or Other Bluetooth Device 43 3 10 The microSD Card 46 3 10 1 Inserting the Card 46 3 11 General Maintenance 47 3 11 1 Caring For The Touchscre...

Страница 39: ...3 1 Features of NEO Figure 3 1 Front View Protective Rib Microphone LED Light Emitting Diode Receiver...

Страница 40: ...mager Battery Cover microSD Card Compartment Expansion Port BACK OF NEO BOTTOM OF NEO Docking Port Cover Beeper Accessory Attachment Point Accessory Attachment Point Battery Door Detection Magnet insi...

Страница 41: ...hand held shuts off with more energy left in the battery so RAM can be backed up for a longer period of time Refer to Suspend Threshold on page 94 for details about reserving battery power for data b...

Страница 42: ...pending on the type of docking station used A hand held inserted in a docking station requires 3 hours to charge the battery to 75 capacity NEO is equipped with an intelligent charging system that pro...

Страница 43: ...difier keys Pressing a modifier key changes the function of the next key pressed The SHIFT CTRL and ALT keys operate much like a desktop keyboard except that they are not chorded two keys held down si...

Страница 44: ...lock icon a blue capital letter A within a white box appears in the taskbar To unlock or turn off CAPS lock press FN BLUE SHIFT again Refer to Keyboard One Shot Modes on page 83 if you need to adjust...

Страница 45: ...e decrease volume key is labelled with a minus symbol Press the FN BLUE key followed by the UP ARROW and or DOWN ARROW keys to adjust the volume Backlight Keys LEFT ARROW and RIGHT ARROW The backlight...

Страница 46: ...d Accessing Alpha Keys On numeric 26 key keyboards numeric keys are directly accessible and all alpha characters are printed on the keys in orange characters An indicator in the left corner of the tas...

Страница 47: ...y will be displayed on the screen Note To choose the second third or fourth alpha character assigned to a numeric key you may want to lock the FN ORANGE key on By default the FN ORANGE key is locked o...

Страница 48: ...Backlight The Display Properties dialog box in the Control Panel allows you to determine the behav iour of the display backlight and its intensity Refer to Display Backlight on page 78 for details abo...

Страница 49: ...3 4 Calibration Screen Follow the directions on the calibration screen to calibrate the screen 3 6 NEO Hand Held Indicators NEO uses an LED Light Emitting Diode onscreen messages and audio tones to i...

Страница 50: ...character is rejected scan input is accepted or rejected an operator s entry does not match in a match field or the battery is low To specify how you want NEO to respond under various condi tions refe...

Страница 51: ...rements Remember to press the FN BLUE key again to turn it off 3 6 3 Onscreen Indicators The taskbar at the bottom of the screen displays a variety of system status indicators Figure 3 5 Taskbar The t...

Страница 52: ...ocked on it is displayed in the taskbar in low ercase characters for example blue key It will remain active only until the next key is pressed at which point the modifier key is turned off Battery Gau...

Страница 53: ...cations can be restricted to prevent inadvertent changes 3 7 Monitoring the Battery and Maximizing Run Time As lithium ion batteries age their capacity decreases gradually and they are generally con s...

Страница 54: ...mation about the battery status of the main battery installed in your unit When the hand held is switched off it goes into a low power suspend state but contin ues to draw a small amount of power from...

Страница 55: ...Bluetooth radio enables short range data communication between devices In addition it provides the capability to use a Bluetooth enabled cellular phone as a data modem ex changing information with ot...

Страница 56: ...air In the pop up Device menu tap on Pair An Authentication dialog box is displayed If the remote device has authentication enabled type the PIN in this dialog box To proceed without authentication ta...

Страница 57: ...at device Click in the checkbox to the left of the service to activate it Click on Done Services that require more information present a configuration dialog box Serial Profile is an example This dial...

Страница 58: ...A microSD card slot is available in the battery compartment microSD cards provide addi tional non volatile memory to your hand held 3 10 1 Inserting the Card Switch off NEO Remove the battery cover a...

Страница 59: ...h chemicals and is susceptible to abrasions and scratches NEO is equipped with a stylus that is designed to safely select items on the touchscreen Use only the stylus on the touchscreen using sharp ob...

Страница 60: ...harsh chemicals it is partially soluble in oils mineral spirits and gasoline The plastic slowly decomposes in strong alkaline solutions To clean ink marks from the keyboard and touchscreen use isoprop...

Страница 61: ...sing the Keyboard 51 4 2 Working with Files Folders and Programs 52 4 3 The Startup Desktop 53 4 3 1 The Desktop Icons 54 4 3 2 The Taskbar 55 4 3 2 1 Using the Taskbar 55 4 3 2 2 Customizing the Task...

Страница 62: ......

Страница 63: ...he touchscreen To choose an icon open a file launch an applet or open a folder Double tap the stylus on the appropriate icon 4 1 2 Navigating Using the Keyboard If the touchscreen has been disabled yo...

Страница 64: ...ders and Programs for additional details about key board navigation 4 2 Working with Files Folders and Programs Figure 4 1 Working with Windows Icons Move the cursor Arrow keys Open file folder or ico...

Страница 65: ...open or launch Press ENTER 4 3 The Startup Desktop When NEO boots up the startup desktop shell is displayed Any applications stored in the Startup folder start up immediately Figure 4 2 NEO Startup D...

Страница 66: ...icon launches Internet Explorer a standard Windows CE 5 0 version Keep in mind that your supervisor will need to set up access using the Internet Options and the Network and Dial up Connections icons...

Страница 67: ...rs For ex ample if you have set the CTRL key Lock to on in the Keyboard menu and you press the key it is displayed as CTRL KEY in the taskbar For detailed information on modifier keys and keyboard opt...

Страница 68: ...displays only those icons you require In the Start Menu choose Settings Taskbar If you re using the keyboard Press FN BLUE to display the Start Menu Highlight the Settings option highlight Taskbar in...

Страница 69: ...heck Disable hot keys the Application from Start menu field becomes enabled Use this field to enter the name of the application you want to run when the user presses the Menu hot key FN BLUE 0 If you...

Страница 70: ...lower left corner of the taskbar Tap on the item with which you want to work If you re using the keyboard Press FN BLUE period Use the arrow keys to highlight a menu item and press ENTER Note Some of...

Страница 71: ...or NEO Supervisor or User Figure 4 3 Security Levels Assigning the Supervisor Security Level The security level is represented by an icon in the shape of a lock in the taskbar The security levels defi...

Страница 72: ...ord in the Password text box all keyboard characters are valid In the Confirm Password text box retype the new password Configuring Security Choosing the Configure button displays the Configure Securi...

Страница 73: ...the rates at which the sound will be recorded Sounds recorded at the higher sample rate or bits per sample will be higher quality sound but will require more file storage space Lower sample rates and...

Страница 74: ...Windows Terminal Server so that you can run a session on the Server machine using NEO Windows CE 5 0 device Remote Connect on page 73 provides a website with details about this option Windows Explore...

Страница 75: ...from the Start Menu and then press the RIGHT arrow key to display the sub menu Choose System Tray in the sub menu Use the arrow keys to highlight the icon in the taskbar about which you d like more in...

Страница 76: ...owing settings Control Panel Network and Dial up Connections and Taskbar and Start Menu Figure 4 6 Settings Sub Menu Control Panel The Control Panel contains applets used to configure hardware the ope...

Страница 77: ...r and Start Menu The Taskbar and Start Menu option displays a dialog box in which you can customize the taskbar choosing which options will be displayed Refer to Customizing the Taskbar on page 56 for...

Страница 78: ...s that are saved in the Flash file system called Flash Disk on NEO or on a microSD card This should be used as a last resort if NEO cannot be reset using any other method 4 5 Using a Dialog Box A dial...

Страница 79: ...icate that additional options are available Press the TAB key to highlight the menu and use the arrow keys on your keyboard to cycle through the options Checkbox This box allows you to select or desel...

Страница 80: ...ete and so on the options you ve chosen in a dialog box Use the TAB key to highlight the button you want to use Press the ENTER key to activate it Saving Your Choices Once you ve made all your changes...

Страница 81: ...ght 82 5 5 2 4 Keyboard One Shot Modes 83 5 5 2 5 Keyboard Macro Keys 84 5 5 2 6 Unicode Mapping 86 5 5 2 7 Scancode Remapping 87 5 5 2 8 Lock Sequence 90 5 5 3 Volume and Sound Properties 91 5 5 3 1...

Страница 82: ...al Recall 115 5 7 1 Creating a Backup Profile 116 5 7 2 Restoring a Profile 119 5 7 3 Viewing a Profile 119 5 7 4 Deleting a Profile 120 5 8 The Storage Manager 121 5 8 1 Formatting a Memory Card 121...

Страница 83: ...tings 133 5 13 1 Imager Demo Applet 134 5 14 Teklogix Scanner Settings 135 5 14 1 Bar Codes Tab 135 5 14 1 1 Scanner Menu 135 5 14 1 2 Restoring Default Settings 136 5 14 2 Options Tab 137 5 14 2 1 Do...

Страница 84: ......

Страница 85: ...ekTerm a Psion Teklogix application that has the ability to maintain multiple si multaneous sessions with a variety of host computers For detailed information please refer to the TekTerm Software User...

Страница 86: ...plications from a single key press Bluetooth Devices Provides the tools to manage device pairing and configuration Certificates A public key is transmitted as part of a certificate The certificate ass...

Страница 87: ...ions Provides options to configure your Internet browser You can determine items such as the default and search page that the browser applies when connecting to the Internet the cache size the Interne...

Страница 88: ...rect connections to a desktop computer Selecting the Change Connection button allows you to change the type of direct connect to your PC Power Displays battery pack power status Alternately battery st...

Страница 89: ...en System Displays system and memory properties In the Memory tab you can allocate memory between storage memory and program memory Teklogix Imagers Used to create modify delete and activate imager se...

Страница 90: ...ved from the host The Display Properties dialog box in the Control Panel allows you to specify the intensity of the backlight along with how long the display will maintain the specified intensity In t...

Страница 91: ...s scan trigger Dim For The value chosen from this drop down menu determines the duration of time that the back light stays on at half the configured intensity dimmed backlight after expiration of the...

Страница 92: ...e FN BLUE and FN ORANGE modifier keys This dialog box also allows you to define macro keys and Unicode characters In the Start Menu choose Settings Control Panel Keyboard icon 5 5 2 1 Key Repeat In th...

Страница 93: ...ce This tab determines the allowable pause between alpha key presses on a numeric keyboard For example suppose you want to type the letter c you would need to press the 2 key three times With the ORAN...

Страница 94: ...ns the keyboard backlight intensity and sliding it to the right lightens the intensity ON For The value chosen from this drop down menu determines the duration of time that the key board backlight sta...

Страница 95: ...until you press the modifier key a second time to unlock or turn it off OneShot If you choose OneShot the modifier key remains active only until the next key is pressed Note Keep in mind that checkin...

Страница 96: ...s can be created to replace fre quently used keystrokes along with the function of executable keys including ENTER BKSP and DEL FN BLUE BKSP function keys and arrow keys Each macro can have up to 200...

Страница 97: ...tap on the Stop Recording button or press the key sequence CTRL ALT ENTER A new screen called Verify Macro displays the macro sequence you created Tap on the Save button to save your macro or Cancel t...

Страница 98: ...creen above shows a U 0061 indicating that the character a is represented by the Unicode value 0061 and so on Keep in mind that Unicode configurations are represented as hexadecimal rather than decima...

Страница 99: ...l key on a keyboard Every key has a unique scancode that is mapped to a virtual key a function or a macro Scancode Remap ping allows you to change the functionality of any key on the keyboard A key ca...

Страница 100: ...d Properties dialog box The first column in the Scancode Remapping tab displays the scancodes in hexadecimal If the scancode is remapped to a virtual key that virtual key is displayed in the next colu...

Страница 101: ...ce is selected the shift state is dependent on whether the shift state is on or off at the time the virtual key is sent When Function is selected a list of valid functions appears in the dialog box Wh...

Страница 102: ...from being pressed accidentally when for example the unit is inserted in a holster To lock the keyboard tap in the checkbox next to Enable key lock sequence Tap in the checkbox next to Keyboard locke...

Страница 103: ...mputer User Manual 91 A locked keyboard icon is displayed in the softkey bar when the keyboard is locked Type the key sequence to unlock the keyboard 5 5 3 Volume and Sound Properties In the Control P...

Страница 104: ...sting this slider modifies the beeper and the receiver volume 5 5 3 2 Sound Adjustments This dialogue box allows you to assign sounds to identify a particular actions For example you can choose the so...

Страница 105: ...5 5 4 1 Battery Capacity In the Power Properties dialog box open the Battery tab to view battery details 5 5 4 2 Power Saving Suspend In the Power Properties dialog box open the Suspend tab Power Sour...

Страница 106: ...suspend state When NEO is in suspend state the network connection will not be broken immediately If the connection is dropped you must re establish the network connection 5 5 4 3 Suspend Threshold The...

Страница 107: ...tely 20 of the battery capacity for memory backup Once the battery is drained the system RAM memory is lost and the unit must reboot In most real time transaction environments this is not a problem it...

Страница 108: ...n is enabled If you make a change tap on Apply to save your change 5 5 4 6 Built in Devices The Built In Devices tab allows you to enable provide power or disable terminate power to the device s insta...

Страница 109: ...r if your touchscreen has never been cal ibrated or if you find that the stylus pointer is not accurate when you tap on an item follow the directions below Choose the Calibration tab and then tap on t...

Страница 110: ...double click time In the Control Panel choose the Manage Triggers icon In the Manage Triggers screen you ll see a list of trigger mappings 5 5 6 1 Trigger Mappings A trigger mapping is an association...

Страница 111: ...o that you can add new trigger mappings Edit Tapping this button brings up the Edit Mapping dialog see Add and Edit Trigger Map ping on page 100 so that you can edit existing trigger mappings Remove T...

Страница 112: ...the trigger events such as the Ex pansion port trigger Soft Scan and Scan for the trigger module selected Note It is possible to map the same source to different modules trigger consumers for example...

Страница 113: ...c is pressed and released a trigger down event is sent to the owner that is the application receiving the trigger press information followed by a trigger up If Double Click is chosen in this menu when...

Страница 114: ...Setup Bluetooth is a global standard for wireless connectivity for digital devices and is intended for Personal Area Networks PAN The technology is based on a short range radio link that operates in t...

Страница 115: ...er allows users to search pair and connect to other Bluetooth devices within their personal area network 5 6 1 Paired Tab This tab lists all paired devices and their corresponding services The format...

Страница 116: ...defines two roles a Push Server and a Push Client Push Server is the device that provides an object exchange server Push Client is the device that pushes and pulls objects to and from the Push Server...

Страница 117: ...volume can be adjusted 5 6 2 Device Tab This tab discovers and displays Bluetooth devices 5 6 2 1 Discovering and Removing Devices Scan discovers Bluetooth devices in range of NEO and lists them in t...

Страница 118: ...omputer from this menu only computers within range of NEO are listed in the Device tab Choosing All lists all detected devices 5 6 2 3 Device Pop up Menu The Device pop up menu allows you to pair a de...

Страница 119: ...device in pairing mode Choose the Devices tab and Scan for devices in your area When the scan is complete tap on the device to which you want to pair In the pop up Device menu tap on Pair An Authentic...

Страница 120: ...heckbox to the left of the service to activate it Tap on Done Services that require more information present a configuration dialog box Serial Profile is an example This dialog box offers a number of...

Страница 121: ...e server ser vices available Serial Scanner and OBEX OPP Serial server enables the Serial Port Profile server a Serial Port can be selected from the drop down menu Keep in mind that when a port is cho...

Страница 122: ...gher the value assigned the greater the scan duration 5 6 5 About Tab Device Name displays the NEO name that is broadcast The name can be changed in the System Properties applet Start Settings Control...

Страница 123: ...ommunicates via Bluetooth to the cell phone which then accesses a WAN Wide Area Network and transfers data using GPRS 1 Enable the Dial Up Networking service in the cell phone 2 Make the phone discove...

Страница 124: ...tion 7 Choose the Next button to display the Modem dialog box 8 In the drop down menu labelled Select a modem choose the name of the modem with which you want to connect and then choose the Configure...

Страница 125: ...ion Teklogix NEO Hand Held Computer User Manual 113 9 Under the Call Options tab turn off Cancel the call if not connected within and press ENTER to save your changes 10 In the Modem dialog box choose...

Страница 126: ...choose the Finish button 11 In the Control Panel choose the Dialing icon 12 The values in the Dialing Properties dialog box need to be edited according to your network carrier specifications Once you...

Страница 127: ...ap on the new icon When you tap on your new connection an onscreen message indicates the status of your connection connected disconnected error messages and so on 5 7 Total Recall Total Recall is a Ps...

Страница 128: ...rofile Tap on the Create Profile button to begin the process Profile Information This dialog box displays the default profile name the type of restore AutoRestore or Man ualRestore and the possible st...

Страница 129: ...t automatically restores itself following a cold reset or a clean reset Finally if you want to choose another location for your backup file optional tap on the button to the right of the Profile Locat...

Страница 130: ...up profile Tap in the checkbox next to the option s listed here to tailor what you want included in the backup Creating a Profile Once you ve defined the type of profile you want to create Tap on the...

Страница 131: ...the Total Recall home screen tap on Restore Profile Tap on the button to the right of the Profile field and locate your backup file Tap on OK In the Profile restore screen click on the Next button Cl...

Страница 132: ...ld and locate your backup file Tap on OK Tap on View Details to review your backup files 5 7 4 Deleting a Profile In the Total Recall home screen tap on Delete Profile In the next screen locate your b...

Страница 133: ...are normally mounted made available to the system automatically when they are inserted They must be dismounted before they can be formatted To format an entire memory card 1 Choose Start Settings Con...

Страница 134: ...ions list box The Create New Partition dialog box appears 2 Type a name for the partition 3 If more than one partition is desired uncheck the Use All Available Disk Space checkbox then specify the des...

Страница 135: ...rties button The Partition Properties dialog appears Tap the Dismount button The partition is dismounted The asterisk disappears next to its name in the partitions list To delete a partition Select th...

Страница 136: ...ch govern Whether to use the transaction safe FAT file system TFAT This file system keeps multiple copies of the file allocation table changing one while maintaining another as a backup Whether to per...

Страница 137: ...IPv6 network support on your unit if your network setup requires this This internet protocol specification version 6 supports 128 bit IP addresses replacing version 4 Choose the IPv6 Support icon to...

Страница 138: ...rver This option is enabled by default to allow file transfers Keep in mind that data transfer in either direction is restricted to the Temp folder that is data are always loaded from the FTP Server t...

Страница 139: ...ption allows you to enabled Internet Protocol specification version 6 that has been published to use 128 bit IP address replacing version 4 Modem Logging When this option is enabled NEO logs AT comman...

Страница 140: ...ynchronize NEO time with server time A warm reset must be performed once the server name as been entered 5 10 1 4 Radio Features AP Density This option allows you to determine the signal strength at w...

Страница 141: ...often the NEO radio enters sleep mode when no activity is detected to reduce power consumption on the client side Another benefit is that when Radio Power Management is enabled even when no activity...

Страница 142: ...ctangle around the cursor to make it clearly visible on the screen 5 10 2 2 User Display Settings User Font Size This option allows you to adjust the size of the font used the NEO display Large Normal...

Страница 143: ...anding of registry keys and values Careless registry editing can cause irreversible damage to NEO 5 11 Error Reporting Error Reporting allows you to enable or disable Microsoft error reporting prompts...

Страница 144: ...atus This tab indicates the status on off of the tools Tapping on Browse logs displays error logs for your review 5 12 2 Settings Choose an Error Level from the drop down menu To change the location w...

Страница 145: ...s collected so that if necessary it can be forwarded to a Psion Teklogix technician for evaluation 5 13 Teklogix Imagers Settings The Teklogix Imagers applet is used to create modify delete and activa...

Страница 146: ...Settings Control Panel and then tap on the Tek logix Imagers icon 5 13 1 Imager Demo Applet An Imager demo applet is also provided to illustrate how the imager works To launch the demo applet tap on...

Страница 147: ...ers For a listing of available scanners and their specifications please refer to Chapter 7 Specifications 5 14 1 Bar Codes Tab 5 14 1 1 Scanner Menu The drop down menu to the right of the Scanner opti...

Страница 148: ...s To display a pop up menu you need to press and hold the stylus on a menu item This equivalent to a right click on a PC Press and hold the stylus on a symbology e g Code 128 to display a pop up a men...

Страница 149: ...rameter to the default setting 5 14 2 Options Tab This tab allows you to tailor the double click parameters and the display options associated with your scanner 5 14 2 1 Double Click Parameters Click...

Страница 150: ...rameter is enabled the type of bar code and the result of the scan appear on the screen Note that this information is only displayed after a successful decode and is visible only while the scanner tri...

Страница 151: ...rformance effect when performing multiple scans since the log file is written to persistent storage 5 14 2 3 Data Handling This option allows you to choose the code page NEO will use to display scanne...

Страница 152: ...ions tab allows you to define up to 10 cases each consisting of up to 10 rules in sequential order Only one case will be applied to a bar code and a case will only be applied if all rules specified in...

Страница 153: ...isplayed in which you can define the rule 5 14 3 1 Case Rules The case rules are defined as follows No rule ignored Match at index matches the match string at a specified index Match and replace at in...

Страница 154: ...at this rule cannot fail Translation information about the status of each case rule is displayed in the scan log file see Scan Log File on page 139 when enabled This is useful if a case fails and you...

Страница 155: ...6 5 Desktop Docking Station PX3001 156 6 5 1 Desktop Docking Station Setup 157 6 5 2 Charging A Battery Installed In NEO 157 6 5 3 Charging a Spare Battery 158 6 5 4 Battery Charge Duration 158 6 5 5...

Страница 156: ...Station 163 6 8 4 Network Access 163 6 8 4 1 Network Addressing 163 6 8 5 Battery Charging LED Behaviour 164 6 8 6 Troubleshooting 164 6 8 6 1 Network Link Unsuccessful 164 6 8 6 2 NEO LED Does Not L...

Страница 157: ...Accessory Model Number Hand Strap PX3024 Wrist Strap with stitched stylus holder PX3028 Carrying Holster compatible with pistol grip PX3020 Carrying Case leather with protective key cover and clip PX3...

Страница 158: ...lanyard attached to the quick release buckle through one of the accessory attachment points the eyelets on the either side of the base of the unit You may find Figure 6 2 useful as a reference Figure...

Страница 159: ...al 147 To attach the hand strap align the eyelet at the top of the hand strap with the threaded insert near the corner of the hand held and secure it in place using the M2x6 screw included with the ha...

Страница 160: ...ion the belt clip adaptor plate so that the thicker folded end aligns with the angled scanner section on the back of NEO as illustrated in Figure 6 5 6 Stylus Holder Note In addition to the hand strap...

Страница 161: ...e for Installation To attach the belt clip adaptor plate to NEO thread the screws through the eyelets into the metal inserts on NEO Figure 6 6 Attaching The Adaptor Plate With the adaptor plate attach...

Страница 162: ...ach to NEO without tools or screws For added convenience the pistol grip is equipped with a stylus inserted in the handle Remove the expansion port cover on the back of NEO Store the cover in the unde...

Страница 163: ...3300 mAh lithium ion battery pack Model No WA3006 Pistol Grip Thumb Latch Release Stylus Note To maintain proper operation ensure that the expansion port and the pistol grip con tacts are dry and free...

Страница 164: ...n that the adaptor connector and NEO docking port are free of dust or any other debris before connecting them A slot on the side of the adaptor is provided to accommodate the carrying strap Thread the...

Страница 165: ...Accessories RS 232 Adaptor Model No PX3050 Psion Teklogix NEO Hand Held Computer User Manual 153 Figure 6 8 Threading Wrist Strap Through Adaptor Thread Carrying Strap through slot in Adaptor Slot to...

Страница 166: ...snap the adaptor into place 6 3 2 Micro USB Adaptor Model No PX3054 This adaptor is equipped with a micro USB port along with a DC IN socket When attached to NEO the adaptor allows you to connect an...

Страница 167: ...gh the slot on the adaptor See Figure 6 8 on page 153 for details Align the docking port on the base of NEO with the adaptor and gently snap the adaptor into place 6 4 Charging Options Psion Teklogix...

Страница 168: ...ature between 18 C and 25 C 64 F to 77 F for maximum performance After unpacking your unit Visually inspect the docking station for possible damage Install the IEC power cord and apply power 6 4 2 Pow...

Страница 169: ...this instruction sheet on Teknet Go to www psionteklogix com Tap on Teknet and enter your user name and password If you re not already a member you will be asked to register free of charge 6 5 2 Charg...

Страница 170: ...he battery with the contacts in the spare battery charge well 6 5 4 Battery Charge Duration When NEO is inserted in the desktop docking station 3 hours is required to charge the battery to 75 capacity...

Страница 171: ...here is a power supply problem 6 5 6 2 NEO Power LED Does Not Light Up Ensure NEO is fully seated in the dock Verify that there is power from the mains outlet Remove the power cable from the docking s...

Страница 172: ...desktop docking station Insert the micro USB connector into the docking station connector Attach the other end of the cable into a USB port on the PC 6 5 8 Linking NEO to an Ethernet Network A micro U...

Страница 173: ...station allows you to operate your hand held using AC power while charging the battery inserted in the unit Adaptor plugs suitable for use in various countries are shipped with the AC wall adaptor Ch...

Страница 174: ...C IN socket to which you can connect the automotive adaptor Insert the DC power plug on the automotive adaptor into the DC IN socket on the Micro USB adaptor or desktop docking station Insert the auto...

Страница 175: ...NEO in the Quad Docking Station Slide NEO into the cradle portion of the quad dock until lightly latched The LED on the hand held unit lights up to show it has external power and may start charg ing t...

Страница 176: ...ork Link Unsuccessful If a network link fails the application must take appropriate action 6 8 6 2 NEO LED Does Not Light When Docked Check that the quad docking station has power Is the Power LED on...

Страница 177: ...rpendicular to the bar code Light reflected directly back into the scanner s exit window may prevent a successful decode Scan the entire bar code If you are using a 1D laser scanner make certain that...

Страница 178: ...ssible to communicate with a variety of Bluetooth peripherals including GSM GPRS handsets scanners printers and so on The range of the Bluetooth radio is limited to approximately 10 meters Psion Teklo...

Страница 179: ...on 171 7 1 4 Bar Code Applications 171 7 2 NEO Radio Specifications 171 7 2 1 802 11b g Radio 171 7 2 2 Bluetooth Radio 172 7 3 Scanner Imager Specifications 173 7 3 1 SE 955HP Specifications 173 7 3...

Страница 180: ......

Страница 181: ...ve with touchscreen Colour 240 x 320 graphic TFT Passive stylus or finger operation LED backlit keyboard Keyboard 48 key Alpha Numeric 26 key Numeric Ergonomically enhanced for ambidextrous one hand o...

Страница 182: ...95 RH non condensing Storage Temperature 20 C to 60 C 13 F to 140 F Shock and Vibration Random vibration 1 m2 s3 5 to 200 Hz 0 5 m2 s3 200 500 with duration of 100 min axis 3 axes and shock of 150 m s...

Страница 183: ...TESS terminal emulations IBM 3270 IBM 5250 HP 2392 Naurtech MCL MCC PTX Connect Stay Linked 7 1 3 Wireless Communication On board IEEE 802 11b g CCX Certified On board Bluetooth radio 7 1 4 Bar Code...

Страница 184: ...ps EVM 802 11b 28 dB typ 16 802 11g 29 dB typ 13 Bluetooth Co existence 2 line hardware handshake with Bluetooth radio 7 2 2 Bluetooth Radio Form Factor Embedded 920 kbps serial interface Bluetooth Ve...

Страница 185: ...4 to 140 F Print Contrast Minimum 25 absolute dark light reflectance measured at 650 nm Dimensions 1 21 cm H x 2 16 cm W x 1 55 cm max 0 47 in H x 0 85 in W x 0 61 in D max Symbologies UPC EAN Code 1...

Страница 186: ...istance Up to 90cm 35 in Symbologies UPC E A EAN RSS Code 39 Code 128 UCC EAN 128 ISBN ISBT Interleaved Matrix Industrial and Standard 2 of 5 Codabar Code 93 93i Code 11 MSI Plessey Telepen PDF417 Mic...

Страница 187: ...CC Composite Linear Code 39 Code 128 Codabar UPC EAN Interleaved 2 of 5 RSS Code 93 Codablock Postal Postnet US Planet Code BPO 4 State Canadian Post Japanese Post KIX Netherlands Post Size 1 78 cm De...

Страница 188: ...ng Range 8 3 mil Linear 02 cm 10 mil PDF417 025 cm 13 mil UPC 033 cm 15 mil Data Matrix 038 cm 15 mil QR 038 cm 35 mil Maxi code 089 cm Near 3 5 in 8 9 cm 3 1 in 7 9 cm 2 1 in 5 3cm 2 3 in 5 8 cm 2 1...

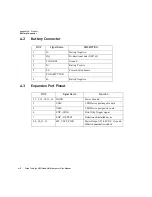
Страница 189: ..._POWER Power Input 6 VDC 2 8 A 5 BATT_OUT Not Connected 6 AUDIO_N Not Connected 7 AUDIO_P Not Connected 8 VBUS_5V USB Vbus 5 V 500 mA 9 DOCK_ID Dock Identifier 10 USB_DOCK_D USB Data Negative 11 USB_D...

Страница 190: ...l data DS2762 3 TH GND Ground 4 B Battery Positive 5 PS Power Switch Sensor POLARITY TAB 6 B Battery Negative PIN Signal Name Function 1 2 5 13 14 15 16 DGND Power Ground 3 USB USB Device port negativ...

Страница 191: ...ion Wireless Zero Config is the native Windows supplicant To activate Wireless Zero Config refer to Advanced Tab on page 22 Tap on Start Settings Network and Dial up Connections Choose the radio icon...

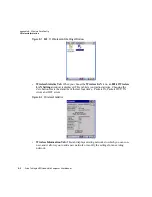
Страница 192: ...on an 802 11 Wireless LAN Settings window is displayed This tab lists your radio statistics Choosing the Zero button resets the statistics of the last four items Packets IN Packets OUT IN errors and O...

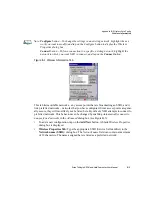
Страница 193: ...rks in the Advanced dialog box see Figure B 5 To add a new configuration tap on the Add New button A blank Wireless Properties dialog box is displayed Wireless Properties Tab Type the appropriate SSID...

Страница 194: ...rd is a standard for protecting data through encryp tion AES supports key sizes of 128 bits 192 bits and 256 bits and will serve as a replacement for the Data Encryption Standard DES which has a key s...

Страница 195: ...or 13 ASCII character sequence or an equivalent 10 or 26 Hexadecimal digit sequence that matches the active WEP key on the access point To assign a Network key highlight The key is provided automatic...

Страница 196: ...on press ENTER or tap on OK The connection you created will be listed in the Wireless Information tab as a preferred network The radio will search for the SSID and compare the WEP and authentication i...

Страница 197: ...d highlight the network that you want to move up or down in the list To move the highlighted item in the list upward or downward tap on the Down or Up button B 2 2 2 Deleting a Preferred Network To de...

Страница 198: ......

Страница 199: ...ins on before the scanner switches to a normal scan sweep When you double tap on this parameter a dialog box is displayed in which you can enter a value of 0 msec 200 msec or 400 msec A value of 0 zer...

Страница 200: ...decode before the scan is cancelled when the user quickly triggers on off Power Mode This parameter is a power saving option Tapping on it displays a screen listing two power mode options Continuous...

Страница 201: ...displays a dialog box in which you can enter a value from 1 to 4 Linear security level 1 specifies that the following code types must be successfully read twice before being decoded Linear security l...

Страница 202: ...These parameters determine the laser pattern s height and rate of expansion Double tapping on this parameter displays a dialog box in which you can enter a value from 1 to 15 C 1 4 Decoded Internal Da...

Страница 203: ...as GLIs from its buffer before transmission When this parameter is enabled the scanner transmits data from PDF417 and MicroPDF417 bar codes containing Character Set ECIs even when the ECI Protocol is...

Страница 204: ...alog box labelled Set Code Lengths where you can define the code length that will be decoded by your scanner Choosing One discrete length allows you to decode only those codes containing a selected le...

Страница 205: ...s Keep in mind that increased levels reduce decode security When you double tap on this parameter a dialog box is displayed in which you can enter a decode performance level of between 1 and 3 Length...

Страница 206: ...ecoded bar code Press the key you want to insert in the dialog box attached to this parameter The ASCII Unicode key value of the keypress is displayed Strip Leading This parameter determines the numbe...

Страница 207: ...curity When you double tap on this parameter a dialog box is displayed in which you can enter a decode performance level of between 1 and 3 Length Restriction Refer to Length Restriction on page C 7 f...

Страница 208: ...char acter are transmitted with the data or None no preamble is transmitted The lead in characters are considered part of the symbol Add Remove Data Refer to Add Remove Data on page 8 for details C 1...

Страница 209: ...C 8 for details C 1 11 UPC EAN Shared Settings The parameters you set here are a shared across all available UPC and EAN bar codes Enable Bookland EAN Setting this parameter to on allows your scanner...

Страница 210: ...f Block Stitching for the omnidirectional scanner engine only C 1 12 Code 93 Enabled Set this parameter to on to enable Code 93 or off to disable it Set Length L1 and Set Length L2 Lengths for Code 93...

Страница 211: ...ws you to decode only those bar codes of a specified length Choosing Two discrete lengths allows you to specify two lengths of bar codes that may be decoded Length within a range allows you to decode...

Страница 212: ...ecode a code type within a speci fied range from 6 to 55 Check Digits Double tapping on this parameter displays a dialog box in which you can choose One or Two check digit s If this parameter is set t...

Страница 213: ...llows you to specify two lengths of bar codes that may be decoded Length within a range allows you to decode a code type within a speci fied range from 4 to 14 Check Digit Verification When enabled th...

Страница 214: ...iscrete 2 of 5 Set Length L1 and Set Length L2 Lengths for Discrete 2 of 5 can be set for Any length Length within a range One dis crete length or Two discrete lengths The length of a code refers to t...

Страница 215: ...e linear code Setting this pa rameter to on enables this parameter C 1 19 PDF 417 Enable Setting this parameter to on enables PDF 417 two dimensional 2D coding Length Restriction Refer to Length Restr...

Страница 216: ...if the first codeword is 903 907 912 914 915 C2 if the first codeword is 908 or 909 C0 if the first codeword is 910 or 911 If Code 128 Emulation is set to off the Micro PDF 417 symbols are transmitted...

Страница 217: ...canner a minimum amount of time to complete its current decode before the scan is cancelled when the user quickly triggers on off Low Power Timeout To extend laser life you can select the length of ti...

Страница 218: ...determines the total time the aiming pattern appears before the scanner laser begins sweeping When you double tap on this parameter a dialog box is displayed in which you can enter a value from 0 to 2...

Страница 219: ...tted with the data this parameter must be enabled Minimum Length Minimum lengths for the bar code can be set from 0 to 255 The length of a code refers to the number of characters i e human readable ch...

Страница 220: ...nfusion ISBT Concat Transmit The codes are not concatenated by default You need to choose one of the options provided for this parameter to send concatenated code Choosing Only Concatenated Codes tran...

Страница 221: ...haracters including check digit s Length Restriction Refer to Length Restriction on page C 7 for details Add Remove Data Refer to Add Remove Data on page C 8 for details C 2 5 EAN 13 Settings Enabled...

Страница 222: ...ion Transmit Check Digit If the check digit is to be transmitted with the data this parameter must be enabled Transmit Number System If this parameter is enabled the number system digit is transmitted...

Страница 223: ...mentary to the main bar code This parameter provides two options Not Required but Transmitted if Read or Required and Transmitted Double tap on Addendum to display a dialog box listing your options Hi...

Страница 224: ...to Length Restriction on page C 7 for details Add Remove Data Refer to Add Remove Data on page C 8 for details C 2 11 Codabar Enabled Set this parameter to on to enable Codabar Start Stop Transmit Co...

Страница 225: ...check digit s Double tapping on these parameters displays dialog boxes where you can define the code length that will be recognized by your scanner Length Mode You can choose to set L1 as Minimum Leng...

Страница 226: ...an readable characters including check digit s Length Restriction Refer to Length Restriction on page C 7 for details Add Remove Data Refer to Add Remove Data on page C 8 for details C 2 13 Code 11 En...

Страница 227: ...thm of the option you ve chosen to ensure the integrity of the symbol data before transmitting If the data does not contain that algo rithm the data is not transmitted Transmit Check Digit If the chec...

Страница 228: ...to on to enable Discrete 2 of 5 Standard 2 of 5 Format This parameter allows you to choose a standard format either Identicon 6 start stop bars or Computer Identics 4 start stop bars Check Digit Verif...

Страница 229: ...to either ASCII or Numeric Minimum Length Minimum lengths for the bar code can be set from 0 to 255 The length of a code refers to the number of characters i e human readable characters including che...

Страница 230: ...he options available for this parameter represent multi level components of a composite symbol Enable CC C and Enable CC AB To activate these components set these parameters to on Linear Transmission...

Страница 231: ...on page C 7 for details Add Remove Data Refer to Add Remove Data on page C 8 for details C 2 21 PDF 417 Enabled Set this parameter to on to enable PDF 417 Length Restriction Refer to Length Restrictio...

Страница 232: ...ta Refer to Add Remove Data on page C 8 for details C 2 23 Codablock Codablock is a stacked variant to the standard bar codes Code 39 and Code 128 Enable Codablock A Codablock A is based on the struct...

Страница 233: ...defined preset A preset is a group of exposure and image correction settings Each preset config ures the imager for a specific purpose such as bar code decoding or image capture Presets also allow eas...

Страница 234: ...t popular bar codes and their subtypes The bar code decoding symbology predefined presets define which bar codes can be decoded The bar code decoding camera predefined presets determine how the bar co...

Страница 235: ...ons It is optimized for a normal office lighting about 300 Lux Low light This preset is designed for very dark conditions such as inside a warehouse where the lights are kept low or inside an unlit tr...

Страница 236: ...a shorter exposure time so as to freeze motion Low light near This preset is designed for dark conditions it uses a longer exposure time and includes the flash D 3 Using the Teklogix Imagers Applet D...

Страница 237: ...ecting a Camera To select a camera Tap on the Camera Presets drop down menu to view the camera options Choose a camera specifically Front Imager which is located at the top of the unit D 3 3 Setting t...

Страница 238: ...w is displayed Type the name of the new preset in the dialog box Tap on OK to save your changes The preset list is displayed the new custom preset appears at the end of the list It is marked as read a...

Страница 239: ...ight the parameter and then press the SPACE key or double click on the parameter An associated dialog box containing the valid range of values for the parameter and the current setting like the sample...

Страница 240: ...isplayed warning you that you are about to remove a preset Tap on Yes to remove the preset or No to cancel the operation D 4 Configuring the Bar Code Decoding Camera Presets To configure the bar code...

Страница 241: ...drop down menu to view the camera options Choose a camera specifically Front Imager which is located at the top of the unit D 4 2 Setting the Active Preset An active preset has an A to the right in Fi...

Страница 242: ...the Add button A screen like the sample following is displayed Type the name of the new preset in the dialog box Tap on OK to save your changes The preset list is displayed the new custom preset appea...

Страница 243: ...ey or double click the parameter An associated dialog box containing the valid range of values for the parameter and the current setting like the sample screen following is displayed Type a value in t...

Страница 244: ...tom preset you want to delete and tap on the Remove button A window is displayed warning you that you are about to remove a preset Tap on Yes to remove the preset or No to cancel the operation D 4 7 C...

Страница 245: ...button D 4 9 Viewing a Preset To view the parameter settings in a preset Highlight a preset and tap on the View button The associated preset window is displayed Tap on the sign to expand one of the l...

Страница 246: ...ustom Preset The parameter values in a custom preset can be modified It is recommended that very few changes be made to a custom preset To ensure that it will work reliably it should be as close as po...

Страница 247: ...p on OK The parameter list is displayed the new value for the changed parameter is shown Tap on OK to exit to the preset list and save the changes D 4 12 Removing a Custom Preset Highlight the custom...

Страница 248: ...and then tap on the Filter tab D 4 14 1 Modifying a Bar Code Setting The rules for manipulating data from selected bar code symbologies can be modified To change the settings for a symbology Tap on t...

Страница 249: ...key or double click the parame ter The following screen is displayed When you ve completed your edits tap on OK D 4 15 Translation Tab Configuring Rules Translation rules enable the automatic processi...

Страница 250: ...adding editing and removing translation rules refer to Translations Tab on page 140 D 4 16 Advanced Tab D 4 16 1 File Locations for Captured Images To configure the location for saved images open the...

Страница 251: ...puter User Manual D 19 To define the location where imager files will be stored Tap on the File Location button Type the file Name choose the Folder and file Type Choose the Location in which your fil...

Страница 252: ...devices that are configured to use them tap in the checkbox next to Show all modules Adding Editing and Removing Triggers For instruction about adding editing and removing triggers refer to Manage Tr...

Страница 253: ...ndent on the type of bar code and quality of the image being captured For example the value may need to be increased to compensate for larger bar codes with more data encoded or for poor quality image...

Страница 254: ...s set to on all decoded Code 39 symbols with a SPACE as the first data character are concatenated to the internal buffer Data from the last Code 39 symbol without a SPACE is added to the buffer as wel...

Страница 255: ...Set this parameter to on to enable EAN 13 Check Digit Strip If you enable this parameter a check digit is stripped from the decoded bar code data Supplements 2 and Supplements 5 Supplements are addit...

Страница 256: ...is set to on the imager does not accept the main bar code without a supplement Supplements Separator Supplements Separator is a space that is added between the EAN 8 bar code and the Supple ment code...

Страница 257: ...arameter expands the UPC E code to a 12 digit UPC A format Check Digit Strip If you enable this parameter a check digit is stripped from the decoded bar code data Number System If this parameter is en...

Страница 258: ...mum allowable code lengths 0 to 80 D 5 11 Codabar Enabled Set this parameter to on to enable Codabar Start Stop Strip Codabar can use the following sets of characters as start and stop characters a b...

Страница 259: ...ble code lengths 2 to 60 D 5 12 MSI Plessey Enabled Set this parameter to on to enable MSI Enable Plessey Set this parameter to on to enable Plessey Check Char When this parameter is set to on the int...

Страница 260: ...le tapping on these parameters displays a screen in which you can set the minimum and maximum allowable code lengths 1 to 80 D 5 14 Interleaved 2 of 5 Enabled Set this parameter to on to enable Interl...

Страница 261: ...reen in which you can set the minimum and maximum allowable code lengths 1 to 48 D 5 17 Discrete 2 of 5 Enabled Set this parameter to on to enable Discrete 2 of 5 Minimum and Maximum Length The length...

Страница 262: ...lengths 4 to 74 D 5 20 Posi Code Reduced Space Symbology Enable Setting this parameter to on enables Posi Code scanning capability Enable Limited A and Enable Limited B Posi Code is a position based s...

Страница 263: ...able 2D Micro PDF 417 Minimum and Maximum Length The length of a code refers to the number of characters i e human readable characters in cluding check digit s Double tapping on these parameters displ...

Страница 264: ...a separator bar The top and bottom of the symbol also have separator bars that extend to the ends of the minimum quiet zones Enabled Set this parameter to on to enable Code 49 Minimum and Maximum Len...

Страница 265: ...minimum and maximum allowable code lengths 1 to 3500 D 5 30 2D Maxicode Enabled Set this parameter to on to enable 2D Maxicode Minimum and Maximum Length The length of a code refers to the number of...

Страница 266: ...l PostNET Enabled Set this parameter to on to enable Postal PostNET Check Digit Strip If you enable this parameter a check digit is stripped from the decoded bar code data D 5 34 Postal Australian Ena...

Страница 267: ...Enabled Set this parameter to on to enable Postal Kix D 5 39 Postal Korean Enabled Set this parameter to on to enable Postal Korean D 5 40 Postal Royal Enabled Set this parameter to on to enable Post...

Страница 268: ......

Страница 269: ...ll Ascii 20 audio indicators beep conditions 38 volume adjustment 39 B backlight display 78 intensity 36 keyboard 36 backup battery 11 backup profile creating Total Recall 116 backup profile restoring...

Страница 270: ...k Digit Verification I 2 of 5 15 cleaning hand held 47 Click Data scanner double click 138 Click Time scanner double click 137 CLSI Editing 13 CLSI Library System 26 Codabar 26 B 26 Codabar 13 Codablo...

Страница 271: ...ation at site 156 operator controls 156 quad dock 162 Dot Time C 1 double click appending characters to a decoded bar code 138 scanner trigger 137 Double Click Manage Triggers menu 99 Double Tap stylu...

Страница 272: ...oard keys 31 ALT 32 arrow keys 32 BKSP 32 CTRL 32 DEL 32 ESC 33 Macro keys 34 macro keys 84 modifiers 31 navigating using the keyboard 51 one shot mode 83 SCAN 33 SHIFT 32 SPACE 32 TAB 33 Keyboard Pro...

Страница 273: ...21 22 23 26 28 29 30 31 partitions creating 122 deleting 123 dismounting 123 formatting 123 management 123 mounting 124 PC connecting NEO to 160 PDF and linear Predefined preset D 3 PDF 417 C 17 33 Ph...

Страница 274: ...Log File 139 Scan Mode 2 scanner decoded internal 1 decoded ISCP 18 module SE955 specifications 173 one dimensional 1D internal scanner 165 options 164 techniques scanning 165 troubleshooting tips 166...

Страница 275: ...UPC E Check Digit 10 UPC E Preamble 10 UPC E1 Check Digit 10 UPC E1 Preamble 10 1D internal 165 2D UPC Half Block Stitching 12 Scanning Mode 2D C 4 Scan Result 138 Scan Result Time 138 screen stylus...

Страница 276: ...libration 36 97 stylus using 51 touch pen using 51 touchscreen disabling and enabling 97 Translations parameters bar codes 140 Transmit Check Digit 21 23 24 27 28 29 30 Transmit Check Digit I 2 of 5 1...

Страница 277: ...165 2D Aztec B 33 2D Data Matrix B 32 2D Maxicode B 33 2D PDF 417 B 31 2D QR Code B 33 2D Raster Expand Rate C 4 2D UPC Half Block Stitching 12 36 key keyboard alpha keys accessing 34 uppercase lette...

Страница 278: ......
Отзывы: