36
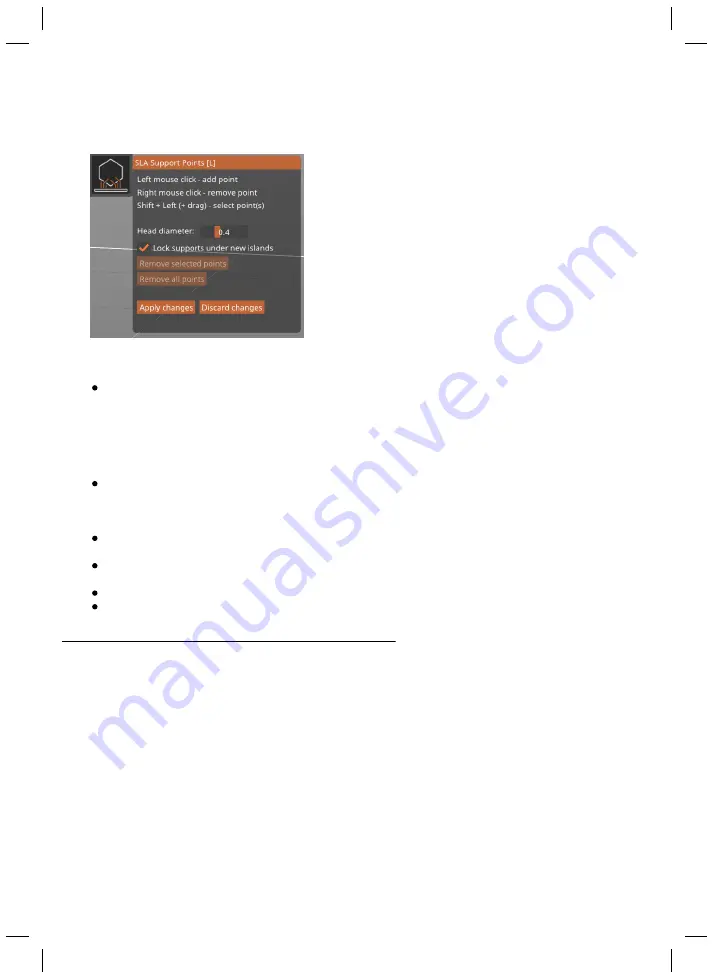
Manual editing
Clicking the Manual editing button opens a new menu
and a new set of tools, which enable you to manually
add, remove and modify support points on the object.
Use Left mouse click to add a support, right mouse click
to remove a support, and combine Shift+Left mouse to
drag a selection box to select more supports. You can
left-click and drag a support point to reposition it.
Manual editing of supports is useful when the automatic
generation doesn’t deliver a perfect result. Once you
have sliced and printed a few objects, you will be able to
recognize which parts of the model may require extra
supports - those are usually places we call “islands”,
basically the critical parts that start mid-air. It’s a good
practice to add a few extra supports to these places to
ensure that the model will withstand the peeling forces.
Head diameter
- specifies the size of the support head. The maximum value is 1 mm by
default - this can be changed by modifying the support diameter in
Print settings -> Supports
-> Support pillar diameter.
Increasing this value may require increasing the Object elevation
value as well. The default value for support head diameter is 0.4 mm and it’s suitable for most
objects. Larger and heavier objects may require stronger connections (higher values). The
support point gizmo has a small cone-shaped part that shows the direction in which the
support will be attached and its size.
Lock supports under new islands
- these are the critical parts of the object that often start
mid-air. Automatic generation of supports can recognize these parts and creates supports for
them accordingly. If you decide to manually edit the supports, you can “lock” these critical
points so you don’t accidentally delete them
Remove selected points
- removes the points that you have selected (e.g. by Shift+left
clicking them). Selected points are marked red. Locked points won’t be deleted.
Remove all points
- removes all points, including automatically generated and even locked
points
Apply changes
- confirms the changers and returns to the previous menu
Discard changes
- discards manually made changes and returns to the previous state
6.9. Pad, supports, layer height and exposure times
There are several tools and settings that will help you print
even very complex objects
without a
hitch.
Pad and supports
are useful for achieving a good object positioning on the print platform,
while the
layer height and exposure times
affect the number of details on the object, as well as
the overall printing time. However, the print time is mainly affected by the total height of the
object.
Содержание PRUSA CW1S
Страница 1: ...V1 06 ENG 3DPRINTING HANDBOOK USER MANUAL FOR THE ORIGINAL PRUSA SL1S SPEED ORIGINAL INSTRUCTIONS ...
Страница 13: ...13 ...
Страница 69: ......


