20
4.6. Time and time zone configuration (optional)
You can configure the printer’s time zone and current time in
Settings - Language & Time - Time
Settings.
If you have the printer connected to the internet, you can use Automatic time settings to
have the time updated automatically depending on your time zone. Next, you should go to
Timezone menu and select your continent and nearest town/city. If you don’t have the printer
connected to the internet, please set the time manually using Date and Time options.
Setting the correct time is useful - the screen will show you when the print job is going to finish.
4.7. Pouring resin into the tank
Before you start printing, always make sure the FEP film on the bottom of the tank is clear
(transparent), clean and has no holes, dents or deep scratches.
Check the tilt platform with the
display and make sure it is completely clean and there is no debris anywhere.
Wear gloves when handling resins!
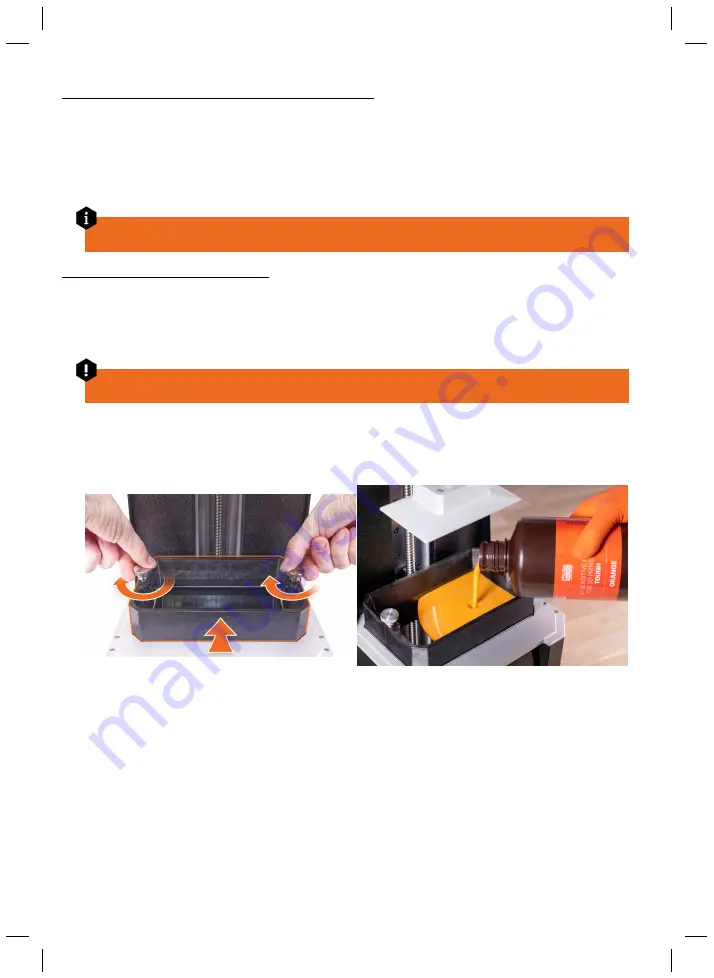
Place the tank on the tilt platform. There is a
small groove
running around the tilt bed that will
help you to position the tank properly. You may hear a little “click” as it falls into place. Use the two
resin tank screws to secure it to the tilt bed. Tighten screws
simultaneously and with the same
amount of force,
otherwise the tank may end up in an uneven position.
Tighten both screws simultaneously and with the same amount of force. Pour the recommended
amount of resin - there is a max level mark in the tank.
Once the tank is secure,
pour the resin in it.
Notice that there is a
max level mark
in the tank that
will help you measure the optimal volume. The SL1S features a built-in resin level sensor, so in
case there’s too little or too much resin, the printer will pause and display an on-screen info
message. Please follow the on-screen instructions to fix the issue.
Содержание PRUSA CW1S
Страница 1: ...V1 06 ENG 3DPRINTING HANDBOOK USER MANUAL FOR THE ORIGINAL PRUSA SL1S SPEED ORIGINAL INSTRUCTIONS ...
Страница 13: ...13 ...
Страница 69: ......


