6.3.8 Loading the filament into the extruder
Before you can load the filament, the printer must be preheated for the correct filament type.
If you have the filament sensor or autoloading disabled
in the settings, you can manually
start the loading process from the LCD menu.
1. Press the control knob on the LCD panel to enter the main menu.
2. Insert the filament into the extruder.
3. Choose the
Load filament
option in the menu and press the button to confirm.
a. If the nozzle is not preheated, the preheat menu will be automatically shown.
So select the filament type and confirm by pressing the control knob.
b. Wait for the nozzle to reach the target preheat temperature.
c. Insert the filament into the extruder and confirm loading by pressing the
control knob.
4. The filament is then loaded to the extruder by the extruder stepper automatically.
If you have
the filament sensor and autoloading enabled
, preheat the printer and simply
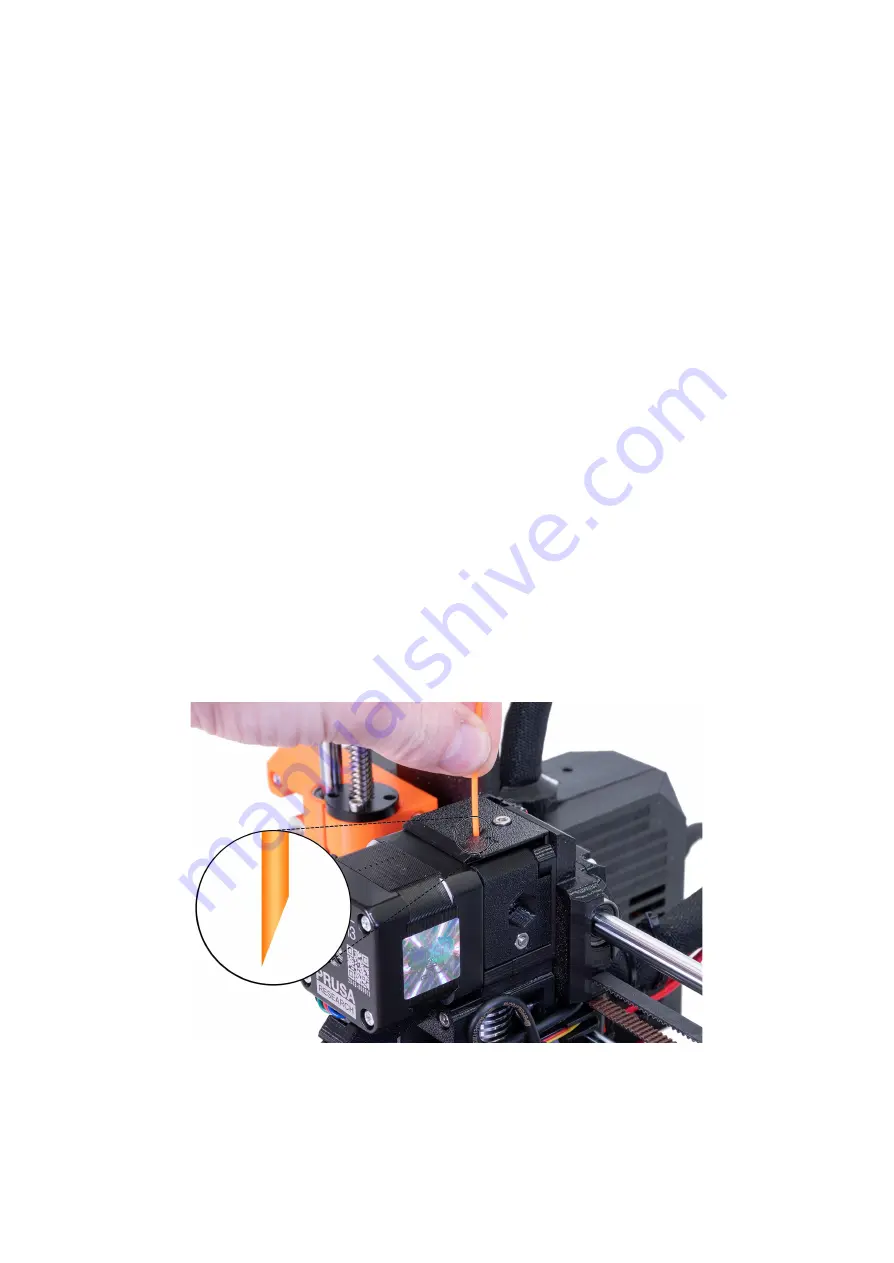
insert the filament into the extruder. Everything is automated from this point. Make sure that
the filament tip is nice and pointy. The Z-axis will rise in case the current Z coordinate is less
than 20mm from the print bed. This will ensure that there is always enough space for
cleaning the nozzle.
You should cut the top of the filament as shown in the next picture.
Pict. 9 - Loading the filament into the extruder
If your filament is running out during a print, you can easily replace it with a new spool. Just
go to the LCD menu, select the Tune submenu and press
Change filament
. The printer will
25


