background image


60 

6.1 Summarize 

The ventilator adopts the MASIMO CO

2

 module. You can select IRMA mainstream CO

2


module to measure the CO

2

 concentration. 


It is intended to be connected to a patient breathing circuit for monitoring of 

inspired/expired gases during recovery and respiratory care. It may be used in the 

operating suite, intensive care unit, patient room and emergency medicine settings for 

adult, pediatric and infant patients. 


It is not intended to be used as the only means of monitoring a patient. It shall always be 

used in combination with other vital signs monitoring devices and or professional human 

judgments of patient condition. The IRMA probe is intended to be used by trained and 

authorized health care professionals only.


6.2 Connection 

Please follow the procedures below: 

1)  Plug the IRMA connector into the CO

2

 interface on the rear plate of the main unit, the 

connection method shown as below. 


Figure 6-1 CO

2

 module connection view

Содержание Boaray 5000C

Страница 1: ...ray 5000D Version Information The version number of this user manual may be updated due to the software upgrades Shenzhen Prunus Medical Co Ltd reserves the right to change it without giving prior notice The version information Version No M93 P 00040 15 0 Release date May 2019 ...

Страница 2: ...nd essential performance Collateral Standard Electromagnetic disturbances Requirements and tests Declaration The intellectual property of the product and its document belongs to Shenzhen Prunus Medical Co Ltd hereinafter referred to as the Company The Company reserves the final right of interpretation for this document Any unauthorized copying storage reproduction or translation of this document i...

Страница 3: ... of the Company for repairing and replacing Any change of the product is verboten without agreement from the Company The user must take responsibility for any malfunction which results from non compliance with the servicing requirements detailed in this manual or the service or repairs are not performed by the personnel of the Company Free Maintenance The user reserves the right to be served for f...

Страница 4: ...read the manual carefully and comply with it strictly especially pay attention to the Warning Caution and Note The optional features may not be completely included in the manual should you have any questions please contact the Company Please put the manual near the product so that you can easily fetch it at any time Illustration The illustrations in the manual are only for reference some settings ...

Страница 5: ...ODUCTION 8 2 2 SYSTEM OVERVIEW 9 2 2 1 External connection view 10 2 2 2 User screen front view 11 2 2 3 User screen rear view 11 2 2 4 Ventilator front view 12 2 2 5 Ventilator rear view 12 2 2 6 Ventilator bottom view 13 2 3 POWER SUPPLY 13 2 4 BATTERY 14 2 5 GAS SUPPLY 15 2 6 SYSTEM SWITCH 15 2 7 USER SCREEN 15 2 8 MODES OF VENTILATION 15 2 8 1 VCV mode 15 2 8 2 Free flow 16 2 8 3 PCV mode 16 2...

Страница 6: ... 3 VENTILATOR SYSTEM 29 3 4 BATTERY MODULE 30 3 5 OXYGEN SENSOR 31 3 6 PATIENT SYSTEM 32 3 7 EXPIRATORY VALVE 33 3 8 CONNECTING THE GAS SUPPLY 35 3 9 CONNECTING THE POWER SUPPLY 36 4 PRE USE CHECK 37 4 1 SYSTEM CHECKING 37 4 2 ALARM TEST 38 4 2 1 Preparations before alarm test 38 4 2 2 High airway pressure alarm 38 4 2 3 Low volume alarm 38 4 2 4 Low oxygen concentration alarm 38 4 2 5 Pipeline fa...

Страница 7: ...MAINTENANCE OF THE BREATHING TUBE 69 7 6 MAINTENANCE OF THE BATTERY 69 7 7 MAINTENANCE OF THE OXYGEN SENSOR 70 7 8 MAINTENANCE OF THE CO2 MODULE 71 8 CONFIGURATION LIST 72 APPENDIX A WORKING PRINCIPLE 73 A 1 PNEUMATIC SYSTEM 73 A 1 1 Pneumatic Diagram 73 A 1 2 Summary 74 A 2 ELECTRICAL SYSTEM STRUCTURE 76 A 2 1 General figure of the electrical system structure 76 A 2 2 Principle 76 APPENDIX B PROD...

Страница 8: ... PRIORITY ALARMS 85 APPENDIX D SYMBOLS AND GLOSSARY 86 D 1 GLOSSARY 86 D 2 EQUIPMENT SYMBOLS 88 D 3 PACKAGE SYMBOLS 89 APPENDIX E ELECTROMAGNETIC CAPABILITY 90 APPENDIX F DEFAULT SETTINGS 96 APPENDIX G REFERENCE 98 ...

Страница 9: ... information throughout each chapter of the manual Please read and understand all the safety information before use to avoid security risks The ponderance of the safety requirement has nothing to do with the arrange order Warning Identify conditions or practices that could result in serious adverse reactions or potential safety hazards Caution Identify conditions or practices that could result in ...

Страница 10: ...ical electrical equipment and IEC 60950 for safety of information technology equipment All configurations shall comply with the valid version of IEC 60601 1 The personnel who are responsible for connecting the optional equipment to the I O signal port shall be responsible for medical system configuration and system compliance with IEC 60601 1 1 Users have the responsibility to carry out the necess...

Страница 11: ...or is connected to the other equipment leakage currents may increase Always perform a regular clean and pre use check before opening the package The equipment must only be connected to a supply mains with protective earth to avoid electric shock During the usage of equipment please do not pull display screen wire otherwise it may result in alarm sound failure When adding attachments or other compo...

Страница 12: ...he warning limit to a proper parameter in order to ensure the safety of patient Positive pressure breathing may be accompanied by the following side effects occur barotrauma hypoventilation hyperventilation or circulatory injury The maintenance is allowed only in the condition that the equipment is not connected to the patient All personnel should be aware that Disassembling or clearing certain pa...

Страница 13: ...egarded as the basic of treatment or diagnosis decisions Such decisions can only be made by the experienced medical personnel based on the previous or accepted manner The Company has no responsibility for the accuracy of the signal handling if auxiliary equipment not provided by the Company are used with the ventilator system If there are differences between the information displayed on the user i...

Страница 14: ...lation of excess liquid in the expiration sensor is not allowed such as in clean and disinfection period otherwise it may affect the function of the ventilator When lifting or moving the ventilator system or some parts of the system please comply with the instruction of the machine and do some preparation of the safety Please do not use the soft tube with the characteristic of antistatic electrici...

Страница 15: ...ing to the local regulations When disposing of the old oxygen sensor observe the relevant regulations for biohazard and do not burn it All the disposable components should be disposed according to the hospital regulations and in an environmental safe way Note When the system is not used it is recommended the device is connected to the main power supply in order to keep the battery power If the sys...

Страница 16: ...ment Boaray 5000 ventilator system is intended for used to treat and monitor children weight above 5 kg and adult patients with respiratory disturbance or insufficient breathing The ventilator should be used only in hospitals or in facilities whose purpose is to provide health care or during transport of a patient within or between hospitals or health care facilities This ventilator consists of th...

Страница 17: ...te myocardial infarction associated with heart dysfunction Caution The ventilator can only be operated by professional medical personnel with experiences in respiratory disease treatment Personnel not be trained or authorized cannot operate the ventilator 2 2 System Overview Caution The illustration in this section is only for reference due to different configuration the illustration may not be en...

Страница 18: ...view Figure 2 1 External connection view 1 Trolley 7 Main unit 2 Hooks 8 Patient system 3 Gas supply pipeline Oxygen and AIR 9 Humidifier 4 Mains power plug 10 SpO2 finger clip 5 User screen 11 Sampling port of CO2 6 Mechanical arm ...

Страница 19: ...utton 8 Manual inspiration button 3 Alarm reset button 9 Standby button 4 Lock unlock button 10 Navigation wheel 5 Inspiration hold button 11 Power battery status indicator 6 Expiration hold button 2 2 3 User screen rear view Figure 2 3 User screen rear view 12 Rotation axis 14 Display separating axis 13 Displayer interface ...

Страница 20: ...xpiratory valve heating silk screen 7 Inspiratory silk screen 3 Expiratory port 8 Inspiratory port 4 Expiratory silk screen 9 Oxygen sensor installation position 5 Expiratory valve unlock silk screen 2 2 5 Ventilator rear view VGA OU T CO2 SpO2 No Obstruct 1 5 4 6 7 8 9 2 3 Figure 2 5 Ventilator rear view ...

Страница 21: ...O2 inlet 12 Air inlet 13 Air inlet silk screen 0 28 0 6MPa 2 2 6 Ventilator bottom view Figure 2 6 Ventilator bottom view 1 Emergency AIR suction port 2 Exhaust port Caution Do not block the emergency AIR suction port and exhaust port located on the bottom of the equipment shown as above figure 2 3 Power supply 1 Power supply specification Input voltage 100 240V Frequency 50 60Hz Current Input 1 5...

Страница 22: ...t lead to interruption of the ventilator work When operating from batteries the status of the battery modules is continuously monitored by the ventilator If the battery capacity is insufficient the ventilator will give alarms Low battery capacity or No battery capacity to notify users When low battery capacity alarm appears the remaining time is about 10 minutes When No battery capacity alarm appe...

Страница 23: ... generate an alarm to notify the users 2 6 System switch The ventilator has a specially designed system switch protective shield which can avoid touching or impacting the switch accidentally to turn off the ventilator 2 7 User screen Refer to the Chapter 5 Operations and settings 2 8 Modes of ventilation The ventilator offers varieties ventilation modes and assist control modes and it meets the pa...

Страница 24: ...or will recognize the patient demand and automatically switch over to deliver a Pressure Support Ventilation This allows flow to exceed the set Peak flow thereby meeting the patient s demand Free flow is available in VCV SIMV VCV SPONT Backup ventilation VCV modes Default setting Close 2 8 3 PCV mode PCV pressure control ventilation in the PCV mode during inspiratory period the ventilator provides...

Страница 25: ...eters need to be set Psupp 2 8 5 SIMV mode SIMV Synchronized Intermittent Mandatory Ventilation In the SIMV mode the independent breathing frequency and the tidal volume or inspiratory pressure is controlled by the patient and a synchronous control is active at a certain interval of time If the trigger level is met in the waiting trigger window the ventilator will provide a synchronized volume pre...

Страница 26: ...IG or FTRIG Tp ETS Prate 2 8 6 DPAP mode DPAP Dual Positive Airway Pressure The ventilator forms the high pressure level and low pressure level according to the pre set value and switches by the pre set frequency and inspiratory time Patients can breathe spontaneously at the high pressure and low pressure level by trigger and the ventilator provides support ventilation according to the pre set pre...

Страница 27: ...d then enter the expiration phase In the SPONT mode the following parameters need to be set FiO2 ETS PEEP Psupp PTRIG FTRIG Tapnea Prate In the SPONT mode when the apnea time of the patient achieves the pre set value enabled by suffocation alarm limit the ventilator will provide the mandatory ventilation according to the per set backup ventilation mode and relative parameters for the patient The o...

Страница 28: ...lung thoracic to ensure commonly using of the minimum pressure to deliver the preset tidal volume and minute ventilation volume The inspiratory pressure keeps constant throughout the preset inspiratory time The inspiratory flow rate is decreasing In PRVC mode the following parameters need to be set TI Freq FiO2 VT PEEP PTRIG FTRIG Prate 2 8 9 NPPV mode NPPV Noninvasive positive pressure ventilatio...

Страница 29: ...en the ventilator completes the current inspiration or press the membrane button again to end inspiratory hold 2 9 2 Expiratory hold Refer to the section 2 2 2 user screen view When the membrane button is pressed the ventilator will switch to a 30 second expiratory holding phase immediately or press the membrane button again to end expiratory hold 2 9 3 100 O2 2 min Refer to the section 2 2 2 user...

Страница 30: ...esigned with a perfect alarm system to help insure patient safety The ventilator has 3 types of alarms according to different potential risks during the alarm generated High Priority Medium Priority and Low Priority When alarm occurs it will remind the user by the alarm indicator light alarm tone and alarm messages different categories of alarms have different alarm information The alarm signals a...

Страница 31: ...y there may be some unreasonable settings or some unimportant malfunctions users could adjust the setting parameters properly or clear up the malfunctions when complete using the equipment When alarm generates the ventilator will remind users by the following auditory and visual signals 1 High priority Alarm indicator light red flashes Alarm tone du du du du du du du du du du Alarm message red bac...

Страница 32: ...ressure High Apnea High PRVC Airway Pressure limit High Expiratory CO2 High Med Expiratory CO2 Low Med SPO2 low Med System leakage Please check the breathing tubes and expiratory valve High Technical alarm O2 supply pressure low High Air supply pressure low High AC Power Failure High Battery failure Med Low battery capacity Med Battery is exhausted High O2 sensor is not connected or failure High T...

Страница 33: ...hes in red If multiple alarms occur the alarm messages are displayed in order of priority and time of occurrence 2 10 3 Alarm limit setting Refer to 5 9 alarm setting Press the Alarm setting to enter the alarm setting screen and set the alarm limit value Warning A HAZARD can exist if different ALARM PRESETS are used for the same or similar equipment in any single area e g an intensive care unit or...

Страница 34: ...efore the 100 seconds period will cancel the silence Cautions In alarm silence status except for the alarm tone the other alarm functions are working normally In alarm silence status if new alarms occur the alarm silence will be cancelled and alarm tone will be activated according to the latest alarm Pressing the membrane button is invalid if no alarm occurs 2 10 5 Alarm reset When alarm generates...

Страница 35: ... 3 Trolley pole 7 M5 hexagon screws 4 Trolley base Assembling procedure 1 Install the trolley pole into the trolley base and use the four M5 hexagon screws to lock the pole from the bottom of the trolley 2 Install the trolley platform to the top of the pole aligning the screw and lock the four M5 hexagon screws Note that when installing the trolley platform the 4 ...

Страница 36: ...exagonal screws then disassembly the pole trolley base the trolley platform and hooks 3 2 Display system 1 Assembling Figure 3 2 Display screen installation view Assembling procedure 1 Prepare the 15 inch display screen the rotation axis assembly and the M4 screws in the package 2 As the above graphic shows put the 15 inch display screen on the worktable attention to protect the LCD install the ro...

Страница 37: ... 5 Humidifier 2 15 inch display screen 6 Trolley 3 Main unit 7 Brake 4 Fixing screw for main unit Assembling procedure 1 Lock the brakes of the trolley align the four foot pads on the bottom of the main unit to the fixing holes of the trolley platform and make sure the four foot pads have ...

Страница 38: ...bracket on the middle of the pole 2 Disassembling 1 Loose the fixing screws to remove the display screen assembly 2 Loose the screws reversely to disassembly the mechanical arm 3 Loose the host fixing screw to separate the ventilator s mainframe and trolley 4 The humidifier can be pulled out directly 3 4 Battery module 1 Assembling VGA OU T CO2 Sp O2 No Obstruc t Figure 3 4 Battery module position...

Страница 39: ...e new oxygen sensor forcefully and then plug the oxygen sensor wire to the oxygen sensor 3 Install the cover 2 Disassembling 1 Push the power switch on the rear of the host to and shut down the ventilator system VGA OU T CO2 Sp O2 No Obstruc t Figure 3 6 Power switch position view 2 Disconnect the ventilator form main power supply and gas supply device ...

Страница 40: ... and remove it Figure 3 8 Oxygen sensor disassembly view 4 Unplug the sensor wire and then pull out the oxygen sensor to take off the oxygen sensor 3 6 Patient system 1 Assembling Please connect the patient system as the diagram shown below Figure 3 9 Patient system connection view ...

Страница 41: ...been shutoff and disconnected to the power supply When disassembling the respiratory pipeline please hold the tie in on the two ends of the corrugated tube to avoid damages to the corrugated tube and the inspiratory expiratory connection port 3 7 Expiratory valve 1 Assembling Figure 3 10 Expiratory valve view 1 Expiratory valve cover 3 Expiratory valve module 2 Expiratory port Assembling procedure...

Страница 42: ...direction of the silk screen simultaneously and press the cover and push the cover lock to lock Figure 3 12 Expiratory valve cover installation view 2 Disassembling 1 Push the cover lock to unlock according to the direction of the silk screen and take out the expiratory valve cover Figure 3 13 Expiratory valve cover disassembly view 2 Pull the lock plate to the left side by your left hand to unloc...

Страница 43: ...as supply connection view Use a monkey wrench or special wrench to fasten the oxygen inlet connection tube and the air inlet connection tube 2 Disassembling Cut off the air and oxygen supply use a monkey wrench or special wrench to demount the oxygen inlet connection tube and the air inlet connection tube ...

Страница 44: ...ower outlet otherwise it will lead to increase of leakage current and result in risk 1 In order to avoid the power plug off fix the power cord by tightening the screw on the clamp it shown as below Figure 3 16 Power supply connection view 2 Plug the main power cord into the socket ...

Страница 45: ... condition 7 Make sure there is no loose phenomenon on the wheels and the brakes have been locked and the ventilator cannot be moved 8 Connect the power cord to the AC power supply the AC power indicator and the battery indicator will light if not that means the system has no electricity Warnings Please always do a pre use check before the patient is connected to the ventilator Please connect the ...

Страница 46: ...value 3 Make sure the Airway pressure high appears in the alarm message display area 4 Set the upper limit of PAW more than the measuring value 5 Make sure the Airway pressure high disappears 4 2 3 Low volume alarm 1 In the alarm setting screen set the lower limit of VTE more than or equal to the measuring value 2 Make sure the Tidal Volume Low appears in the alarm message display area 3 Set the l...

Страница 47: ...ttery 2 Make sure the AC Power Failure appears in the alarm message display area 3 Connect the ventilator to the Power supply again 4 Make sure the AC Power Failure alarm disappears 4 2 7 Continuous airway pressure alarm 1 In the inspiratory phase press the Insp Hold membrane button 2 About 15 seconds later make sure the High Continues Pressure appears in the alarm message display area 3 Press the...

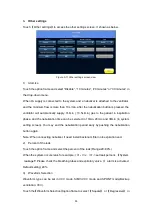
Страница 48: ...ow key pad indicates the selected status and its display highlight The light blue frame indicates the active status and the user can adjust the parameter by the navigation wheel Rotate the navigation wheel with clockwise to increase the parameter and rotate the navigation wheel with counterclockwise to decrease the parameter The gray pad indicates the unusable status the function is disabled or th...

Страница 49: ... actual interface When turning off the equipment the system will save the current ventilation mode and relative parameters settings which can be selected by the user as a patient category when the system is used in the next time 5 3 Power up screen The power up screen is the first screen displayed on the screen when the ventilator is turned on In Power up screen the system performs the functional ...

Страница 50: ...l continue the ventilation according to the latest settings If you choose the Adult or Pediatric the ventilator will provide ventilation according to the default settings Different parameter setting and operation is confirmed by selecting different patient categories Please follow the below procedures to set the patient category 1 Touch or rotate the navigation wheel to select the needed patient c...

Страница 51: ... value 4 Push the navigation wheel to confirm the value 3 Mode setting 1 Touch or rotate the navigation wheel to Mode setting 2 Push the navigation wheel to confirm 3 Select the mode in the drop down menu 4 Start to test system leakage and compliance Touch or rotate the navigation wheel to Start on the left and confirm by pressing the navigation wheel 5 Startup to enter main screen Touch or rotate...

Страница 52: ...n the Start touch screen icon is highlighted and you can exit the standby mode by pressing the dial In this mode the following membrane buttons are disabled 5 6 Main screen The Main screen provides the operator with displays of current mode of ventilation alarm status battery charge status monitored parameters waveforms display and so on It shown as below ...

Страница 53: ...on display area Displays the current alarm information 3 Status information display area 1 Displays the spontaneous breathing icon 2 Displays the patient category 3 Displays the screen lock unlock icon 4 Display the battery status icon 5 Display the alarm silence icon 4 Function screens buttons area There are 5 buttons 1 Mode Setting 2 Measured value ...

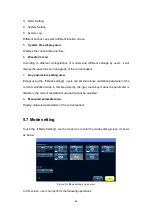
Страница 54: ...rameters setting area Except using the Mode setting users can set the relative ventilation parameter of the current ventilation mode in this area directly the gray touch key means the parameter is disable in the current ventilation mode and cannot be adjusted 8 Measured parameter area Display measured parameters of the current patient 5 7 Mode setting Touch the Mode Setting touch screen icon to en...

Страница 55: ...o adjust the value and push the navigation wheel to confirm setting 3 Backup mode can be set in SPONT mode Touch Backup Mode option frame and select PCV VCV or PRVC in the drop down menu 4 Touch Free flow option frame to select Start or Exit Note The ventilation parameters is corresponding to the current ventilation mode In other word when you select a ventilation mode only the parameters associat...

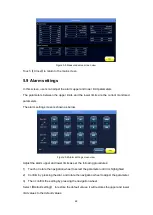
Страница 56: ... screen is shown as below Figure 5 6 Alarm setting screen view Adjust the alarm upper and lower limits as per the following procedures 1 Touch or rotate the navigation wheel to select the parameter until it is highlighted 2 Confirm by pressing the dial and rotate the navigation wheel to adjust the parameter 3 Then confirm the setting by pressing the navigation wheel Select Default setting to resto...

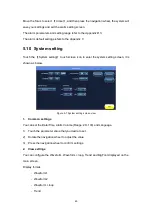
Страница 57: ...ch screen icon to enter the system setting screen it is shown as below Figure 5 7 System setting screen view 1 Common settings You can set the Date Time Alarm Volume Range 20 100 and Language 1 Touch the parameter value that you desire to set 2 Rotate the navigation wheel to adjust the value 3 Press the navigation wheel to confirm settings 2 View settings You can configure the Waveform Waveform lo...

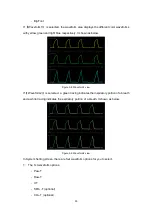
Страница 58: ... 5 8 Waveform1 view If Waveform2 is selected a green tracing indicates the inspiratory portion of a breath and a white tracing indicates the expiratory portion of a breath It shown as below Figure 5 9 Waveform2 view In System Setting screen there are four waveform options for you to select 1 The 1st waveform options Paw T Flow T V T SPO2 T optional CO2 T optional ...

Страница 59: ...T Flow T SPO2 T optional CO2 T optional 4 The 4th waveform opotions Hidden SPO2 T optional Paw T Flow T V T CO2 T optional If Hidden is selected the waveform area displays three waveforms the four waveform is hidden If waveform Loop is selected the two Loops display on the right side of the screen It shown as below ...

Страница 60: ... The 1st loop options P V F P F V V CO2 optional 2 The 2st loop options F P P V F V V CO2 optional If Trend is selected the main screen can display six trends The time of trend 1 h 4 h 8 h 12 h 24 h If Big Font is selected the main screen can display one waveform and the current big font monitoring values ...

Страница 61: ... and the nebulization time can be selected in 10min 20min and 30min in system setting screen You may end the nebulization period early by pushing the nebulization button again Note When connecting nebulizer it need install bacterium filter onto expiration end 2 Percent of the leak Touch the option frame and select the percent of the leak Range 20 80 When the system occurs leak for example VTI VTE ...

Страница 62: ...e according to the leakage volume of the system the maximum compensation volume is 60 of the setting tidal volume 7 Rapid shallow breathing It is a quotient of spontaneous breathing frequency and tidal volume and the measured value is displayed on the measured value screen Parameter range 0 0 1000 0 bpm L Rapid shallow breathing can be set in SPONT mode 8 Occlusion pressure P0 1 It is a measure of...

Страница 63: ...nsation range 0 100 increment 1 default 80 11 AutoPEEP It is a pressure differentials of the setting and measured PEEP Touch the option frame to select AutoPEEP and the system is tested automatically and the value is displayed on the measured value screen Parameter range 0 100cmH2O AutoPEEP is available in all modes 12 CO2 module zeroing For mainstream CO2 module they need to establish a zeroing e...

Страница 64: ...ation testing and software upgrade In Biomed mode you can set altitude Altitude setting range 1000 8000m Default setting 100m Figure 5 13 Password input screen view 5 11 System log The System log screen provides the operator with reviews of previous alarm messages and setting and it records time and contents The time of system logs are stored in accordance with their generated time sequence Touch ...

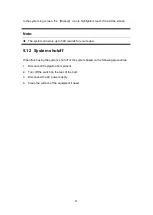
Страница 65: ...store up to 500 records for your review 5 12 System shutoff When finish using the system shut off of the system based on the following procedures 1 Disconnect the pipeline from patient 2 Turn off the switch on the rear of the host 3 Disconnect the AC power supply 4 Clean the surface of the equipment if need ...

Страница 66: ...irway adapters Incorrect probe zeroing will result in false gas readings No modification of this equipment is allowed Replace the airway adapter if rainout condensation occurs inside the airway adapter The IRMA probe is not designed for MRI environments If for whatever the reason the IRMA probe is in direct contact with any parts of the infant s body an insulation material shall be placed between ...

Страница 67: ...adjunct in patient assessment It must be used in conjunction with other assessments of clinical signs and symptoms The IRMA probe is not intended to be in patient contact Caution Never sterilize or immerse the IRMA probe in liquid The IRMA oxygen sensor cell and IRMA airway adapters are non sterile devices Do not autoclave the devices as this will damage them Do not apply tension to the probe cabl...

Страница 68: ...cine settings for adult pediatric and infant patients It is not intended to be used as the only means of monitoring a patient It shall always be used in combination with other vital signs monitoring devices and or professional human judgments of patient condition The IRMA probe is intended to be used by trained and authorized health care professionals only 6 2 Connection Please follow the procedur...

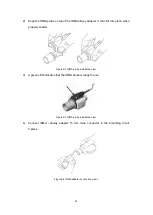
Страница 69: ...hen properly seated Figure 6 2 IRMA probe installation view 3 A green LED indicates that the IRMA probe is ready for use Figure 6 3 IRMA probe installation view 4 Connect IRMA airway adapter 15 mm male connector to the breathing circuit Y piece Figure 6 4 IRMA adapter connection view I ...

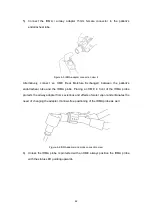
Страница 70: ...dotracheal tube and the IRMA probe Placing an HME in front of the IRMA probe protects the airway adapter from secretions and effects of water vapor and eliminates the need of changing the adapter It allows free positioning of the IRMA probe as well Figure 6 6 IRMA adapter and probe connection view 6 Unless the IRMA probe is protected with an HME always position the IRMA probe with the status LED p...

Страница 71: ...y adapter 6 4 Zeroing procedure Warning Incorrect probe Zeroing will result in false gas readings In order to secure high precision of the IRMA probe measurements the following zeroing recommendations should be followed Zeroing is performed by snapping a new IRMA airway adapter onto the IRMA probe without connecting the airway adapter to the patient circuit and then using the host instrument to tr...

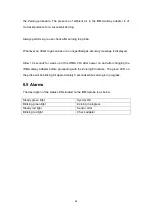
Страница 72: ...ed Allow 10 seconds for warm up of the IRMA CO2 after power on and after changing the IRMA airway adapter before proceeding with the Zeroing Procedure The green LED on the probe will be blinking for approximately 5 seconds while zeroing is in progress 6 5 Alarms The description of the status LED situated on the IRMA probe is as below Steady green light System OK Blinking green light Zeroing in pro...

Страница 73: ...tic agent glass cleanser acetone or any other irritant cleanser Do no use abrasive cleanser e g steel wool silver polish or detergent Place the liquids far away from the electronic components Do not use equipment which is out of order Please let authorized Customer Service representative of the Company complete all the necessary maintenance work whenever at possible or accomplish the maintenance w...

Страница 74: ...s effectively but we do not guaranteed unless the Company provides written authorization We suggest that when cleaning or sterilizing you should use drinking water at least or more healthful water otherwise the result may be affected Cleaning is the most important step in cleaning and sterilizing process If you clean the instrument improperly it would be impossible to sterilize or high temperature...

Страница 75: ...sensor life When cleaning and installation Check the parts good or not if necessary change or repair it 7 2 Maintenance of the ventilator surface 1 Using wet cloth that dipped in flexible cleanser 75 of medical alcohol to wipe the surface of the ventilator 2 After finish the clean of the surface using dry Lint free clothe to wipe the residual detergent Warning If liquid dip into control units will...

Страница 76: ...filter is placed on the rear of the ventilator it shown as below Figure 7 1 Water filter position view Cautions Do not block the outfall of the water filter Replace requiems 1 Replace the filter core every year and replace the filter core when the pressure difference reaches to 0 1 MPa 7 4 Maintenance of the expiratory valve Figure 7 2 Expiratory valve disassembly view 1 Refer to the section 3 7 t...

Страница 77: ...medical alcohol or use the high temperature high pressure steam sterilization the maximum temperature is 134 degree 7 6 Maintenance of the battery Whenever the equipment is connected to the AC power source the battery is being charged automatically Do not allow your battery become fully discharged as this may damage the system When the equipment is turned on make sure that the battery indicator is...

Страница 78: ...he disinfection method to all parts is the effectiveness and applicability If any operation will induce danger to the patient like change the O2 sensor then should disconnect the tube between the ventilator and the patient The exhausted O2 sensor must be replaced or discarded according to the local regulations don t discard the obsolete O2 sensor in a normal way The O2 sensor is a sealed part it c...

Страница 79: ...Remove the disposable IRMA Airway Adapter prior to cleaning the IRMA probe 2 Gas span check Gas readings should be verified at regular intervals with a reference instrument If great error of gas readings were found please contact the manufacturers service department for maintenance by the after service engineers Warnings Never sterilize or immerse the IRMA probe in liquid ...

Страница 80: ...ver that the accessories package or the accessories are damaged do not use the accessories 1 The recommended accessories damageable parts list No Name Specification 1 Mask Optional Adult Pediatric 2 Manual bag Adult Pediatric optional 3 Ventilator disposable absorber suit Adult Pediatric 4 Oxygen sensor MOX 4 Caution The accessories listed above are recommended by the company we have no responsibi...

Страница 81: ...lve 17 Expiratory pressure sensor P 3 Water trap 18 Flow sensor 4a 4b Pipeline pressure sensor 19 Expiratory valve 5a 5b Pressure regulator 20 Expiratory outlet 6a 6b Proportional electromagnetic valve 21 Gas resistor 7a 7b Check valve 22 Pressure regulator 8a 8b Flow sensor 23 Flow control valve 9 MIXER 24 Gas reservoir ...

Страница 82: ... The gas flow controlling module control the air and oxygen flow separately through the solenoid proportional valve in order to reach the pre set ventilation standard 3 The gas mixer and safety valve system realize that the air and the oxygen is mixed evenly and deliver the mixed gases to the patient through the inspiration port At the same time when the patient s airway pressure is much higher th...

Страница 83: ...expiratory pressure 3 Expiratory module To achieve the patient s expiratory function during mechanical ventilation and assist the inspiratory module to realize different modes of mechanical ventilation 4 Patient system Connect the ventilator with patient through the patient system and deliver the controlling gas to the patient The division of the modules is as below Figure A 1 Gas module connectio...

Страница 84: ...supply power for the boards valves sensors heaters fans etc The input of the power module is selected in two ways one is the network power AC 100 240V and the other is from lithium battery 2 The main controlling unit provide the running platform for the operation system it is the center controlling unit and also the executive unit of the entire unit 3 The airway controlling unit provides the drive...

Страница 85: ... External power supply Power input 100 240V frequency 50 60Hz Current input 1 5A Max Backup batteries 11 1VDC 7800mAh Gas supply Pressure supply range 0 28 0 6MPa Gas impurity The gas provided should not contain water oil or impurity particle and the content must be lower than the following standard Air H2O 7g m3 Oil 0 5mg m3 Oxygen H2O 20mg m3 Environment Working Temperature 10 50 Humdity 95 non ...

Страница 86: ...ssure levels Normal operation 65dB A B 3 Setting parameters Parameter Description Accurancy Tidal volume Range 20 2000 mL D series Range 50 1500 mL C series Increment 20 100 Ml 5 mL 100 1000 mL 10 mL 1000 2000mL 50 mL 20mL or 15 of the set value whichever is greater Respiration frequency Range in SIMV mode 1 40 bpm In other modes 4 100 bpm increment 1 bpm 2bpm or 10 of the set value whichever is g...

Страница 87: ...oncentration Range 21 100 Increment 1 6 of the set value Apnea time Range 10 60 sec Increment 5 sec 1 s or 10 of the set value Respiration sensitivity Range 10 60 Increment 10 Prate Range 1 5 Increment 1 B 4 Monitoring parameters Parameter Description Inspiration tidal volume Range 0 3000 mL Resolution 1 mL Expiration tidal volume Range 0 3000 mL Resolution 1 mL Minute ventilation volume Range 0 9...

Страница 88: ...n 0 1 cmH2O AutoPEEP Range 0 100cmH2O Resolution 0 1 cmH2O PR Range 30 250 bpm Resolution 1bpm EtCO2 Range 0 99 mmHg Resolution 1mmHg InCO2 Range 0 99 mmHg Resolution 1mmHg B 5 Main alarm parameters Alarm content Range Tidal volume low High 100 2000 mL OFF Low OFF 20 2000 mL Minute volume High 0 40 L Low OFF 0 39 L O2 concentration High 21 100 Low OFF 21 99 Airway pressure High 6 100 cmH2O Low 0 9...

Страница 89: ...system response time 1 second Accuracy specifications during standard conditions Range Accuracy 0 to 114 mmHg 0 2 mmHg 2 of reading High Continues Pressure It will give an alarm when the airway pressure is continuous above PEEP 15 cmH2O for 15 seconds Apnea Range 10 60 s increment 5 s O2 supply pressure low The O2 supply pressue is less than 0 28 MPa Air supply pressure low The O2 supply pressue i...

Страница 90: ...mits Airway pressure low The airway peek pressure is below the pre set lower limit pressure The tidal volume is set too low The pipeline is falling off Serious gas leakage Improper alarm settings Check the patient and the breathing system Check the settings of the ventilation and the alarm limits High Continues Pressure The airway pressure is continuous above PEEP 15 cmH2O for 15 3 seconds Check t...

Страница 91: ...r set value or even lower The gas supplied in the oxygen tube is not the oxygen The oxygen sensor is malfunctioned or invalid The oxygen sensor has not been calibrated The oxygen modules have malfunction Check the oxygen supply pipeline O2 sensor is not connected or failure O2 sensor is disconnected or invalid connect and replace O2 sensor System leakage Breathing tubes and expiratory valve leak P...

Страница 92: ...eathing system The warning setting is improper Check the patient and the breathing system Check the pipleline outlet hoop perssure Check the patient s breathing system do the leak test if possible Check the paused time and the graphical display to verify Considering use the ventilator to increase the patient s respiratory support Low battery capacity The battery modules can maintain for less than ...

Страница 93: ... content Possible reasons Solutions Frequency high The breathing frequency is too high Triggering automatically Leakage in the pipeline Check and take care of the patient Check the trigger settings Check the connection of the patient s pipiline Frequency low The breathing frequency is too low Improper setting of the trigger sensitivity High tidal volume Check and take care of the patient Check the...

Страница 94: ... mL VTE Expiration tial volume unit mL MV Mechanical minute ventilation volume unit L min MVspn Spontaneously minute ventilaion volume unit L min Freq Setting mechanical ventilaion frequency monitoring total breathing frequency unit bpm fspn Spontaneous breathing frequency unit bpm TI Inspiration time unit s TP Breathing hold time unit s I E Inspiration and Expiration rate PTRIG Pressure trigger u...

Страница 95: ...en concentration unit R The airway resistance unit mH2O L s C Compliance unit mL cmH2O RSB Rapid shallow breathing unit bpm L P0 1 Occlusion pressure unit cmH2O NIF Negative inspiration force unit cmH2O AutoPEEP Intrinsic PEEP unit cmH2O Weight Weight unit kg Kg Kilogram mL Milliliter L Litre bpm Bit per minute L min or LPM Litre per minute cmH2O Centimeter water column Paw T Pressure time wavefor...

Страница 96: ...tion valve unlock label AC power indicator light Battery indicator light Battery Nebulizer Screen and membrane button lock Screen and membrane button unlock Inspiration port Expiration port CE mark Vendor special data serial port Fuse The air source connector The Oxygen source connector RS 232 Serial port Vendor special data port System switch Manufacturer Year of manufacture Serial number Authori...

Страница 97: ... connect the different parts of the equipment or the systems to the same potential does not absolutely refer to the grounded potential The exhausted batteries should not be disposed in a normal way In some areas there may be no recycle facilities Proper disposal of products D 3 Package symbols THIS WAY UP FRAGILE DO NOT ROLL KEEP AWAY FROM RAIN STACK limit BY NUMBER KEEP AWAY FROM SUNLIGHT Caution...

Страница 98: ...acturer s declaration Warnings Boaray 5000 C D series should not be used adjacent to or stacked with other equipment and that if adjacent or stacked use is necessary the system should be observed to verify normal operation in the configuration in which it will be used Type A equipment is intended for use in the industrial environment due to the conduction and radiation disturbance of the Boaray 50...

Страница 99: ...CISPR 11 Group 1 The Boaray 5000 C D series uses RF energy only for its internal function Therefore its RF emissions are very low and are not likely to cause any interference in nearby electronic equipment RF emissions CISPR 11 Class A Boaray 5000 C D series is suitable for use in all establishments other than domestic establishments and those directly connected to the public low voltage power sup...

Страница 100: ...nsient burst IEC 61000 4 4 2kV for power supply lines 2kV for power supply lines Mains power quality should be that of a typical commercial or hospital environment Surge IEC 61000 4 5 1 kV for input output lines 2 kV for lines to ground 1 kV for input output lines 2 kV for lines to ground Mains power quality should be that of a typical commercial or hospital environment Voltage dips short interrup...

Страница 101: ...m be powered from an uninterruptible power supply or a battery Power frequency 50 60 Hz magnetic field IEC 61000 4 8 3A m 3A m 50 60Hz Power frequency magnetic fields should be at levels characteristic of a typical location in a typical commercial or hospital environment NOTE UT is the a c mains voltage prior to application of the test level ...

Страница 102: ...s including cables than the recommended separation distance calculated from the equation applicable to the frequency of the transmitter Recommended separation distance d P 2 1 d P 2 1 80 MHz 800 MHz d P 3 2 800 MHz 2 5 GHz where p is the maximum output power rating of the transmitter in watts W according to the transmitter manufacturer and d is the recommended separation distance in metres m b Fie...

Страница 103: ...romagnetic environment in which radiated RF disturbances are controlled The customer or the user of the Boaray 5000 C D series can help prevent electromagnetic interference by maintaining a minimum distance between portable and mobile RF communications equipment transmitters and the Boaray 5000 C D series as recommended below according to the maximum output power of the communications equipment Ra...

Страница 104: ...ion mode VCV VCV Ventilation parameter default settings Patient category adult pediatric Ti s 1 7 0 5 VT mL 450 50 f bpm 12 30 TP s 0 0 PEEP cmH2O 0 0 FTRIG L min 2 2 PTRIG cmH2O 3 3 Psupp cmH2O PEEP 12 PEEP 6 Pinsp cmH2O PEEP 12 PEEP 6 PHigh cmH2O 12 6 PLow cmH2O 0 0 ETS 30 30 FiO2 40 40 Prate 3 3 Tapnea s 20 20 Alarm default settings Tidal volume mL Lower limit Adult 100 Pediatric 30 Minute vent...

Страница 105: ... Lower limit OFF Airway pressure cmH2O Upper limit 40 Pediatric 20 Lower limit 0 End expiratory CO2 mmHg Upper limit 60 Lower limit 30 Inspiratory CO2 mmHg Upper limit 4 Lower limit OFF SPO2 Lower limit 90 Oxygen supply kPa Upper limit 600 Lower limit 280 Air supply failure Upper limit 600 Lower limit 280 ...

Страница 106: ...y and essential performance of anesthetic systems EN ISO 15223 1 Medical devices Symbols to be used with medical device labels labeling and information to be supplied Part 1 General requirements ISO 80601 2 55 Medical electrical equipment Particular requirements for basic safety and essential performance of respiratory gas monitors IEC 60601 1 8 Medical electrical equipment Part 1 8 General requir...

Отзывы: