


7
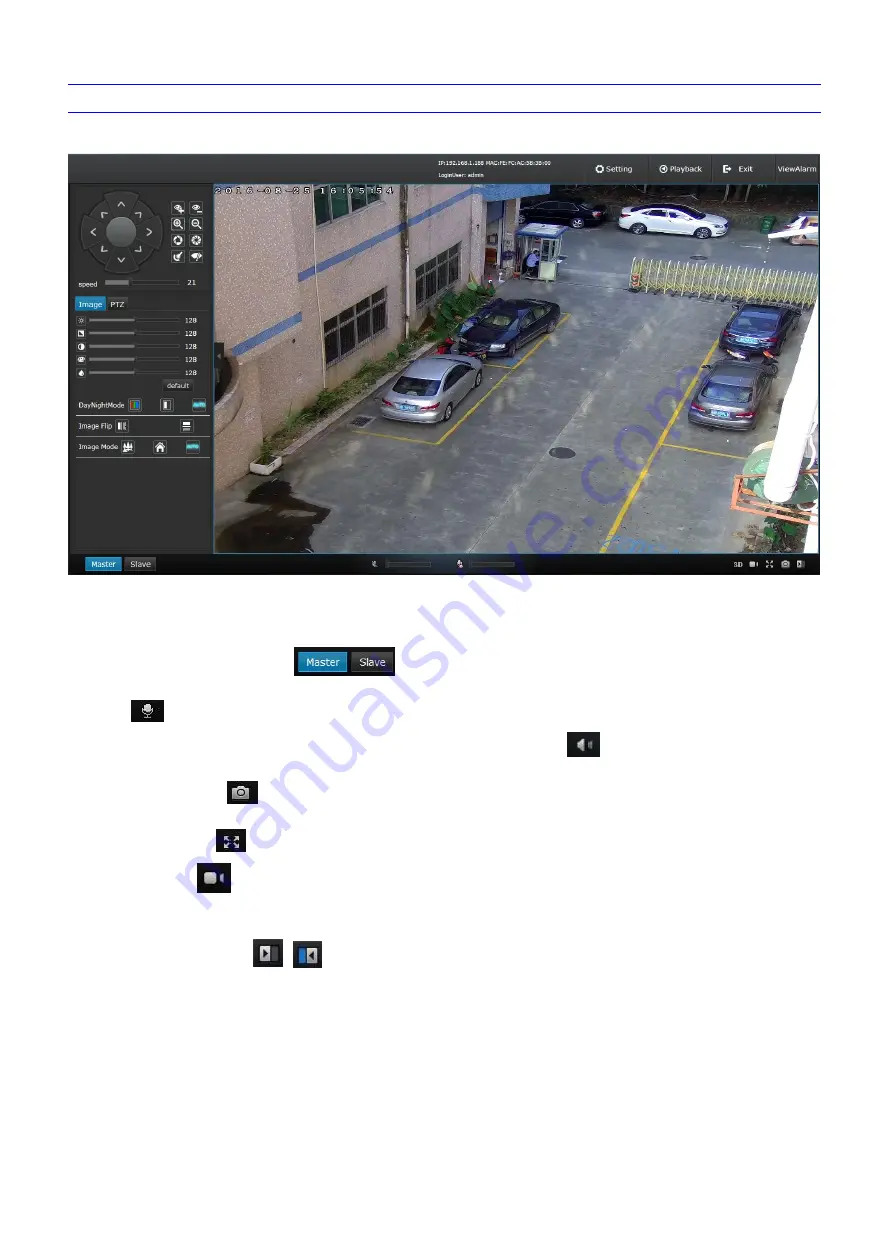
Live view
Live preview interface as shown infigure 3-6:
Figure 3- 6
In the Live view interface, users can do remote operations such as master/slave stream video preview, voice intercom, listen,
Record, full-screen preview, Snap picture, PTZ control, preset, area scan, pattern scan, PTZ watch, preview video image volume adjustment,
Day/Night switch,Image Flip, Image Mode, etc.
Master/slave stream: Notice the
buttons at the left lower corner, click it to switch the preview mode.
Voice intercom: Connect a sound box at the device voice output port, then connect a mike at the PC port. Click microphone icon
, then adjust the volume, the voice intercom between PC and Network High Speed Dome can be performed.
Listen: Connect a sound pick-up at the device audio input port, click the audio icon
, users can call real time monitoring at PC
port.
Snap picture: Click
icon to do screen video capture, it will create BMP picture and store in the specified folder automatically.
The default file storage path is C:\IPCamera, users can set it at the Setting→→Local→→Local setting .
Full screen: Click
icon to get full screen preview, press ESC or right mouse click to exit full screen preview.
Record: Click
icon to do manual video operation and store in the specified file automatically (Video format is mp4, the default
file storage path is C:\IPCamera\, users can set it at the Setting→→Local→→Local setting .
3D positioning:3D position function can be opened or closed.
Switch the sidebar: click
or
icon to switch to the sidebar.
Image parameters adjustment: Users can adjust the image parameters at the video preview interface, such as image brightness,
hue, contrast, saturability and sharpness, etc. as shown in Figure 3-7:
Содержание NC691B
Страница 7: ...3 Connection instruction ...