background image

Содержание 831.218220

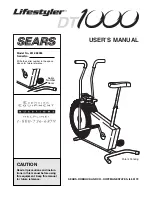
Страница 1: ... 0 Serial No Write the serial number in the space above for reference Serial Number Decal _ Assembly Operation Maintenance Part List and Drawing BIKE EXERCISER User s Manual Sears Roebuck and Co Hoffman Estates IL 60179 ...

Страница 2: ...g decal s If a decal is missing or illegible call t 888 533 t333 and request a free replacement decal Apply the decal in the location shown Note The decal s may not be shown at actual size Misuseof this machine may result in serious injury Read user s mannuall prior to use andfollow all warnings and Instructions Do not allow children on or aroundmachine Peda s continue to sp n when you stop pedali...

Страница 3: ...IMPORTANT PRECAUTIONS 3 ...

Страница 4: ...rivacy of your home For your benefit read this manual carefully before you use the exercise cycle If you have questions after reading this manual please see the back cover of this manual To help us assist you note the product model number and serial number before contacting us The model number and the location of the serial number decal are shown on the front cover of this manual Before reading fu...

Страница 5: ...o the key number of the part from the PART LIST near the end of this manual The number following the parentheses is the quantity needed for assembly Note Seine small parts may have been pro assembled If a part is not in the hardware kit check to see if it has been preassembled If a part is missing call t 888 533 t333 M6 Locknut M8 Locknut M1O Locknut 56 4 66 4 64 2 M8 Split M1O Split Washer 72 4 W...

Страница 6: ...4 54 Loosen the Seat Knob 29 a few turns Next pull the Seat Knob outward insert the Seat Post 6 into the Frame 1 and then release the Seat Knob Move the Seat Post upward and downward slightly to make sure that the pin on the Seat Knob is engaged in one of the adjustment holes in the Seat Post Next push the Seat Guide 46 into the top of the Frame 1 Attach the Seat Guide with an M4 x 5mm Patch Screw...

Страница 7: ... the Handlebar Axle 33 Insert the Handlebar Axle into the Frame 1 and center it Note It may be helpful to use a rubber mallet to insert the Handlebar Axle 5 Do not pinch the Reed Switch Wire 3t 33 6 While another person holds the Upright 2 near the Frame 1 connect the Reed Switch Wire 31 to the Extension Wire 39 Tip Do not pinch the Reed Switch Wire 3t or the Extension Wire 39 Set the Upright 2 on...

Страница 8: ...into the battery compartment and reattach the battery cover Make sure to orient the batteries as shown by the diagram inside the battery compartment 7 Batteries _ Ocatterr L s 8 While another person holds the Console 3 near the Upright 2 connect the console wire to the Extension Wire 39 Then connect the console ground wire to the Ground Wire 80 Insert the excess wire into the Upright Tip Do not pi...

Страница 9: ... to the Left Handlebar Base not shown in the same way Wide Side of the Tube 56 Hexagonal Holes 10 Slide the Left and Right Handlebars 7 9 onto the Handlebar Axle 33 Make sure that the Handlebars are on the correct sides Using the included pedal tool tap a Push Nut 78 onto each end of the Handlebar Axle 33 Make sure that the Push Nuts are turned as shown in the inset drawing Tip It may be helpful t...

Страница 10: ...hat the Pedal Bushing 43 is oriented as shown Firmly tighten the shaft of the Pedal 23 clock wise into the right Crank Arm 26 Then tighten the 1 2 Pedal Nut 68 onto the shaft Attach the other Pedal not shown in the same way 11 26 68 44 79 43 71 23 42 23 12 Make sure that all parts are properly tightened before you use the exercise cycle Note After assembly is completed some extra parts may be left...

Страница 11: ...ry Mode To convert the handlebars to the stationary mode the link arms must be disconnected from the pedals Pull the link arms outward against the blue washers until the link arms are free of the pedal bushings see drawing 2 at the left Be careful not to pinch your fingers Next lift the link arms off the pedals and clip them onto the lock rods see drawing 1 at the left HOW TO ADJUST THE SEAT For e...

Страница 12: ...s that you have pedaled The lower right display can show your pedaling speed in miles or kilometers per hour and the approxi mate number of t m calories you have burned When you use the handgrip pulse sensor the lower right display will also show your heart rate see step 3 on page 13 theupperd S 1 the priority display I The priority display can ill show the elapsed time I II the distance that you ...

Страница 13: ...s of clear plastic on the metal contacts on the handgrip pulse sensor remove the plastic In addition make sure that your hands are clean To measure your heart rate hold the handgrip pulse sensor with your Contacts palms resting against the metal contacts Avoid moving your hands or gripping the contacts tightly 4 When your pulse is detected the heart shaped indicator in the lower right display will...

Страница 14: ... Guard Clips 76 the left Guard Fastener 35 and the Left Guard 13 See the inset drawing Press down on the Belt 22 There should be no more than 3 4 inch and no less than t 4 inch of vertical movement in the center of the Belt 76 76 If the Belt 22 needs to be adjusted first loosen the right Guard Fastener not shown To tighten the Belt turn the M6 Nuts 53 clockwise to loosen the Belt turn the M6 Nuts ...

Страница 15: ...osen but do not remove the M4 x 16ram Screw 27 Then slide the Reed Switch slightly closer to or away from the Magnet and retighten the Screw Turn the Crank for a moment Repeat until the console displays correct feedback When the Reed Switch 31 is correctly adjusted reat tach the Right Shield not shown 26 15 ...

Страница 16: ...r energy If your goal is to burn fat adjust the intensity of your exercise until your heart rate is near the lowest number in your training zone For maximum fat burning exercise with your heart rate near the middle number in your training zone Aerobic Exercise If your goal is to strengthen your cardiovascular system you must perform aerobic exercise which is activity that requires large amounts of...

Страница 17: ...chilles Stretch With one leg in front of the other reach forward and place your hands against a wall Keep your back leg straight and your back foot flat on the floor Bend your front leg lean forward and move your hips toward the wall Hold for 15 counts then relax Repeat 3 times for each leg To cause further stretching of the achilles tendons bend your back leg as well Stretches Calves achilles ten...

Страница 18: ...Bright Screw 21 4 Stabilizer Cap 62 4 M4 x 16mm Round Head Screw 22 1 Belt 63 1 Idler Arm Washer 23 2 Pedal 64 3 M10 Locknut 24 2 Handlebar Base Cap 65 2 M10 x 75mm Carriage Bolt 25 1 Pulley Crank 66 6 M8 Locknut 26 2 Crank Arm 67 2 Flange Screw 27 1 M4 x 16ram Flange Head Screw 68 2 1 2 Pedal Nut 28 1 Bearing Assembly 69 9 M4 x 25ram Screw 29 1 Seat Knob 70 1 M4 x 5mm Patch Screw 30 2 Guard Brack...

Страница 19: ...EXPLODED DRAWING Model No 831 21822 0 ROZOSA 11 34 78 49 J 56 58 24 38 35 12 65 76 36 54 55 67 73 71 53 44 15 43 23 i_48 69 35 12 _ _ 3_4 73 45 29 70 28 _ 16 71 23 43 18 50 54 54 20 4 69 5 z 54 4 69 19 ...

Страница 20: ...rica Marca de Servicio de Sears Brands LLC f 90 DAY FULL WARRANTY If this Sears bike exerciser fails due to a defect in material or workmanship within 90 days of the date of purchase call 1 800 4 MY HOME 1 800 469 4663 to arrange for free repair or replacement if repair proves impossible The frame is warranted for a period of 5 years from the date of purchase This warranty does not apply when the ...

Отзывы: