background image

7

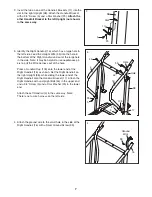
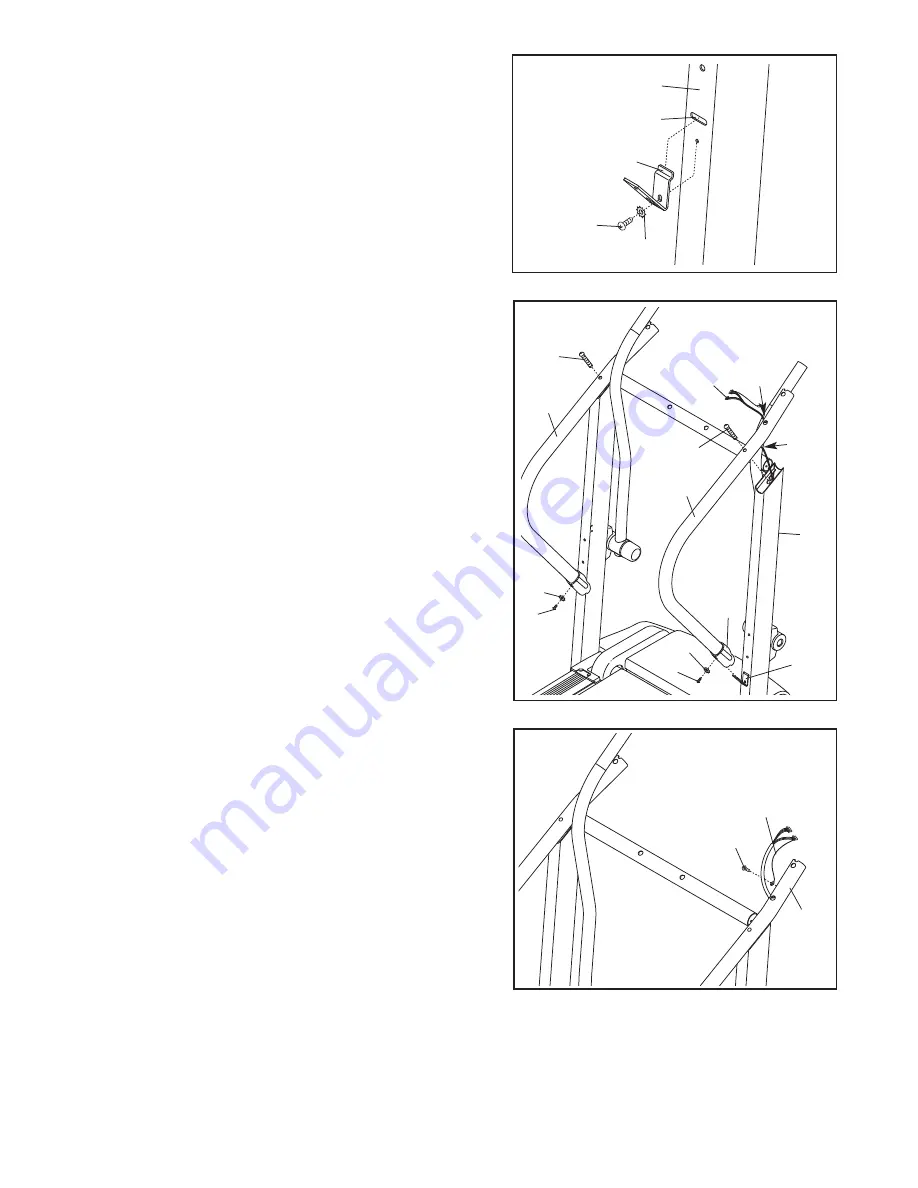
2.  Insert the tab on one of the Handrail Brackets (17) into the

slot in the right Upright (38). Attach the Handrail Bracket
with a 3/4” Screw (5) and a Star Washer (25). 

Attach the

other Handrail Bracket to the left Upright (not shown)
in the same way. 

5

25

38

17

Slot

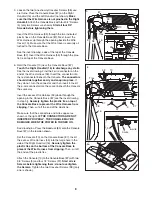
3.  Identify the Right Handrail (16), which has a large hole in

the left side. Feed the Upright Wire (53) into the hole in
the bottom of the Right Handrail and out of the large hole
in the side. Note: It may be helpful to use needlenose pli-
ers to pull the Wire Harness out of the hole.

Press a Handrail Cap (103) onto the lower end of the
Right Handrail (16) as shown. Set the Right Handrail on
the right Upright (38), while sliding the lower end of the
Right Handrail onto the Handrail Bracket (17). Attach the
Right Handrail with an Upright Bolt (44) in the upper end
and a 3/4” Screw (5) and a Star Washer (25) in the lower
end. 

Attach the Left Handrail (4) in the same way. Note:
There is not a wire harness on the left side.

53

Hole

16

44

44

4

103

5

25

25

38

17

Hole

2

3

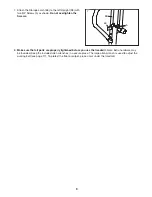
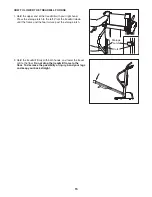
4. Attach the ground wire to the small hole in the side of the

Right Handrail (16) with a Silver Ground Screw (99).

Ground

Wire

16

99

4

5

Содержание 365e CrossWalk

Страница 1: ...ONS As a manufacturer we are com mitted to providing complete customer satisfaction If you have questions or if parts are damaged or missing PLEASE CONTACT OUR CUSTOMER SERVICE DEPARTMENT DI RECTLY CA...

Страница 2: ...MENT 10 HOW TO FOLD AND MOVE THE TREADMILL 14 TROUBLESHOOTING 16 CONDITIONING GUIDELINES 18 ORDERING REPLACEMENT PARTS Back Cover LIMITED WARRANTY Back Cover Note An EXPLODED DRAWING and a PART LIST a...

Страница 3: ...number 146148 or see your local electronics store 12 Failure to use a properly functioning surge suppressor could result in damage to the con trol system of the treadmill If the control sys tem is dam...

Страница 4: ...e only 25 This treadmill is intended for in home use only Do not use this treadmill in a commer cial rental or institutional setting WARNING Before beginning this or any exercise program consult your...

Страница 5: ...e product model number and serial number before calling The model number of the treadmill is DTL3495 0 The serial num ber can be found on a decal attached to the treadmill see the front cover of this...

Страница 6: ...res the included allen wrenches and your own phillips screwdriver and rubber mallet For help identifying the assembly hardware see the drawings below If a part is not in the parts bag first check to s...

Страница 7: ...to use needlenose pli ers to pull the Wire Harness out of the hole Press a Handrail Cap 103 onto the lower end of the Right Handrail 16 as shown Set the Right Handrail on the right Upright 38 while sl...

Страница 8: ...s 53 into the large hole in the side of the Right Handrail 16 Securely tighten the plastic ties on the bottom of the Console Base to prevent the Wire Harness from slipping Then cut off the ends of the...

Страница 9: ...uded Keep the included allen wrenches in a secure place The large allen wrench is used to adjust the walking belt see page 17 To protect the floor or carpet place a mat under the treadmill 7 Attach th...

Страница 10: ...malfunc tion or break down grounding provides a path of least resistance for electric current to reduce the risk of elec tric shock This product is equipped with a cord having an equipment grounding c...

Страница 11: ...button or the Speed button to start the walking belt A moment after the button is pressed the walking belt will begin to move Hold the handrails and begin walking As you exercise change the speed of t...

Страница 12: ...of measurement hold down the Stop button insert the key into the console and continue to hold the Stop button for a moment An E for English miles or an M for metric kilometers will appear in the Fat C...

Страница 13: ...ack for a total body workout move the upper body arms forward and back as you walk on the treadmill To vary the intensity of your upper body exercise the resistance of the upper body arms can be adjus...

Страница 14: ...ll until the storage latch closes over the catch Make sure that the storage latch is fully engaged over the catch To protect the floor or carpet from damage place a mat under the treadmill Keep the tr...

Страница 15: ...the left Pivot the treadmill down until the frame and the foot rail are past the storage latch 2 Hold the treadmill firmly with both hands and lower the tread mill to the floor Do not drop the treadm...

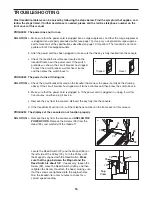
Страница 16: ...the circuit breaker located on the treadmill frame near the power cord see the drawing above If the circuit breaker has tripped wait for five minutes and then press the switch back in b Make sure that...

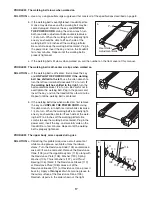
Страница 17: ...o overtighten the walking belt Plug in the power cord insert the key and run the treadmill for a few minutes Repeat until the walking belt is centered b If the walking belt slips when walked on first...

Страница 18: ...be aerobic Aerobic exercise is activity that requires large amounts of oxygen for prolonged periods of time This increases the demand on the heart to pump blood to the muscles and on the lungs to oxyg...

Страница 19: ...les Stretch With one leg in front of the other reach forward and place your hands against a wall Keep your back leg straight and your back foot flat on the floor Bend your front leg lean forward and m...

Страница 20: ...Warning Decal 60 2 Isolator 61 1 Catch 62 1 Frame Spacer Left 63 1 Magnet 64 2 Incline Leg Pivot Bolt 65 1 Belly Pan 66 1 Latch 67 1 Walking Belt 68 3 Wire Tie 69 4 Wire Tie Clamp 70 1 Incline Wire 7...

Страница 21: ...40 76 77 64 55 8 92 54 55 95 95 96 94 93 92 19 90 70 28 28 33 28 33 34 28 31 31 28 46 47 57 76 36 37 76 35 38 53 76 26 76 88 80 18 22 23 19 20 48 21 14 42 15 14 53 112 111 110 104 105 108 106 107 109...

Страница 22: ...uential damages arising out of or in con nection with the use or performance of the product or damages with respect to any economic loss loss of property loss of revenues or profits loss of enjoyment...

Отзывы: